Pro Tools Tutorial
38
SSL UF1 User Guide
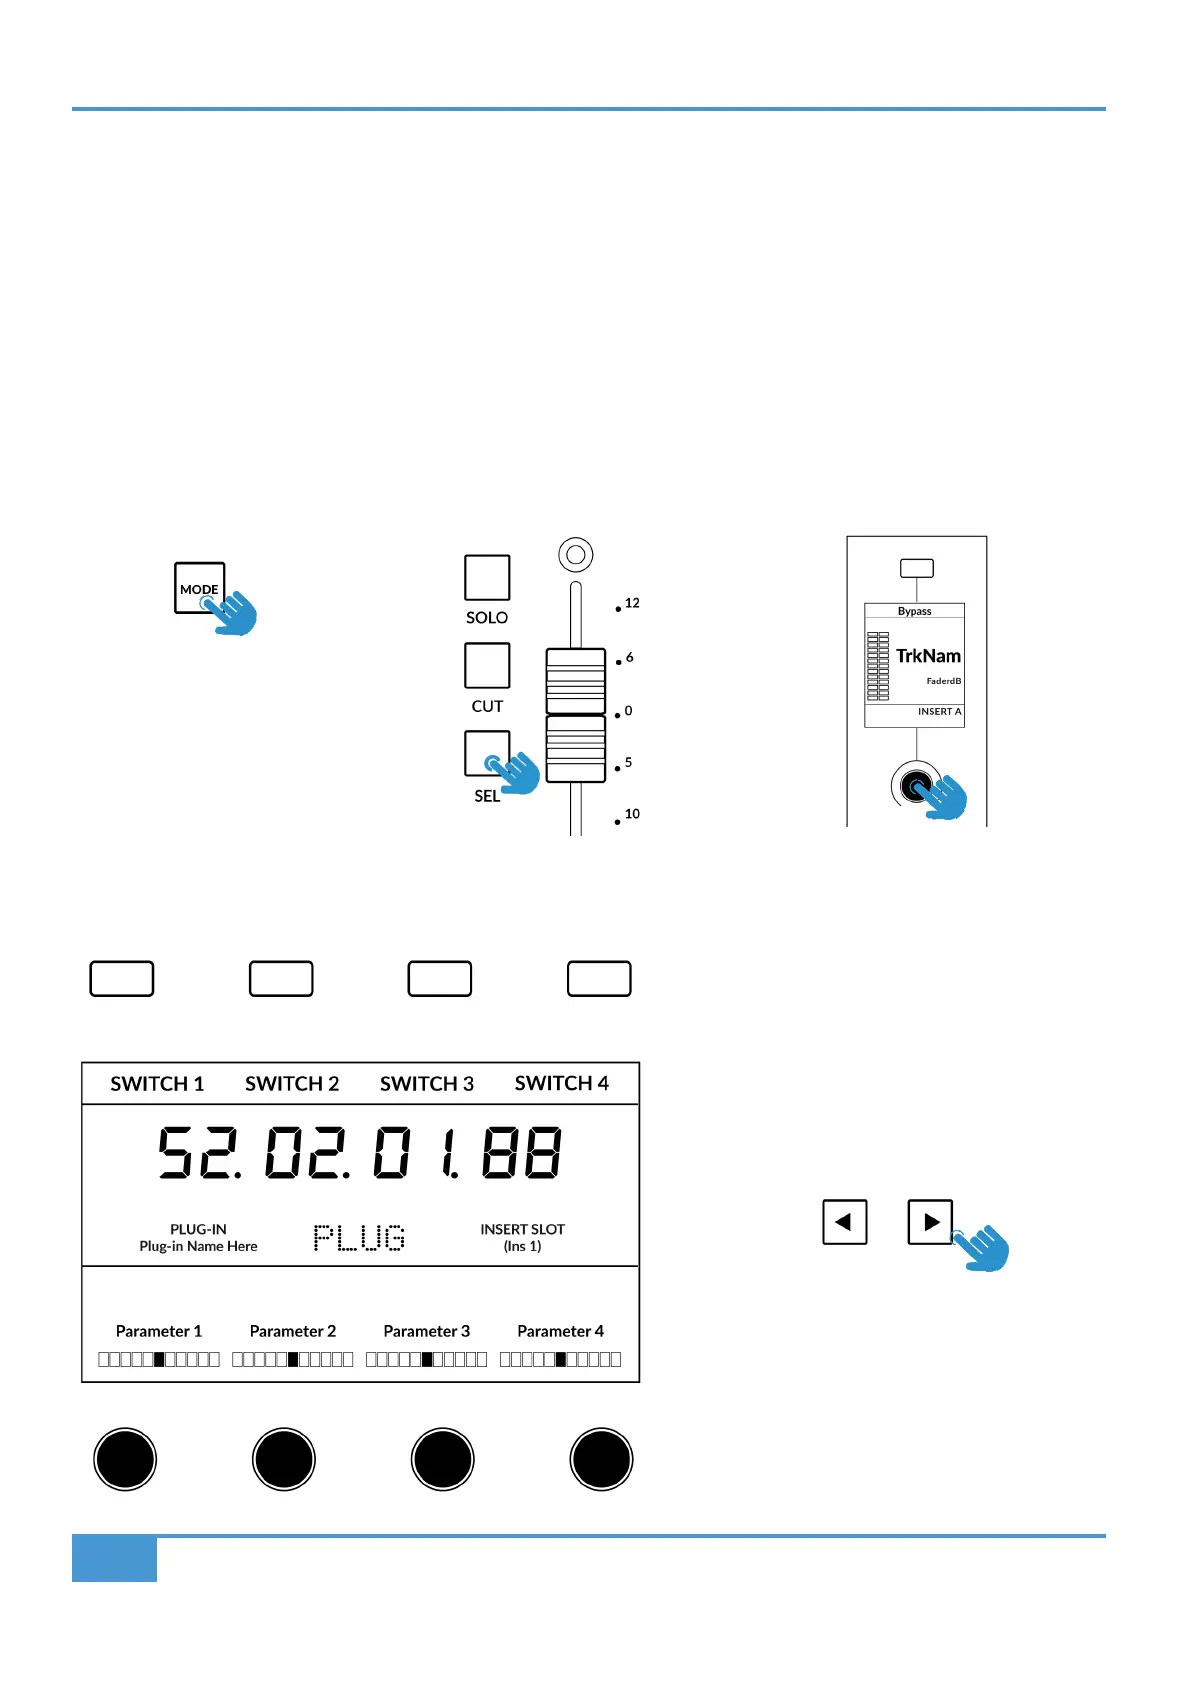
Plug-in Mode
Plug-in Mode provides a smart way of controlling plug-in parameters for Inserts A-E of the selected track, whilst automatically
opening the plug-in GUI at the same time. Please note that the plug-in must already be inserted in Pro Tools.
1. To enter Plug-in Mode, press MODE key and cycle until it lights cyan and PLUG is shown in the centre of the display.
Alternatively, long press the MODE Button & select the PLUGIN option from the top-row of soft keys.
2. Use the SEL key on the fader channel to select the track.
3. Rotate the V-Pot underneath the small display to choose an insert slot (A-E) press the V-Pot to select. The available parameters
are displayed on the large display and controllable from the 4 x V-Pots beneath it. Switch functions might also be available
(plug-in dependent) across the 4 soft keys at the top.
4. Use the Page < > keys to navigate through the different pages of parameters the plug-in presents.
STEP 1: Enter Plug-in Mode
by pressing the PLUGIN
key - MODE button lights
cyan.
STEP 2: Use a SEL key to
select the track.
STEP 3: Select an insert
slot using the V-Pot to scroll
through the insert slots A-E
and push to load.
STEP 4: Use the Page keys to move through
the plug-in parameter pages.