6.6 Battery connection
Step 2:
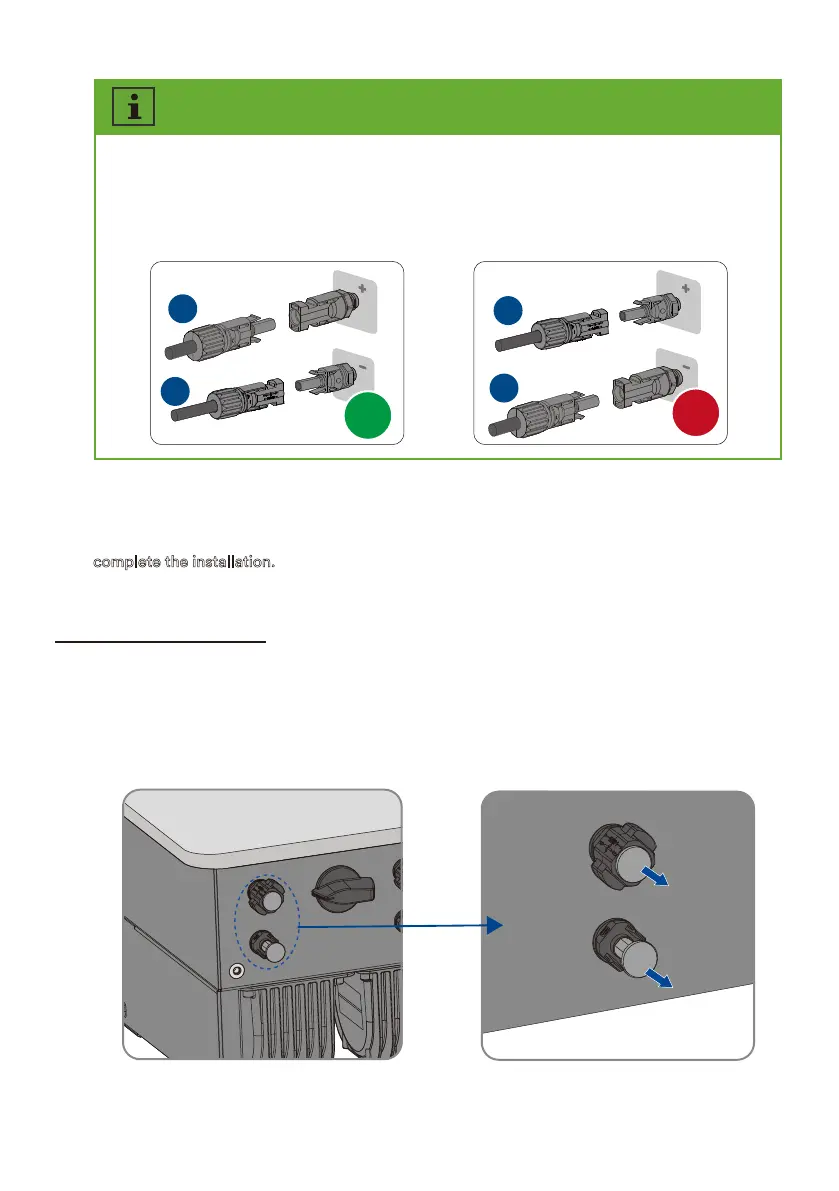
Remove the dust and waterproof cover of the S connector on the inverter and retain
it.
Step 1:
or assembling the attery connector, reer to .. Assembling the DC connectors.
complete the installation.
Check the ositive and negative olarity o the P strings, and connect the P connectors to
corresponding terminals only after ensuring polarity correctness. (The graph uses the type 2
connector as an eamle only.
√
+
-
+
-
×
Step 7:
Ensure that all DC connectors and the DC connectors with sealing plugs are securely in
place.
UM0035_ASW05-12kH-T2-T3_EN_V01_0523
 Loading...