35
GB
Printing using a TV monitor (MONITOR OUT mode)
Reducing the red-eye
phenomenon
You can reduce the red-eye
phenomenon of a subject shot using a
flash.
Note
If you perform editions such as
enlarging, reducing the size of, rotating
or moving an image after the red-eye
reduction adjustment, the red-eye
reduction may not take effect. Perform
the red-eye reduction after these
editorial operations.
1
Display the EDIT menu (page
31).
2
Press the arrow (B/b/V/v)
button to select (Red-eye
reduction) and then press
ENTER.
The adjustment frame appears on
the image, which indicates the
range for red-eye reduction
adjustment.
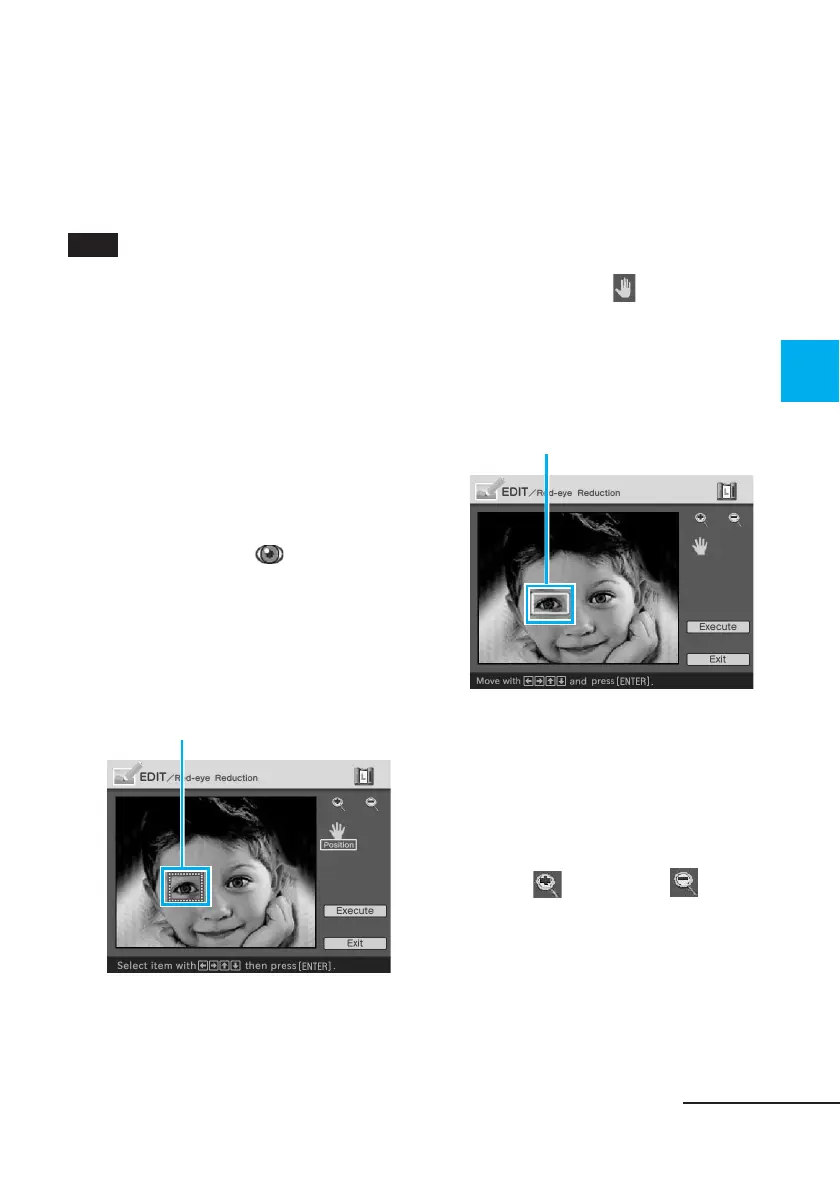
Adjustment frame
3
Adjust the position and size of
the adjustment frame.
Make the red-eye reduction
adjustment for the right and left
eyes separately.
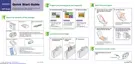
To move the adjustment frame
1 Press the arrow (B/b/V/v)
button to select
(Position) and
press ENTER.
2 Move the frame with the arrow
(B/b/V/v) button.
The frame moves in the selected
direction.
Moves the frame.
3 Press ENTER.
The frame is fixed in the current
position.
To adjust the size of the
adjustment frame
Press the arrow (B/b/V/v) button
to select
(Enlarge) or
(Reduce) and press ENTER.
Continued