– 24 –
KP-44PS2/44PS2U/51PS2
RM-903
1 Two screws
(Hexagon head)
2 Pull the main
bracket, and
remove each
connectors
on main bracket.
3 Set the
main bracket.
3-8. CHASSIS BLOCK REMOVAL
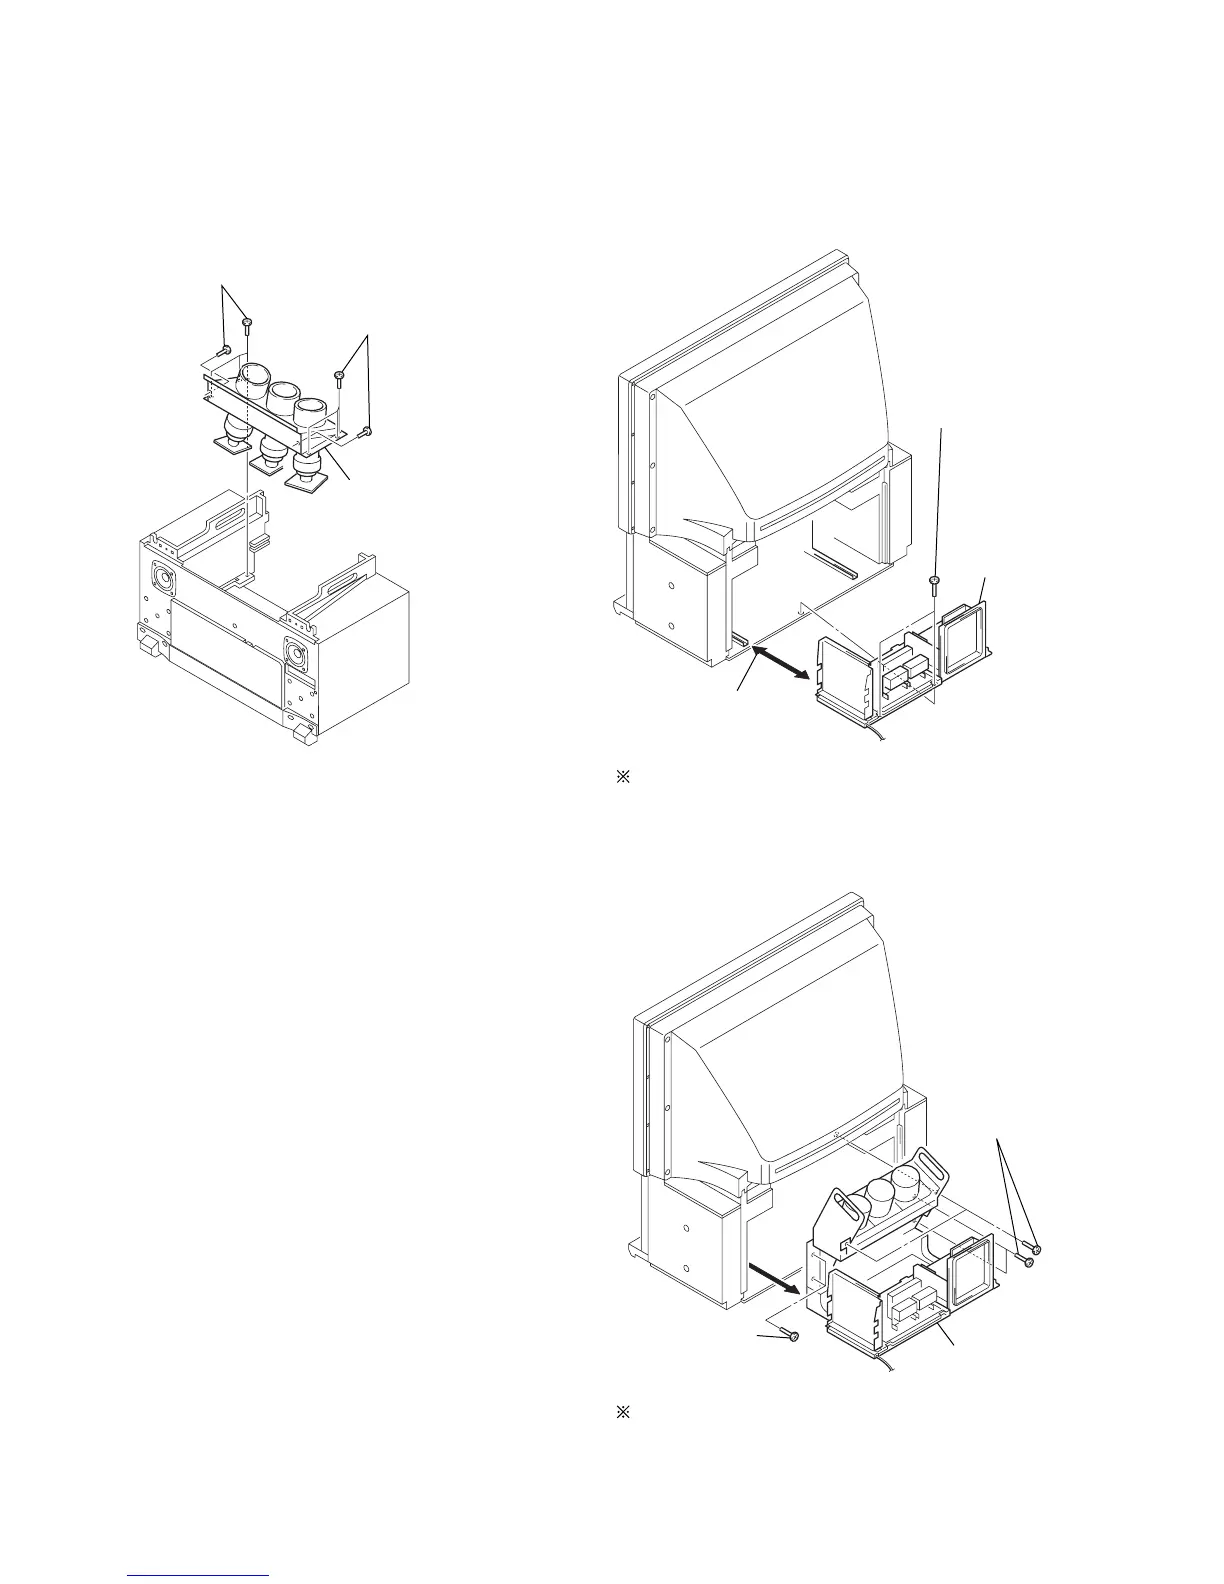
(1) PICTURE TUBE BLOCK REMOVAL
• KP-44
Pay particular attention to the wires of each Printed circuit
boards when puling out the main bracket.
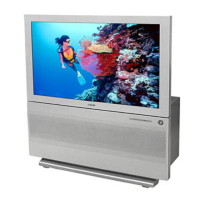
(3) CHASSIS BLOCK REMOVAL
• KP-51
Pull out the chassis block by gripping the handles as shown in
the diagram.
At this time, pay particular attention to the components
removed in (2).
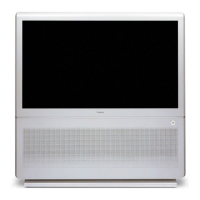
(2) MAIN BRACKET REMOVAL
• KP-51
2 Picture tube block
1 Four screws
(Hexagon head 4 x 20)
1 Four screws
(Hexagon head 4 x 20)
1 Two screws
(Hexagon head)
2 Pull out the
chassis block
1 Four screws
(Hexagon head)