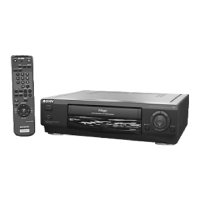
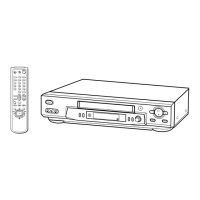
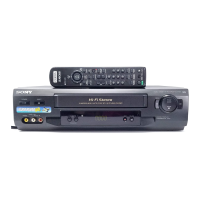
Do you have a question about the Sony SLV-975HF and is the answer not in the manual?
Record model and serial numbers for product reference.
Ensure ventilation, avoid heat/dust, proper placement, and prevent condensation.
Equipment meets FCC limits; provides measures to correct radio/TV interference.
Caution regarding unauthorized recording of copyrighted material.
Check received items: remote, batteries, cables, plug adaptor, Cable Mouse.
Prepare the remote for operation and control of VCR/TV.
Insert batteries, set COMMAND MODE switch, and understand TV control buttons.
Program remote for non-Sony TVs using manufacturer code numbers.
Table of manufacturers and corresponding remote control codes.
Guide to choosing connection based on TV and cable setup.
Safety and preparation before making connections.
Connect VCR to TV and stereo system via A/V inputs for improved quality.
Connect VCR using S-Link for automatic TV input switching.
VCR setup procedures after A/V connections are made.
Connect VCR with cable box for channel control via Cable Mouse.
Setup steps for Hookup 1: RF unit, language, clock, cable box settings.
Set up VCR Plus+ channels for Hookup 1, auto or manual.
VCR auto-sets clock via time signal; manual setting available.
Connect VCR without cable box or with limited-scrambled-channel box.
Setup steps for Hookup 2: RF unit, language, clock, tuner preset.
Set up VCR Plus+ channels for Hookup 2, auto or manual.
Connect VCR using antenna: VHF/UHF and VHF-only antenna connections.
Setup steps for Hookup 3: RF unit, language, clock, tuner preset.
Set up VCR Plus+ channels for Hookup 3, auto or manual.
Connect VCR with incompatible cable box for channel recording.
Setup steps for Hookup 4: RF unit, language, clock, tuner preset.
Set up VCR Plus+ channels for Hookup 4 using manual mapping.
Connect VCR with DSS receiver for channel control via Cable Mouse.
Setup steps for Hookup 5: RF unit, language, clock, cable box settings.
Connect VCR with cable box and A/B switch for convenient recording.
Setup steps for Hookup 6: RF unit, language, clock, cable box settings.
Set up VCR Plus+ channels for Hookup 6, auto or manual.
Manually set guide channels for scrambled channels after mapping.
VCR automatically sets clock using time signals from TV/cable broadcasts.
Turn off VCR to activate automatic clock set and time zone adjustment.
Steps to manually set the date, time, and day of the week.
Select time zone and daylight saving options for accurate clock setting.
Step-by-step guide to manually set the date, time, and day.
List of cable box brands and their corresponding control codes for setup.
Verify cable box control functionality by testing channel changes.
Steps if VCR fails to control the cable or DSS receiver.
Guide to performing an automatic scan for all available channels.
Set ANTENNA/CABLE to CABLE for preset cable TV channels.
Set ANTENNA/CABLE to ANT for preset VHF and UHF channels.
Manually add or remove channels from the preset list.
Manually tune channels using fine tuning for unclear pictures.
Explanation of using PlusCodes to automatically program recordings.
VCR sets guide channels from ZIP code and daily program info.
Manually select the correct channel map pattern if multiple are available.
Coordinate guide channel numbers with TV channel numbers for VCR Plus+.
Load a tape and press PLAY to begin playback.
Perform stop, pause, search, and eject operations during playback.
Use SMART CUE to skip unwanted scenes and resume playback.
Find specific tape points using the counter, resetting and searching.
Select channel, tape speed, and press REC to start recording.
Press STOP to end the recording process.
Use DISPLAY and COUNTER/REMAIN to view remaining tape time.
Switch TV to TV input and select channel while VCR records.
Break off safety tab to prevent accidental erasure.
Select TV programs using their unique station identification codes.
Enter program PlusCodes to automatically schedule recordings.
Lock VCR to prevent unauthorized operation except for timer recordings.
Manually set date, start/stop times, channel, and tape speed.
Set recording patterns for daily, weekdays, or weekly recurrences.
Control tape playback speed for fast-forward, rewind, and slow motion.
Utilize Shuttle ring for variable speed playback and frame-by-frame viewing.
Press PLAY to return to standard playback from other modes.
Set VCR to stop recording automatically after a specified duration.
View, modify, or cancel previously set recording timers.
Record stereo signals and Second Audio Program (SAP) sound.
Choose audio output (stereo, mono, left/right channel) during playback.
Explanation of stereo and monaural sound track recording.
Use index signals to quickly locate specific recordings on the tape.
Correct picture distortion or unstable playback via tracking adjustment.
APC feature enhances recording/playback quality by adjusting to tape conditions.
Configure VCR settings via the ADVANCED OPTIONS menu.
Introduction to basic and insert editing techniques for tape recordings.
Make a copy of a tape by transferring content.
Replace parts of a recording with new material.
Connect VCR to another VCR or stereo system for recording or editing.
Perform basic editing operations, synchronizing playback and recording.
Replace picture/sound segments of a recording with new material.
General setup procedures for connecting the VCR to a TV.
Set RF UNIT switch to match TV connection for correct signal reception.
Connect 300-ohm twin lead antenna cable using an EAC-32 connector.
Connect VHF/UHF antennas using the EAC-66 band separator/mixer.
Solutions for power switch, VCR operation, and clock display problems.
Fixes for no picture, unclear picture, rolling picture, or no sound.
Visual examples of problems caused by dirty video heads.
Troubleshooting for no picture, poor reception, or tape ejection during recording.
Solutions for remote commander, channel change, and TV control problems.
Details on VCR format, video system, tape speed, tuner, and connectors.
Power, operating temps, dimensions, mass, and supplied accessories.
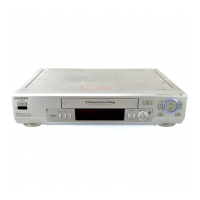
Identification and page references for front panel buttons.
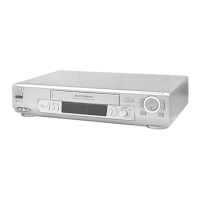
Identification of indicators and symbols shown in the VCR's display window.
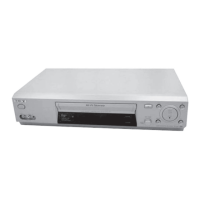
Identification of rear panel jacks and the RF UNIT switch.
Identification of remote buttons 1-18.
Identification of remote buttons 19-30.
Quick guide for playing tape, recording, and watching TV with Hookup 1.
Quick guide for playing tape, recording, and watching TV with Hookup 2.
Quick guide for playing tape, recording, and watching TV with Hookup 3.
Quick guide for playing tape, recording, and watching TV with Hookup 4.