Applying ViSi Mobile Monitoring System / Initiate Monitoring
72
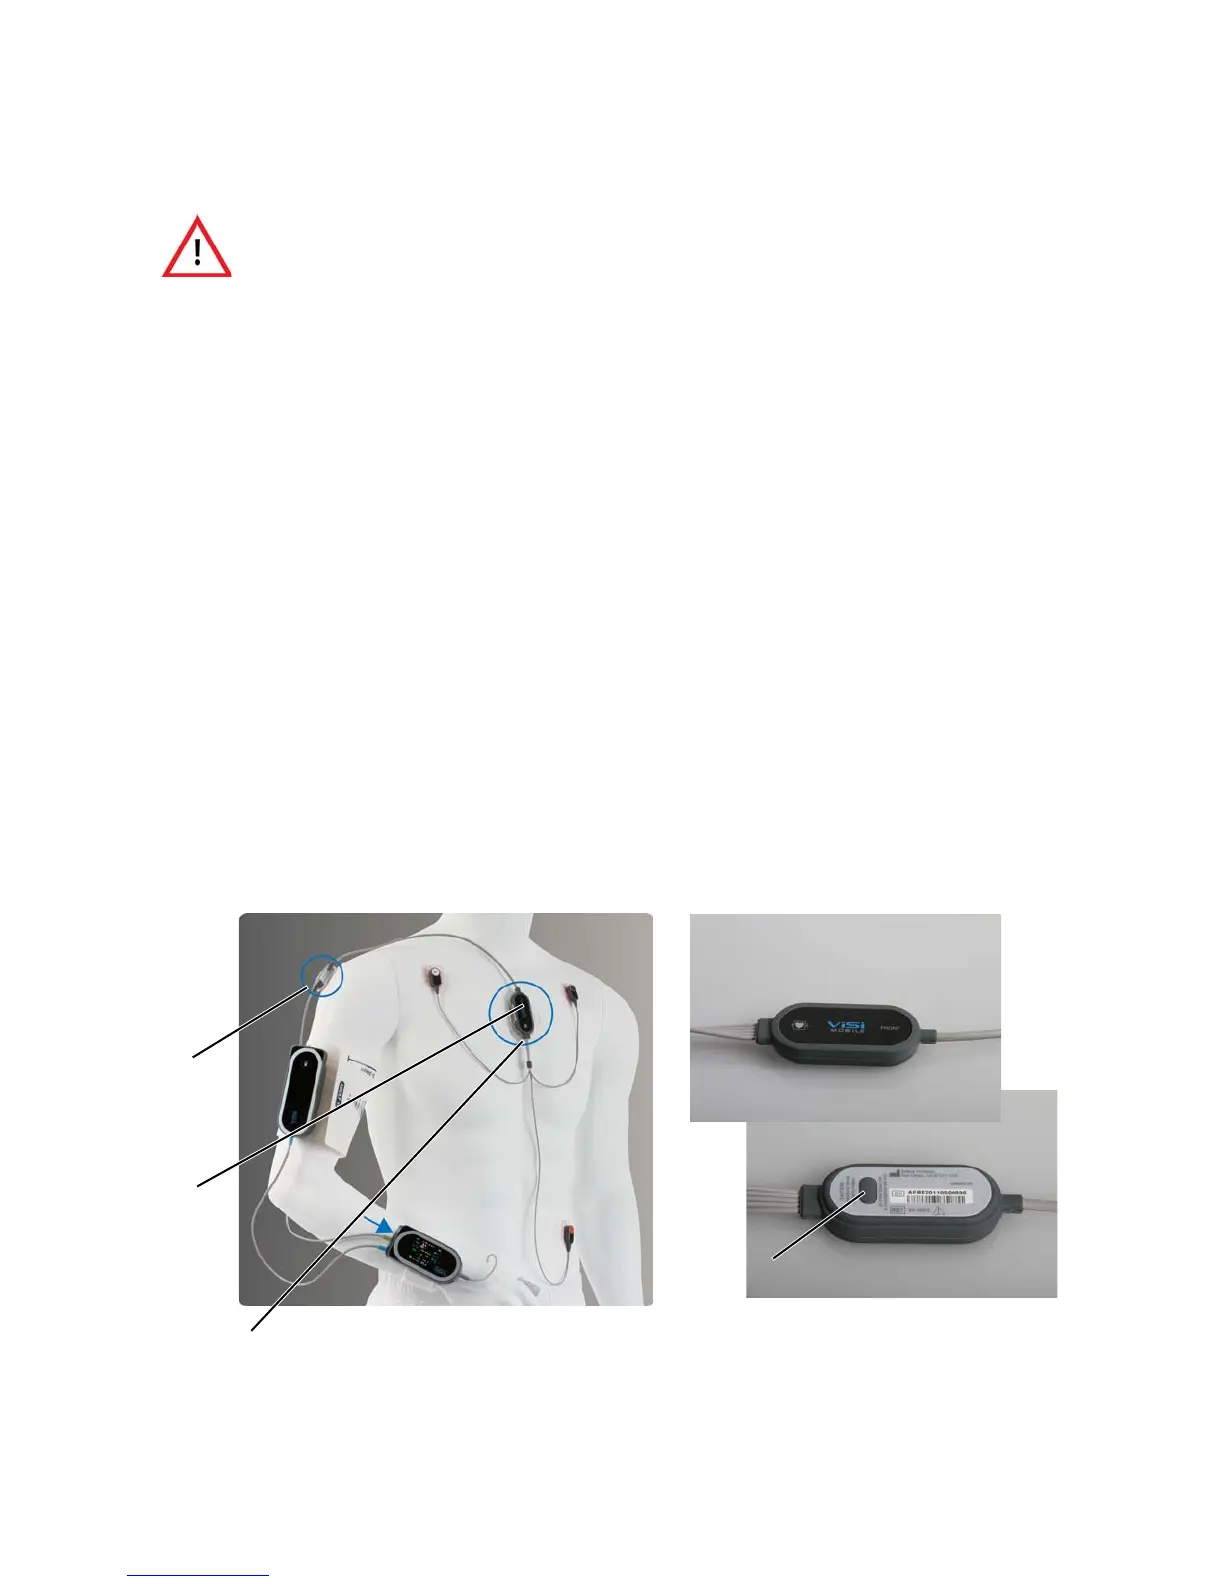
To apply the Chest Sensor
1. Remove the securements from the Disposable Kit and snap the Chest and Upper Arm Modules
into the securements.
2. Secure the Chest Module of the Chest Sensor between the sternum and the shoulder (same side as
the Monitor). The ideal location is the lower half of the sternum. If contraindicated, move the
Chest Module of the Chest Sensor higher on the sternum or laterally from the sternum.
Note: The Chest Sensor should be oriented vertically, with the lead wires hanging downward. Do
not orient the sensor more than a few degrees to the left or right.
Note: Ensure the “Front”, “ViSi Mobile” and “Defibrillation” labels on the Chest Module of the
Chest Sensor are facing outwards away from the patient’s skin.
Note: Ensure the “barcode” label and the Temperature sensor on the Chest Module of the Chest
Sensor are placed inwards directly against the patient’s skin.
Note: For patient comfort, shave or clip the hair in the areas where the Chest Module Securement
comes in contact with the chest.
3. Secure the Upper Arm Module of the Chest Sensor vertically on the outside of the upper arm.
4. Remove the ECG electrodes from the Disposable Kit.
5. Connect the Chest Sensor lead-wires to the ECG electrodes.
6. Apply the ECG electrodes to the prepared sites on the chest as shown.
Note: The default ECG configuration is Lead II.
Avoid placing the ViSi Mobile Cable Securements and ECG electrodes over
areas of abrasions, irritation, or other sensitive areas. If possible, remove,
reposition, and replace ECG electrodes and Cable Securements if the
patient complains of pain/itching at the sites.
Upper
Chest
Chest Sensor Module (rear view)
Chest Module (front view)
(Place this side against patient’s skin)
(Place this side away from the patient’s skin)
lead-wires
pointing downwards
Temperature Probe
Arm
Module
Sensor
Module


 To Next Page