39SPEKTRUM NX20 • TRANSMITTER INSTRUCTION MANUAL
EN
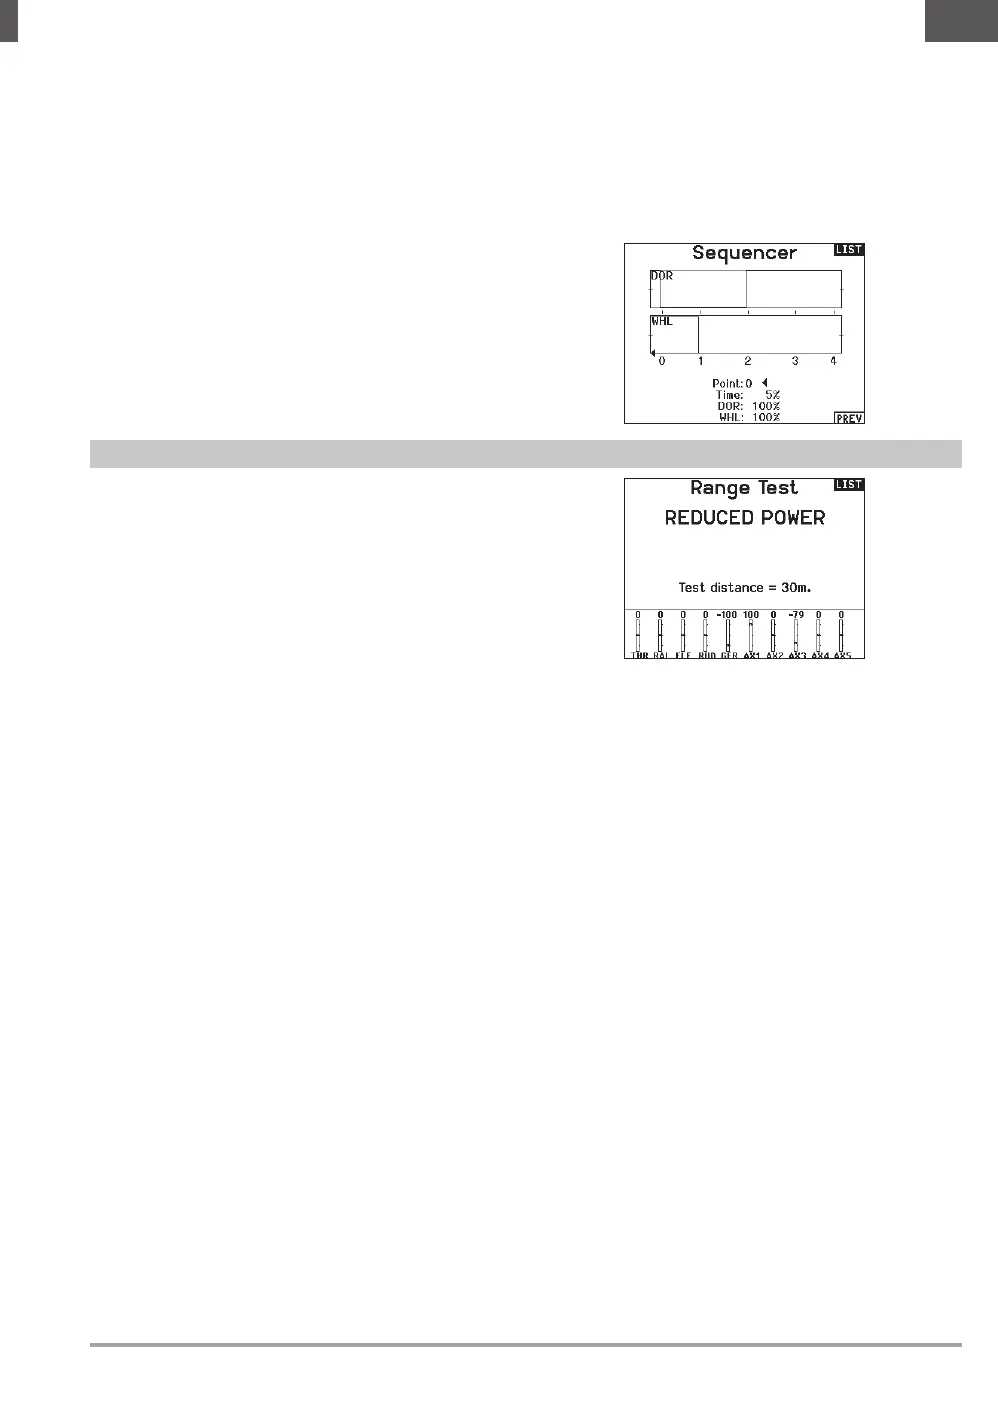
The Range Test function reduces the power output. This allows for
a range test to confirm the RF link is operating correctly. Perform
a range check at the beginning of each flying session to confirm
system operation.
To Access the Range Test screen:
1. With the transmitter on and the main or telemetry screen
displayed, press the scroll wheel. The Function list displays.
2. Scroll to highlight Range Test, then press the scroll wheel to
access the Range Test function.
3. With the Range Test screen displayed, push and hold the
trainer button. The screen displays Reduced Power. In this
mode the RF output is reduced allowing for an operational
range test of your system.
4. If you let go of the trainer button, the transmitter will go back
to Full Power.
IMPORTANT: Telemetry alarms are disabled during the Range Test.
Range Testing the NX20
1. With the model restrained on the ground, stand 30 paces
(approx. 90 feet/28 meters) away from the model.
2. Face the model with the transmitter in your normal flying
position and place the transmitter into Range Test mode (see
above). Then push the trainer button; the power output will be
reduced.
3. Operate the controls. You should have total control of your
model with the transmitter in Range Test mode.
4. If control issues occur, contact the appropriate Horizon Product
Support office for assistance.
5. If performing a range test while a telemetry module is active,
the display will show flight log data.
Range Test
TIP: If you need to use a 3-position switch, you must assign
one direction to two adjacent switch positions—e.g., 0 and 1.
Assign the opposite direction to the third switch position.
3. Assign the timing for the Forward and Reverse directions as
desired. There is no delay when you use the Nor option. You
may also select a delay time between 0 and 30 seconds.
4. Assign names for each sequencer function as desired.
5. Select either Step (S) or Proportional (P) for the Sequencer
output.
Step: The sequence only changes at kick points. Otherwise,
there is a delay in the sequence until it reaches the next kick
point.
Proportional: The sequence movement is proportional
between kick points. The sequence maintains rate and
direction until it reaches the next kick point.
6. Adjust the Sequencer motion percentages in the third screen.
For example, you may move points 1, 2 and 3 closer to the
beginning of the sequence so the motion occurs earlier. This
results in a delay between point 3 and point 4 at the end of the
sequence.
Testing the Sequence
The Sequencer function determines the response for channels
included in the sequence.
Refer to the Monitor screen to see how respective channels
interact in the Sequencer.
 Loading...