ST500 Tach-Timer Installation
© Stack Limited
7
Figure 1 - Tach-Timer display location
INSTALLATION
You do not need complicated tools or special training to install the Tach–
Timer. To gain the benefits of using this quality instrument all you need
are a few basic workshop tools, the willingness to read and follow these
instructions carefully and the time to complete each task in sequence.
Product Installation
The installation process begins when you
start to install the wiring harness, the
controls and the Tach–Timer display. After
you have completed these tasks, you can fit
and connect the optional wheel speed and
IR sensors and the external shift light if you
have them. You can then connect the Tach–
Timer to the vehicle electrical supply.
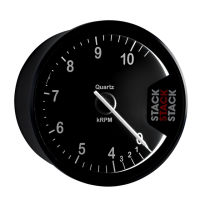
Instrument Panel
1 You will need to cut a hole into the instrument panel to accept the
Tach–Timer. Choose a suitable position for it :
• Mount the Tach–Timer on the instrument panel so that the driver
can see it easily, looking either through or over the steering wheel
(see Figure 1).
• Position the Tach–Timer so that the driver can see it either square
on or from a position slightly above.