Installation ST500 Tach-Timer
© Stack Limited
8
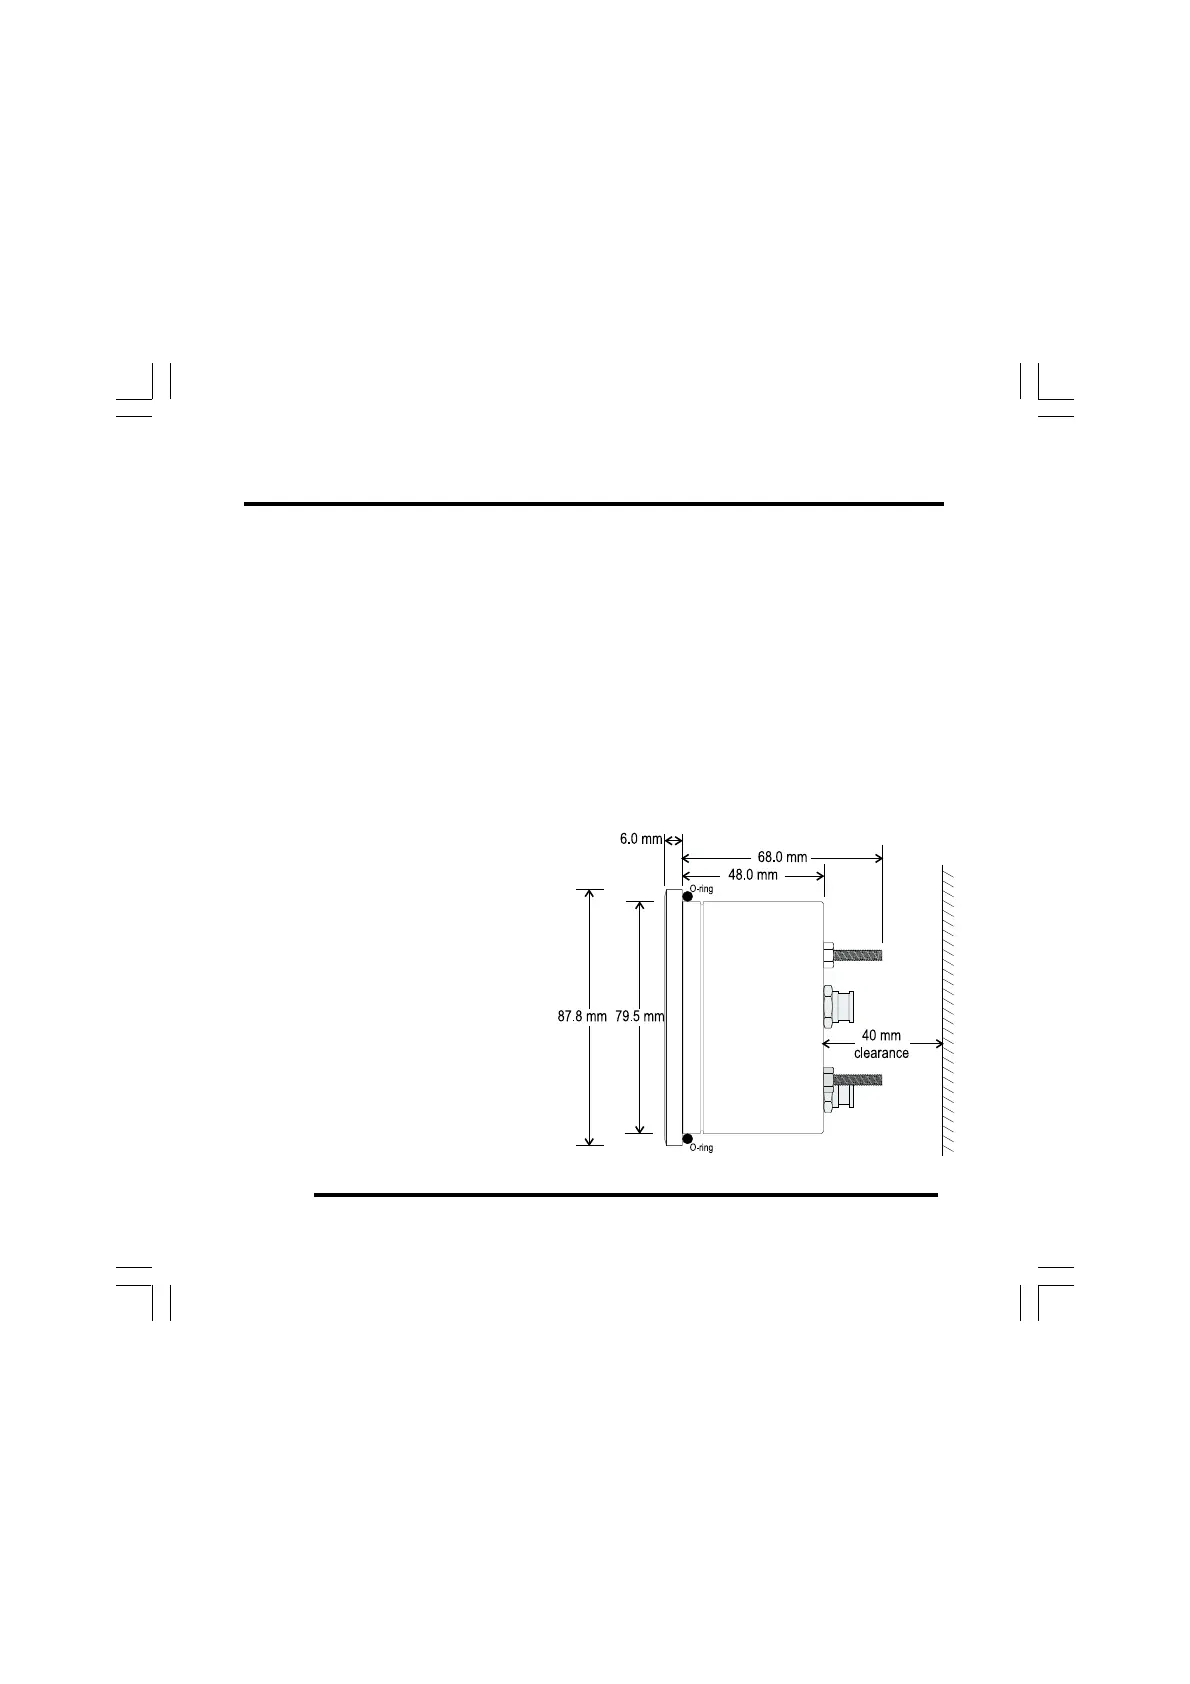
• Make certain there is sufficient space behind the instrument panel
to accept the Tach–Timer. Allow additional space for the wiring
harness and its connectors without the need to apply sharp bends
to the harness.
2 Figure 2 shows the overall dimensions of the Tach–Timer, which fits
into a standard 80 mm diameter hole.
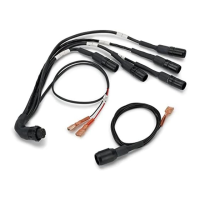
Wiring Harness
Stack supplies a wiring harness to connect the Tach–Timer within the
vehicle. If you find that the standard wiring harness is unsuitable for
installation on your vehicle, contact Stack for details of wiring harness
extensions. Labels identify
each wire in the harness
shown in Figure 3.
1 Identify all the relevant
connectors of the wiring
harness.
2 Plan the location of all
the component parts of
your Tach–Timer and
decide the best layout to
use when you install the
wiring harness.
Figure 2 - Overall dimensions