109MS 240, MS 260, MS 260 C
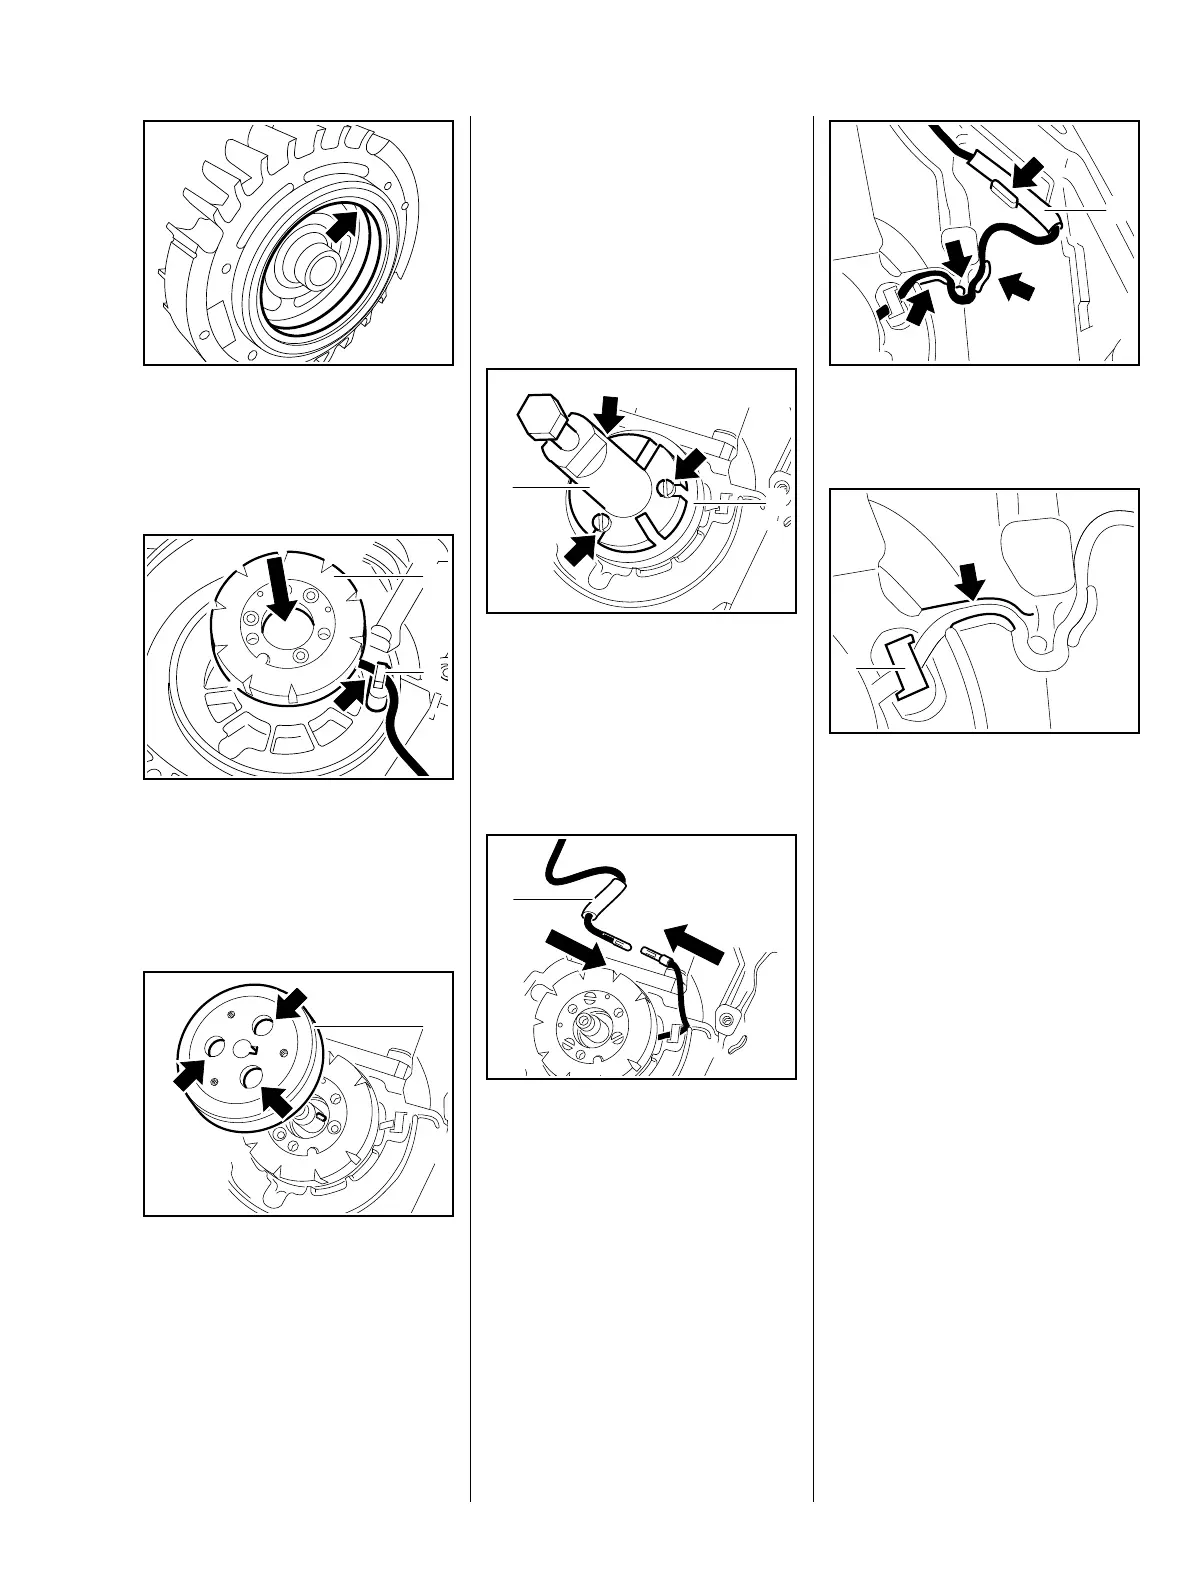
: Inspect the magnet ring (arrow) in
the flywheel for cracks or other
damage. If damage is found,
replace the flywheel.
: Place the generator (1) in
position with the connecting wire
(arrow) facing the crankcase and
push the retainer (2) into its seat
at the same time.
: Push the centering tool (1)
1118 893 3500 onto the
crankshaft so that the slot
engages the Woodruff key – the
generator is now centered.
165RA442 TG
165RA443 TG
1
2
165RA444 TG
1
– Use threadlocking adhesive,
b 17.
– Insert the screws through the
holes (arrows) and tighten them
down firmly.
– Tightening torques, b 3.5
– Remove the centering tool (1).
: If necessary, secure the puller (2)
1107 890 4500 with screws
(arrows) and pull off the centering
tool.
: Reconnect the pin and socket
connector.
– Push the insulating tube (1) over
the connector.
To reduce the risk of a short circuit,
make sure the insulating tube
completely covers the connector.
165RA445 TG
1
2
165RA446 TG
1
: Push the generator wire and
connector (1) into the guides
(arrows) as far as stop.
: The wire must be properly seated
in the guide and must not project
– bond in position if necessary
(arrow).
The retainer (1) must be pushed
fully home.
The flywheel must not touch the
generator wire.
– Reassemble all other parts in the
reverse sequence.
1
165RA447 TG165RA448 TG
1