71MS 240, MS 260, MS 260 C
: Pry out the annular buffer (1).
– Check the annular buffer (1) and
replace if necessary
– Hold the annular buffer (1)
with its small diameter facing the
crankcase.
– Use STIHL press fluid to simplify
assembly,
b 17
: Push the annular buffer (1) into
the bore until its groove (arrow)
engages the housing rib (2).
165RA486 TG
1
165RA256 TG
1 2
– Position the tank housing on the
annular buffer – the holes must
line up.
: Insert screw (arrow) and tighten it
down firmly.
– Push the plug into the annular
buffer as far as stop.
– Reassemble all other parts in the
reverse sequence.
– Tightening torques, b 3.5
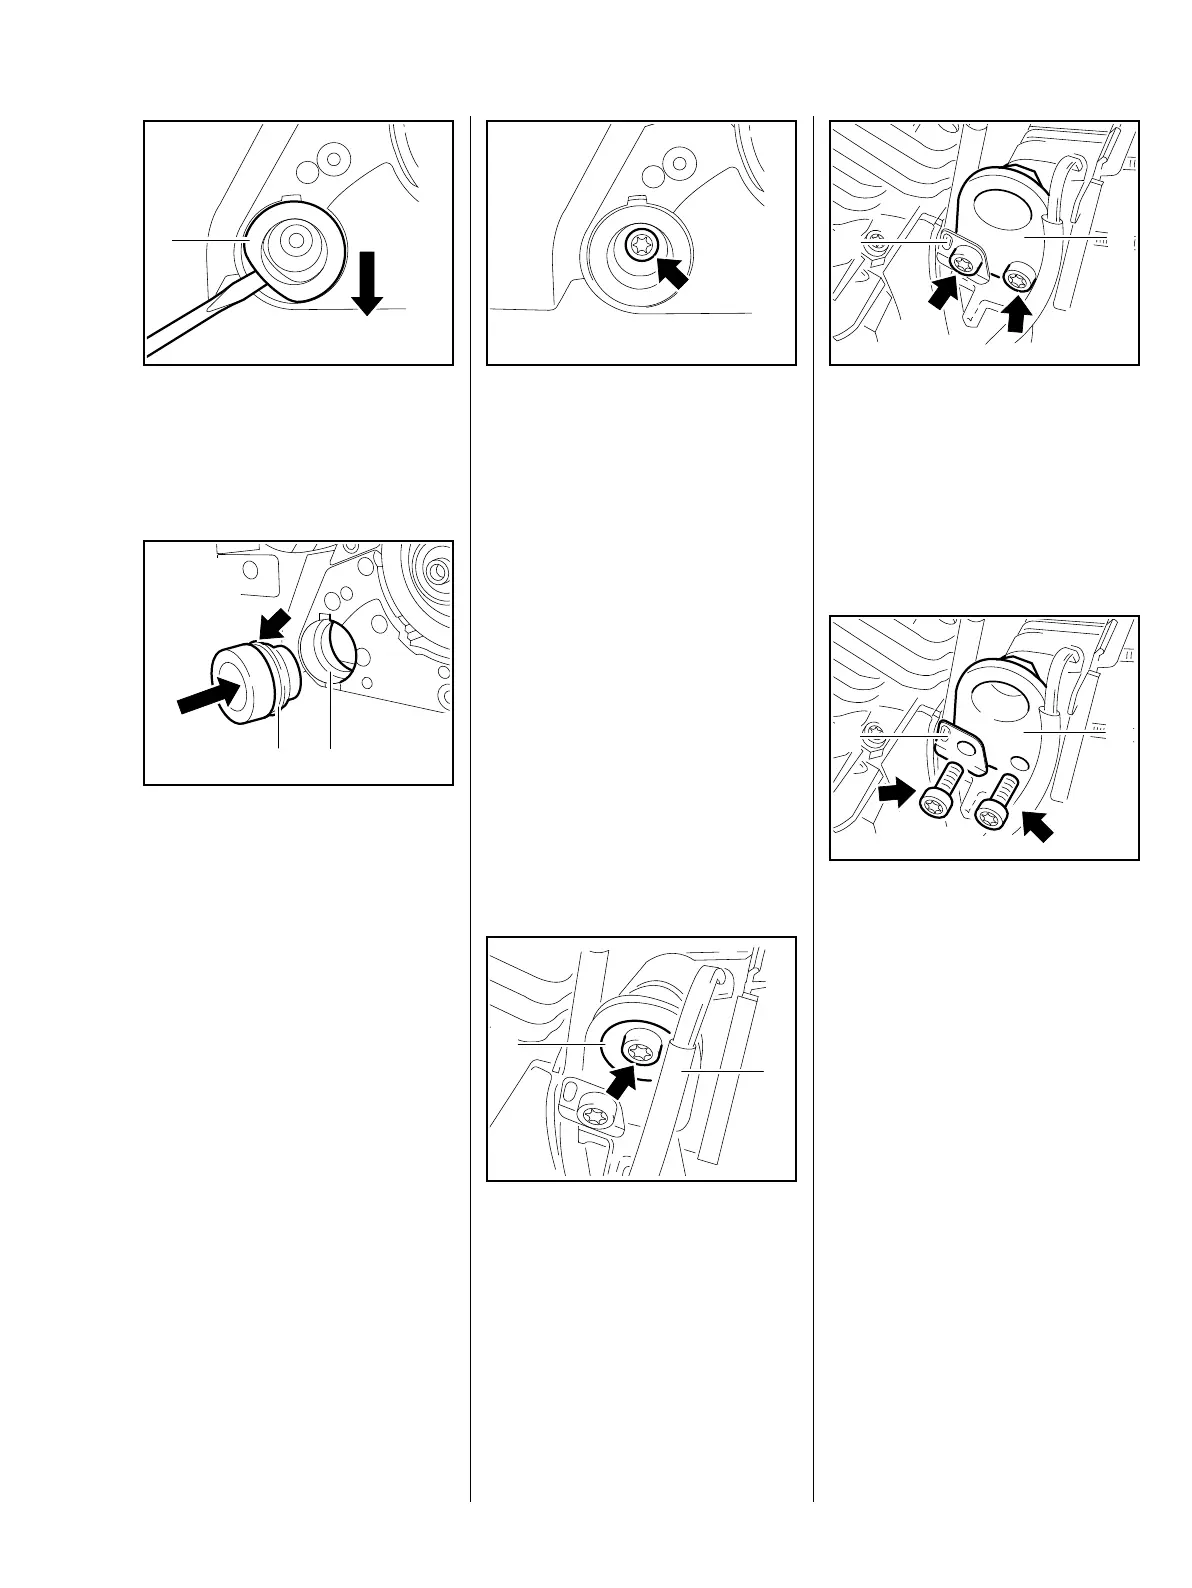
11.3 Annular Buffer at Ignition
Side
– Remove the shroud, b 8.4
– Push the wiring harness (1) to
one side.
: Take out the screw (arrow) and
remove the washer (2).
165RA254 TG165RA257 TG
1
2
: Take out the screws (arrows) and
remove the retaining plate (2).
– Remove the annular buffer (1).
– Check the annular buffer (1) and
replace if necessary
– Hold the annular buffer (1)
with its tapered side facing the
crankcase.
– Fit the annular buffer (1) in
position.
– Fit the retaining plate (2) in
position.
– Check that the ignition lead is in
its guide and not pinched.
: Insert screws (arrows) and
tighten them down firmly.
165RA258 TG
1
2
165RA242 TG
1
2

 Loading...