27MS 240, MS 260, MS 260 C
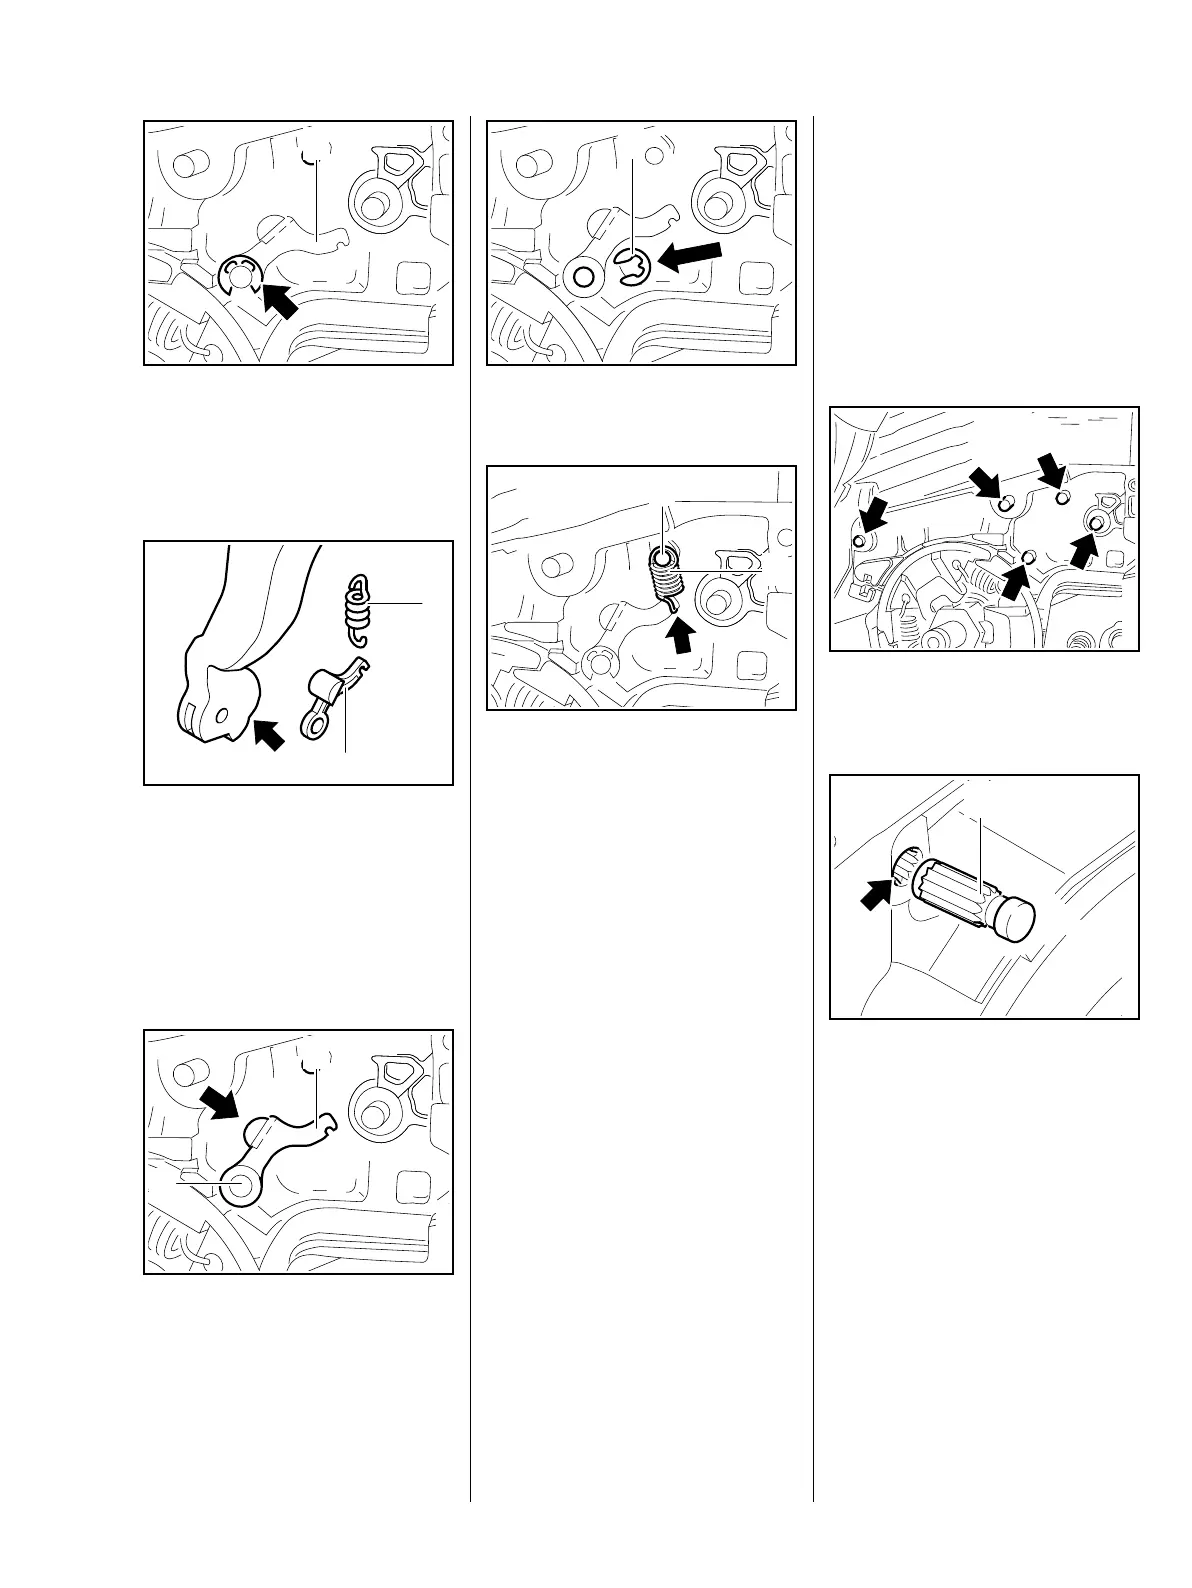
: Remove the E-clip (arrow).
– Pull the cam lever (1) off the pivot
pin.
– Check the cam lever (1) and
spring (2) and replace if
necessary.
– Check the condition of the cam
contour (arrow) and replace the
hand guard if necessary.
– Position the cam lever (1) so that
its cam (arow) faces the cam on
the hand guard.
: Push the cam lever (1) on to the
pivot pin (2).
165RA061 TG
1
1
165RA062 TG
2
165RA063 TG
1
2
: Fit the E-clip (1).
: Attach the spring (1) to the cam
lever so that the open side of the
spring hook (Pfeil) points toward
the housing.
If the groove in the spring's anchor
pin is worn, install a new pin, b 7.5
– Attach the spring (1) to the anchir
pin (2).
The cam lever is not yet under
tension – the spring may become
detached.
– Reassemble all other parts in the
reverse sequence.
– Tightening torques, b 3.5
– Lubricate the cam lever, b 17
165RA064 TG
1
1
165RA065 TG
2
7.5 Pins
The anchor pins secure the springs.
Worn pins must be replaced
– the springs may otherwise
become detached and pop out.
All parts have been removed from
the pins in the following illustrations
for greater clarity.
: Use a suitable tool to pull out the
pins (arrows).
– Before installing the new pin (1),
coat its knurled shank with
Loctite, b 17
: Position the new pin (1) in the
bore (arrow) so that the knurling
on the pin meshes with the
existing knurling in the bore.
Turn the pin (1) back and forth as
necessary.
165RA066 TG
165RA067 TG
1