92 MS 240, MS 260, MS 260 C
High speed screw
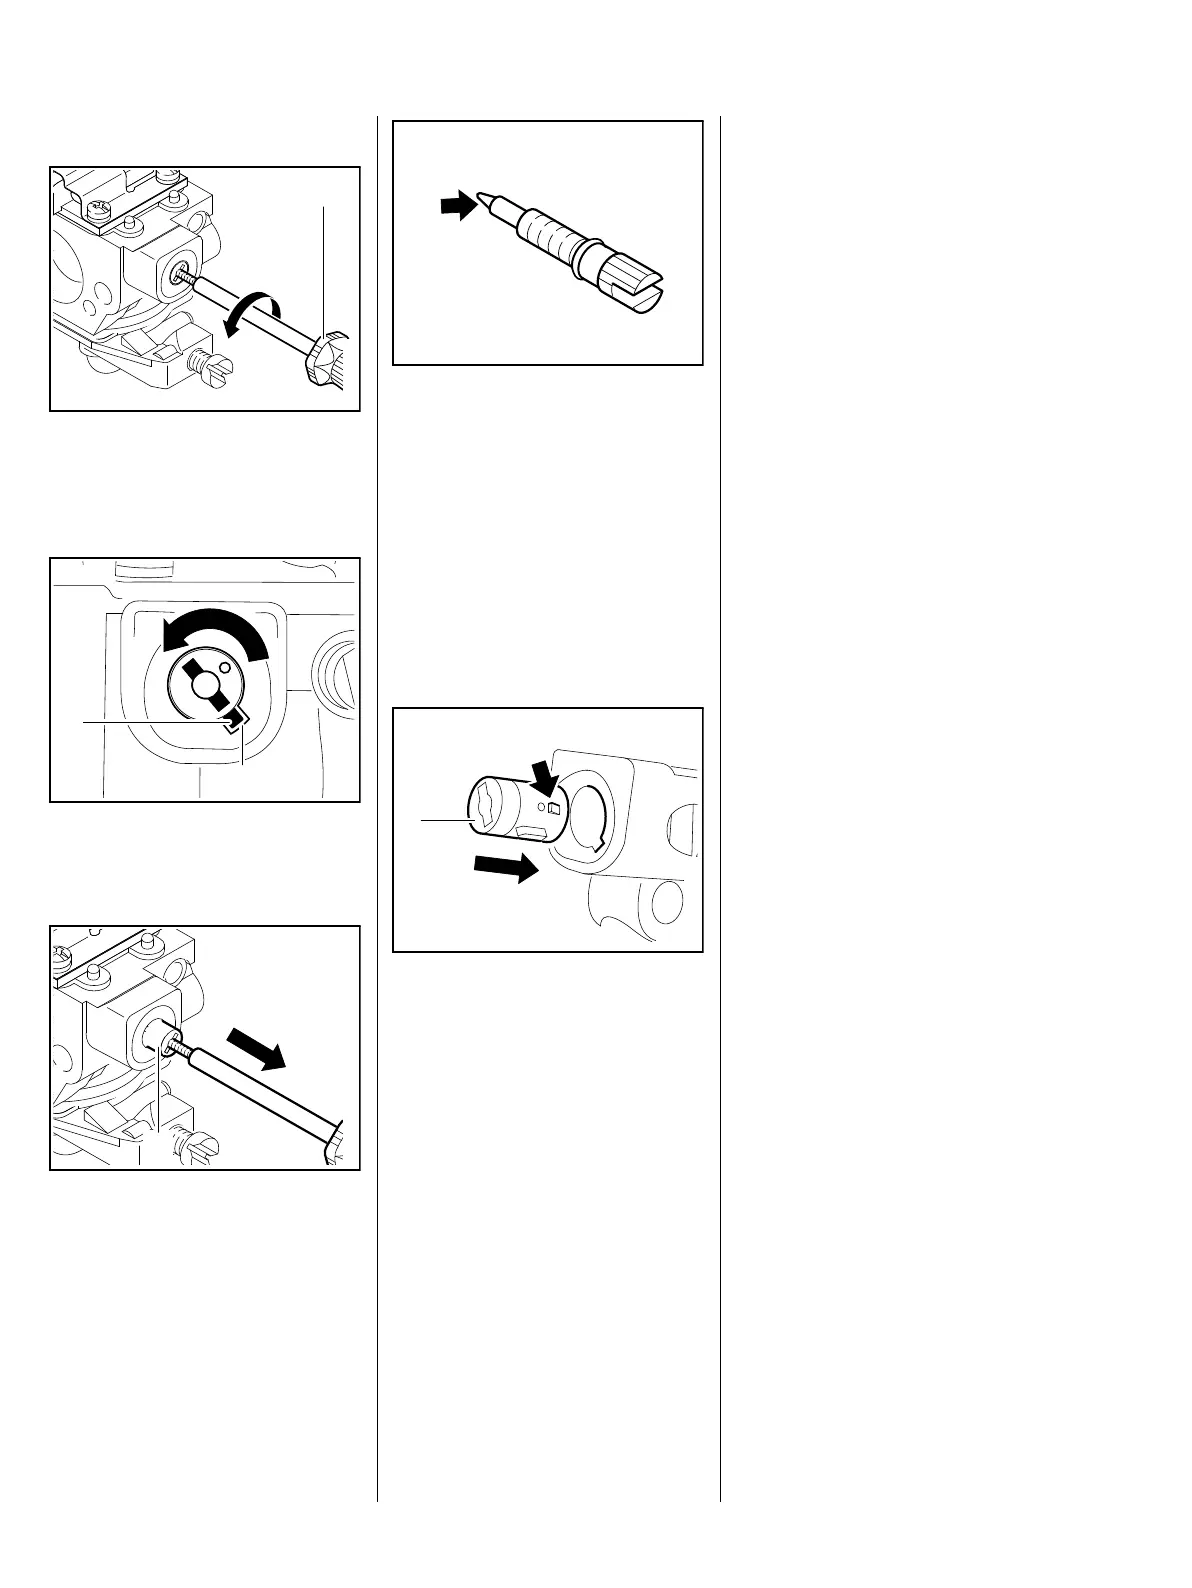
: Screw the puller (1) 5910 890
4500 counterclockwise into the
limiter cap – left-hand thread.
: Rotate the limiter cap until the lug
(2) is in line with the slot (1).
: Pull out the limiter cap (1).
– Take out the high speed
screw (H).
Always install a new limiter cap.
1
165RA368 TG
165RA369 TG
1
2
1
165RA370 TG
: Inspect the tip (arrow) for
damage or wear and replace the
screw (H) if necessary.
– Screw down the high speed
screw (H) as far as stop.
– Continue with installing limiter
cap.
Pre-installing limiter cap
: Push the new limiter cap (1) on to
the high speed screw (H) as far
as the detent (arrow)
– do not push it fully home.
The basic setting with the pre-
installed limiter cap is carried out
with screwdriver
5910 890 2304.
– Reassemble in the reverse
sequence.
– Carry out basic setting, b 14.5.1
165RA371 TG
165RA372 TG
1
14.5 Adjusting the Carburetor
14.5.1 Basic Setting
The basic setting is necessary only
if the high speed screw (H) or low
speed screw (L) has to be replaced
or after cleaning and adjusting the
carburetor from scratch.
It is necessary to carry out the basic
setting after removing the limiter
cap.
The carburetor and air filter are
installed, the adjusting screws fitted
and the new limiter cap pre-
installed.
– Check chain tension and adjust if
necessary.
– Inspect the spark arresting
screen (if fitted) and clean or
replace if necessary. b 8.1
– Check the air filter and clean or
replace if necessary, b 14.1
– Starting with the low speed and
high speed screws against their
seats, turn them 1 full turn
counterclockwise.
– Allow engine to warm up.
Setting disk 5910 893 6600 may be
fitted on the screwdriver
5910 890 2305 to simplify
adjustments.