33MS 240, MS 260, MS 260 C
8.2.1 Preparations
– Remove the shroud, b 8.4
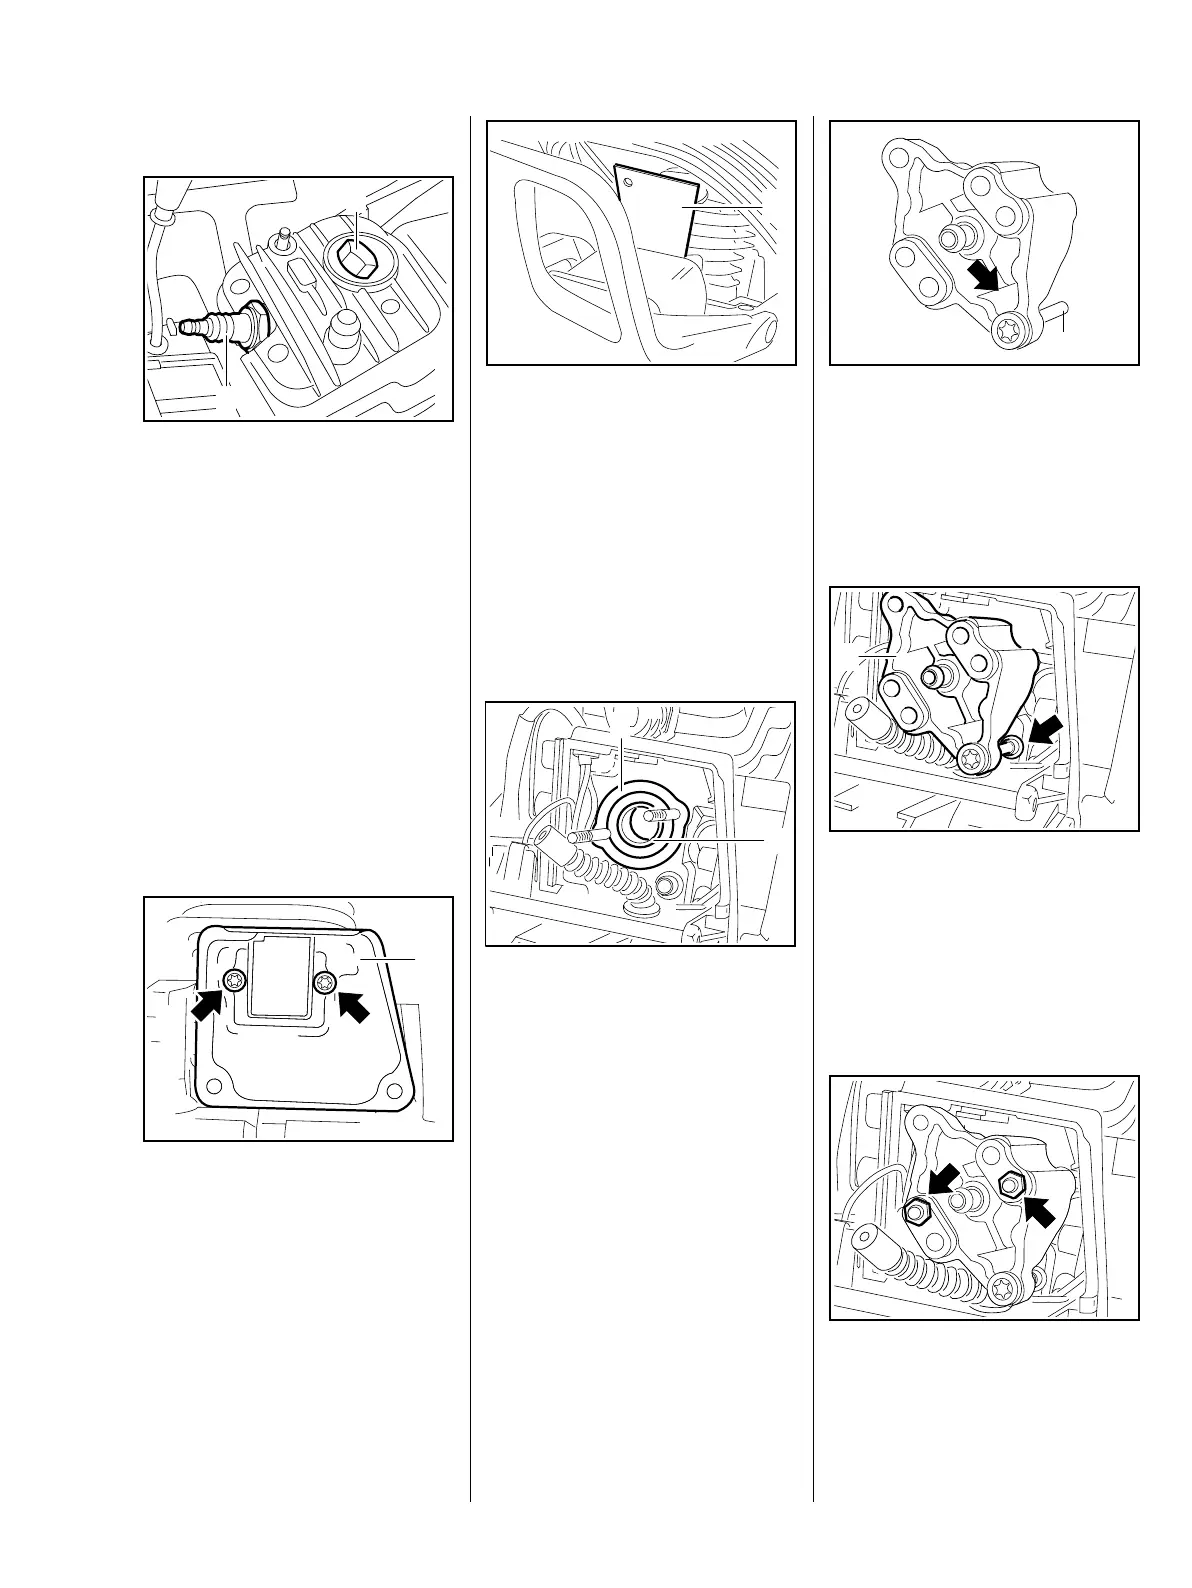
– Set the piston to top dead center.
This can be checked through the
spark plug hole.
– Remove the decompression
valve, b 8.9
: Fit the plug (1) 1122 025 2200
and tighten it firmly.
: Fit the spark plug (2) and tighten
it down firmly.
– Tightening torques, b 3.5
– Remove the muffler exhaust
casing, b 8.1
: Loosen the screws (arrows).
165RA474 TG
1
2
165RA085 TG
1
: Fit the sealing plate (1)
0000 855 8106 between the
cylinder exhaust port and heat
shield (if fitted) and tighten down
the screws moderately.
The sealing plate must completely
fill the space between the two
screws.
– Remove the carburetor, b 14.2
: Check that the sleeve (2) and
washer (1) are in place.
165RA099 TG
1
1
165RA100 TG
2
– Pin (1) must be in the test flange
1128 850 4200
– it seals the impulse hose.
: Make sure that the pin (1) is in
hole "2" (arrow).
– Fit the test flange 1128 850
4200 (1).
: When pushing the test flange (1)
into position, make sure the pin
engages the impulse hose
(arrow).
: Fit the nuts (arrows) and tighten
them down firmly.
165RA475 TG
1
1
2
1
165RA493 TG165RA494 TG