48 MS 240, MS 260, MS 260 C
8.7.2 Installing
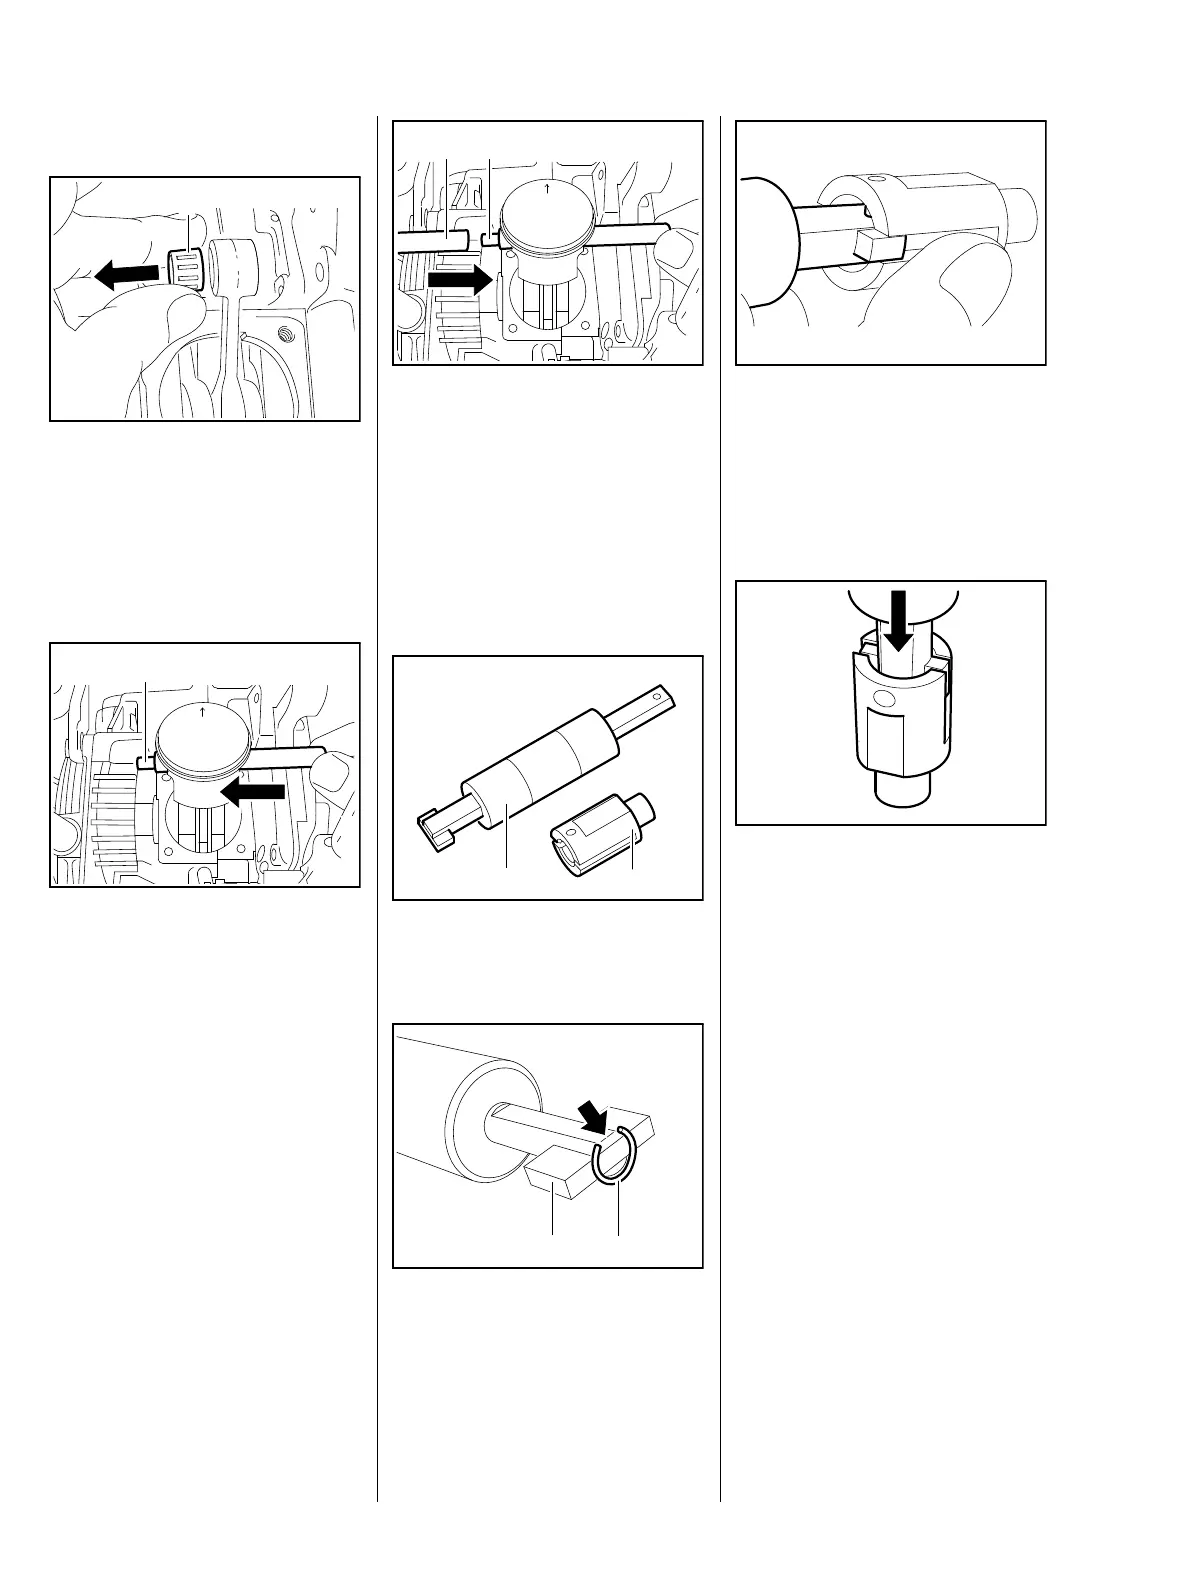
: Pull out the needle cage (1),
check it and replace if necessary.
– Lubricate the needle cage (1)
with oil and push it into the
connecting rod.
– Install the snap ring in the piston
boss at the clutch side
– the assembly drift
1110 893 4700 can be pushed
through the installed snap ring.
– Line up the piston so that the
arrow on the piston crown points
toward the exhaust port/muffler.
– Place the piston on the
connecting rod.
: Push the assembly drift (1)
1110 893 4700, small diameter
first, through the piston and small
end (needle cage) and line up the
piston.
165RA149 TG
1
165RA150 TG
1
– Lubricate the piston pin with oil.
: Fit the piston pin (1) on the
assembly drift (2) and slide it into
the piston.
The piston has a snap ring at both
sides. The snap ring at the clutch
side must be installed first.
: Remove the sleeve (1) from the
installing tool 5910 890 2210.
: Attach the snap ring (1) to the
magnet (2) so that the snap ring
gap is on the flat side of the tool's
shank (arrow).
165RA151 TG
21
165RA152 TG
1
2
165RA153 TG
1
2
: Push the large slotted diameter of
the sleeve over the magnet and
snap ring.
The inner pin must point towards
the flat face of the tool's shank.
: Press the installing tool
downwards into the sleeve until
the magnet butts against the end
of the guide slot.
Use a suitable base.
165RA154 TG
165RA155 TG