88 MS 240, MS 260, MS 260 C
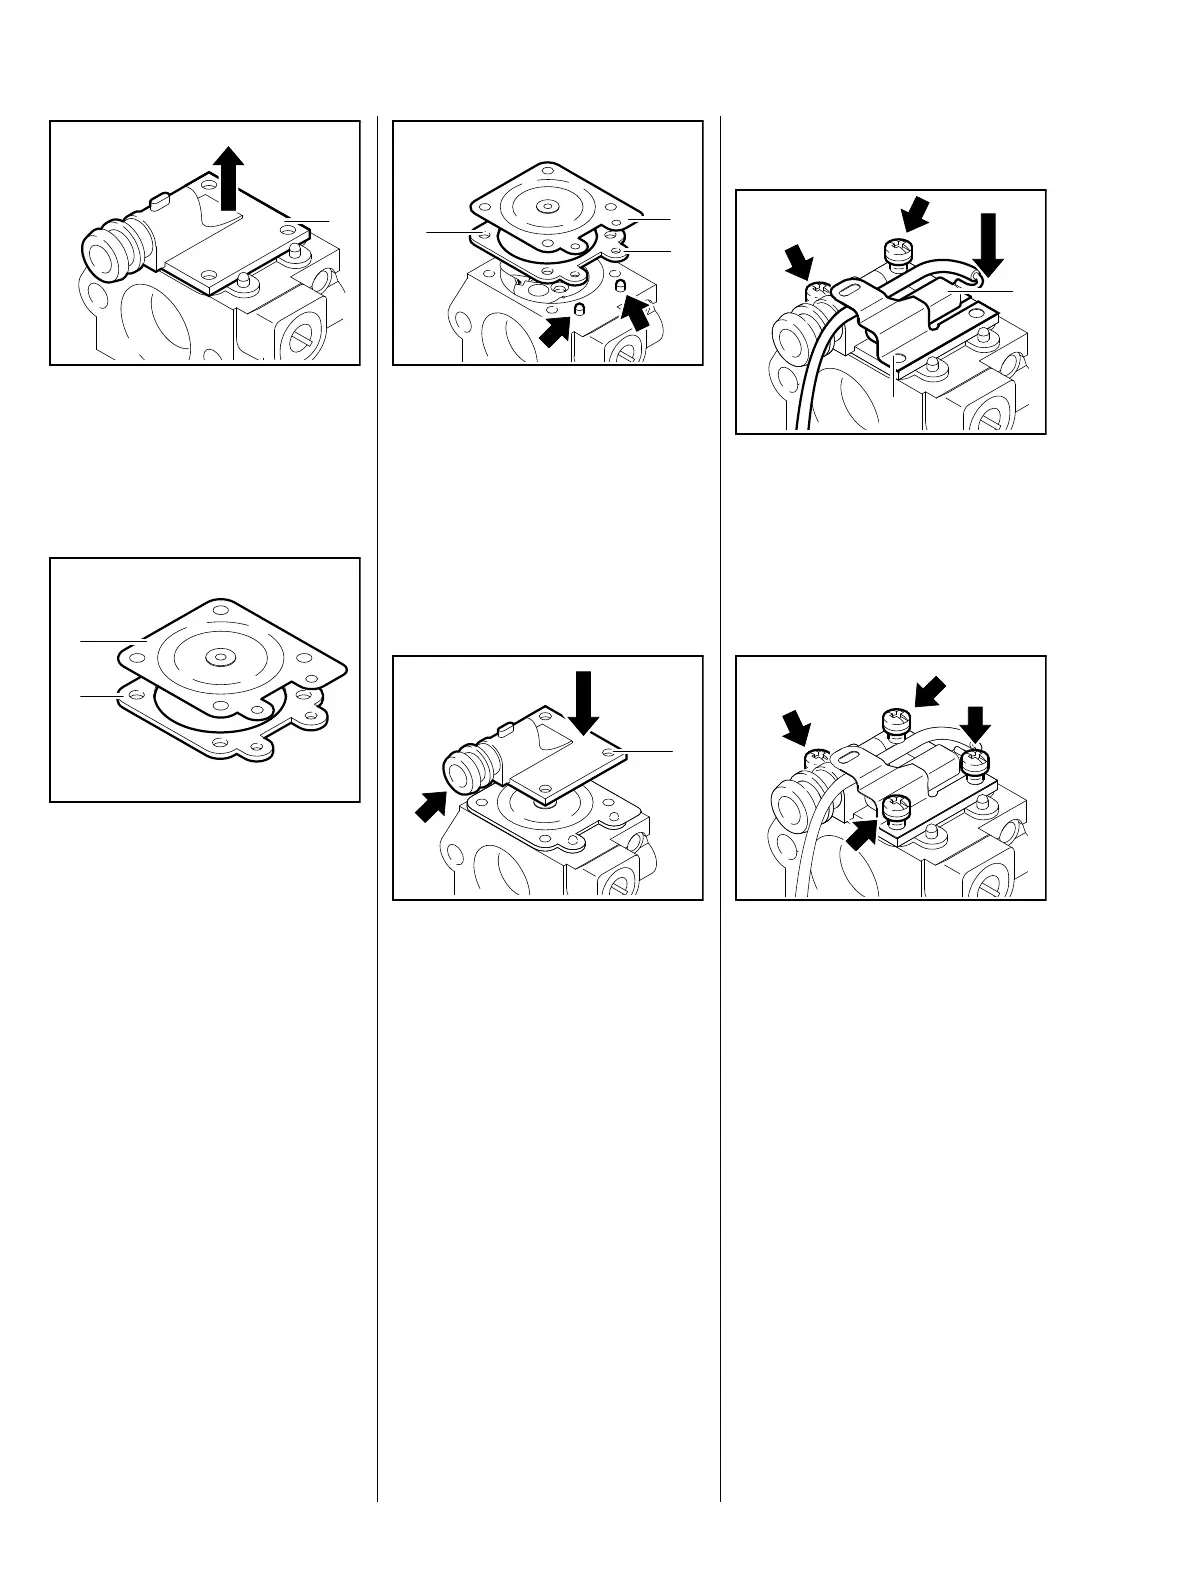
: Remove the end cover (1).
If the gasket and diaphragm are
stuck to the carburetor, remove
them very carefully.
: Carefully separate the metering
diaphragm (1) and gasket (2).
The diaphragm material is
subjected to continuous alternating
stresses and eventually shows
signs of fatigue, i.e. the diaphragm
distorts and swells and has to be
replaced.
– Check the metering diaphragm
(1) for signs of damage and wear.
Install a new gasket.
165RA341 TG
1
1
2
165RA342 TG
– Note installed positions of
metering diaphragm (2) and
gasket (1).
: Place the gasket (1) and
metering diaphragm (2) on the
pegs (arrows) and check that the
tabs (3) are at the same side as
the adjusting screws.
– Position the end cover (1) so that
the stub (arrow) points towards
the air filter.
: Fit the end cover (1) carefully –
the holes must be in alignment.
165RA076 TG
1
2
3
165RA343 TG
1
Versions with handle and
carburetor heating
: Insert two screws (arrows) to hold
the end cover, gasket and
metering diaphragm in position.
: Fit the thermostatic switch (1)
and retainer (2).
: Fit the screws (arrows).
– Check position of diaphragm and
gasket, then tighten down all
screws firmly in a crosswise
pattern..
– Reassemble all other parts in the
reverse sequence.
165RA344 TG
2
1
165RA229 TG