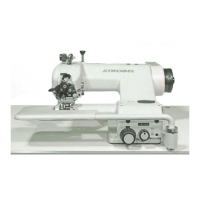
35 BA_KA-ED_A22_190313_en.doc
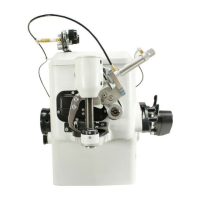
5.3 Setting the plunger lifting (Fig. 18)
The plunger needs to be lifted by 8 mm. Mount the pneumatic cylinder (1) on the
bearing plate (2) as vertically as possible to the plunger.
The setting is done as follows:
- Set the plunger all the way up with the stitch depth controller (digital display
010-012). The needle needs to raise about 0.1 to 0.2 mm, otherwise loosen the
threaded pin (3) and adjustments to the nut (4) against the nut (5):
Turn the nut to the left - plunger higher
Turn the nut to the right - plunger lower
- Turn air pressure on the maintenance unit back to 0 bar.
- Flexible coupling (6) nut srew (4) and secure with lock nut, clutch.
- Screw (1) in equal parts in the piston of pneumatic cylinder (1) and the flexible
coupling screw.
- Accounts under the lock nut (8) against the piston of the pneumatic cylinder
- By turning the screw as long .(6) clutch in the clutch screw until the piston of the
pneumatic cylinder 8 mm from its lower limit is pulled out.
- Second nut (8) tighten against the clutch.
- Set the maintenance unit to 5 to 6 bar pressure.
- Turn manual switch on the 1V1 solenoid (Fig. 25) by 90 degrees to the right.
- Measure lifting height at plunger. The lifting height between upper and lower
position needs to be 8 to 8.5 mm.
- Unlock the 1V1 solenoid by turning the manual switch to the left
(Fig. 25).
- The speed of the pneumatic cylinder can be set by two exhaust throttle screws
on the 1V1 solenoid (Fig. 25). By turning in the upper screw the lowering of the
plunger is slowed down and lower screw controls the raising. The lifting should
be throttled only in so far as that mechanically hard knocks are avoided and thus
increased wear.
The transport support (1) should be moveable for at least
0.5 mm downwards when the plunger is lifted. (dimension 1
to 1.5 mm in
Fig. 19).
- Afterwards the adjustment of switch S7 needs to be checked
(see point “5.7 Setting of switch S7 (Fig. 23)”)