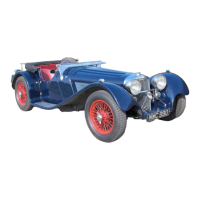
8.3.18 Running board strakes
Refer to figure 12 to assist in fitting your running board strakes. The looks of the running board strakes are
much improved by gently curving the strakes to go with the body shape, both upwards as they go forward to
match the running board curve and inwards to match the body shape, they will need curving to various
degrees starting straight for the outer strake to curved to match the body line on the inner strake.
You can, if confident fit these with rivets in one go but protect the body from the ends of the strakes by
wrapping them in masking tape, the safer way is to fit them with M3 bolts and nuts before removing,
cleaning off tape and refitting them.
Start off by protecting the running boards with masking tape, then draw a straight line across the running
board 3 ¼ inches forward of the rear end of the door, this is the line for the rear of the strakes.
Outer strake. Prepare and fit the outer longest strake first, this is straight but as with all the strakes needs a
slight curve upwards to sit on the wing nicely, if they are not curved to follow the wing they will look kinked
at every mount position.
Gently warm the strake in your hands while gently bending the strake upwards to follow the curve in the
wing, once happy position on the wing lining up with the mark for the rear end of the strakes.
Starting at the rear mount hole, measure 25 mm from the outer edge of the body to the outer edge of the
strake, drill then nut and bolt at this hole then move forward to the next mount hole, continue until the outer
strake is fully fitted.
Note, take care when drilling through the strakes, use a drill stop or length of small bore hose to stop the drill
from hitting and damaging the strake.
Inner strake. Next fit the inner shortest strake, this needs curving upwards like the outer strake but also
needs curving inwards as it goes forward to match the body. Take your time warming and curving this shape
as the better it is, the better your finished car will look. Then like the outer strake start by aligning the rear
end and beside the rear mount hole measure 25 mm from the wing beading to the inner edge of the strake (32
mm if you haven’t fitted the wing beading yet) before drilling and bolting that position. The move forward to
the next hole measuring before drilling, the strake will flex a little as you go to help get the alignment
perfect, continue until the inner strake is fully fitted.
Centre strake. Next take the centre strake and as before curve this to suit the upwards curve of the wing as
well as giving it a curve inwards but not as much as the inner strake, this needs curving to fit central between
the inner and outer strakes, you could draw a centre guide line on the masking tape and keep offering up the
strake until happy with the shape. Then as before line up the rear end of the strake and measure the exact
centre between the outer strake and inner strake for the rear mount hole, drill and bolt this hole before
moving forward to the next hole, measuring the centre again before drilling and bolting. Carry on to the front
and you will have three strakes with the inner one matching the body curve and the centre one exactly
central.
Final two strakes. The final two strakes can be fitted in the same way as the centre strake using the strakes
either side of them to measure from to find the centres. This will get you five strakes of varying degrees of
curve to suit the body. Once happy remove the strakes clean off the body and refit with 3 mm pot rivets, take
care to wrap the end of the strake not being riveted with tape to protect the body as you move along, remove
the tape when your ready to rivet that end. When finished repeat with the second side.
Strake rubber inserts. When you have the strakes fully fitted you can cut and fit the rubber inserts, take
your length of rubber insert and cut a ‘V’ into the end of it, refer to figure 12, using super glue hold the ends
of the ‘V’ together this give the end of the rubber a nicer finish. Insert the rubber into the first strake from
this first ‘V’ and run it to the other end, cut the rubber 25 mm over length (this is to overcome and shrinkage
that may occur) before cutting and gluing the second ‘V’ this can then be fully inserted (you will be able to
get the extra length in), before moving on to the next strake.