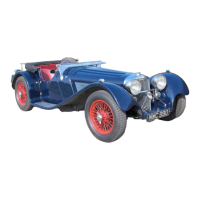
9.2.2 Headlamps QK596 and horns
To install these headlamps start by loosening and lowering the thumb screw on the bottom of the headlamp,
the headlamp stone guard and lens cover will then release from the bottom and lift off the top of the lamp.
With this done you can access the screws retaining the headlamp unit, this can be then be removed allowing
access to the headlamp wiring later on. Now remove the nut, lock washer and domed spacer from the
headlamp mount.
Next decide which wires you need to bring into the headlamp, you will need the headlamp dip/main beam,
earth, horn and side lamp wires (some headlamps don’t have positions for side lamps, on these cars the side
lamps have to be fitted in special piggy back lamp holders in with the flashers), the chosen wiring can then
be passed up the conduit ready to go into the headlamp.
Pass these cables through the top of three holes in the lamp bar and through the bottom hole pass two cables
to extend the horn cables up into the headlamp. With these cables in place pass the wires through the
headlamp spacer and into the headlamp making sure they don’t get jammed or nipped anywhere, this is tight
as the cables need to go around 90degrees inside the spacer.
With the wires in the headlamps they can now be fitted to the headlamp bar, pass the threaded mount through
the domed spacer and headlamp bar and refit the lock washer and nut and finger tighten in place, as long as
your car is sitting level you can then align your headlamps with the aid of a spirit level, this can be done
before refitting the headlamp internals. There are three alignment checks you need to do:
1 Make sure the two headlamps are straight with each other by running the level across both their
faces.
2 Make sure the headlamps are upright by running the level flat on the front from the bottom centre to
the top center.
3 Make sure the headlamps are set to the correct beam height by running the level on the front at 90
degrees this will get the headlamp aim close if not exact for Mot checks.
4 Once happy with position tighten nut to hold headlamps secure.
The horns can also now be fitted at this stage and can be connected up at the horn and the wires in the
headlamp can be connected up as described above if they have standard H4 bulbs.
If they have special ‘manual focus’ bulbs which are identifiable by being held in with a screw clamp these
can have the bulb fitted either way around so connect them up before testing to see if Main and dipped beam
are in the correct positions.