IntelliShot & FlexoShot: Operations Manual Page 33
Non-Portion-Control Dispensers
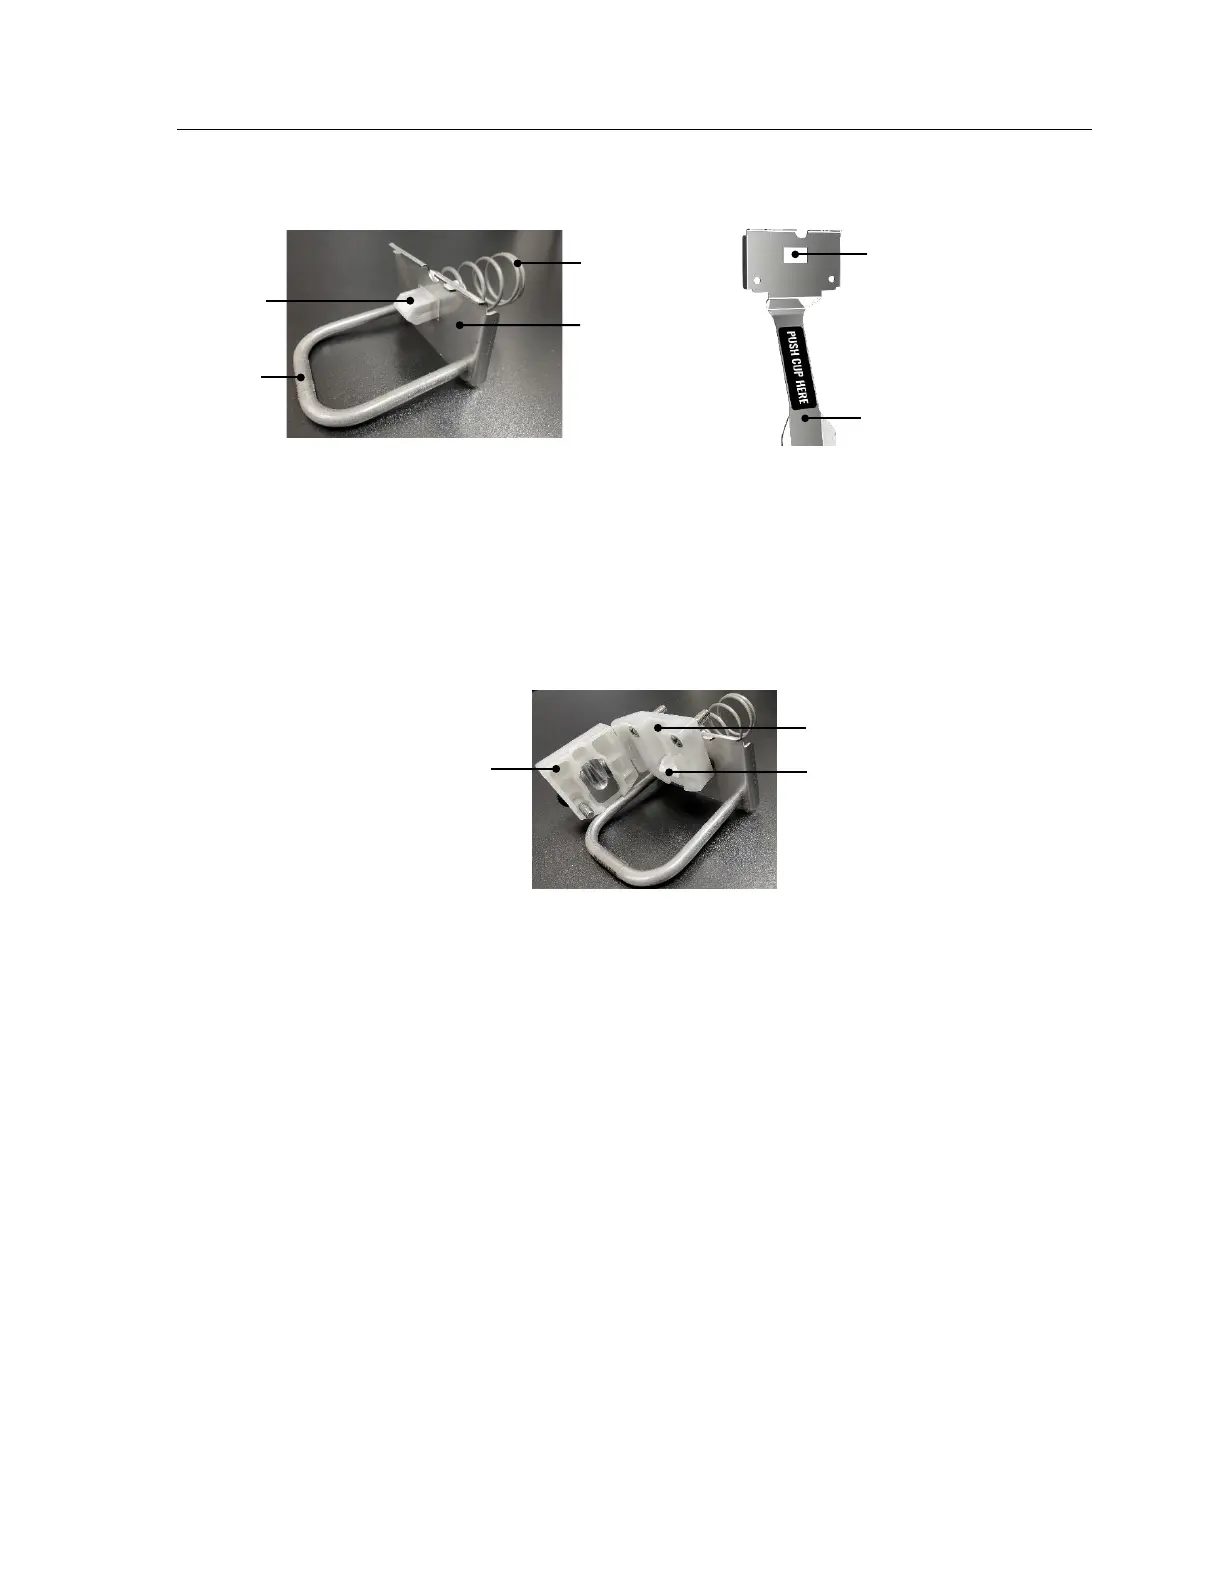
1. Position the spring onto the back of the plunger tip.
2. Insert the plunger tip through the opening on the back plate of the dispense handle or cup lever.
3. Insert the plunger tip with attached spring and dispense handle or cup lever through the
opening of the valve body. If the metal valve insert is attached (one-product dispenser or left
valve assembly on multi-product dispenser), insert the metal valve insert through the opening
on the valve body before inserting the plunger tip.
4. Attach the valve door to the valve body. The valve door must be attached before installing the
valve assembly and dispense handle or cup lever to the valve block.
Figure 38: Self-serve dispense handle and valve assembly
5. Insert the spring into the spring cup on the valve block.
6. If the metal valve insert is attached, gently pull the thermistor wire through the grommet on the
right side of the spring cup to ensure it is not pinched in the spring.
7. With the valve door open, push and hold the valve body firmly in place as the spring will push
the assembly forward. Install the long screws to secure the valve body to the valve block. Do
not over-tighten.
8. Install the metal valve insert. If the metal valve insert is attached, gently pull the thermistor wire
from behind the valve body while installing the metal valve insert.
9. Secure the metal valve insert with the short screw. Metal valve inserts with a thermistor wire,
must fit securely so the refrigeration system operates efficiently. Do not over-tighten. Gently
pull the thermistor wire again to ensure it moves freely and is not pinched.
10. Close the valve door by turning the thumbscrew clockwise. Do not overtighten.
11. Slide the front panel up and behind the valve block. If it’s a tight fit, slightly push on the
dispense handle or cup lever while sliding up the panel. Reinstall the four screws.
12. Close the dispenser door.
13. Plug in and turn on the dispenser.
14. Reinstall the catch tray, if applicable.
15. Allow the dispenser to return to operating temperature and load product.
Self-serve
dispense
handle
handle
plate
Figure 37: Insert plunger tip through dispense handle or cup lever plate
Cup lever opening
for plunger tip