22
4 Initial set-up
Aer switching on the DIGITRADIO 140 for the first time, the initial set-up wizard starts.
Seings can all be changed at any time in the future.
> To launch the initial set-up wizard, use the arrow buons on the remote control to select the [YES] field and press the
OK buon.
> In the next step you can select the time format. Select the desired seing [12] or [24] and press the OK buon to move
on to the next step.
> Here it is possible to select which source (DAB+, FM or the Internet) the DIGITRADIO uses to obtain and update the time
and date. Once selected, proceed to the next step to enter the time zone to ensure that the time is displayed correctly.
> Proceed to specify whether summertime or wintertime is applicable at the time of seing.
> In the next step you can specify whether the DIGITRADIO should remain connected to the Internet when on standby. This
can, for example, be useful for the multi-room or app control. Power consumption is, however, increased by using the
standby mode.
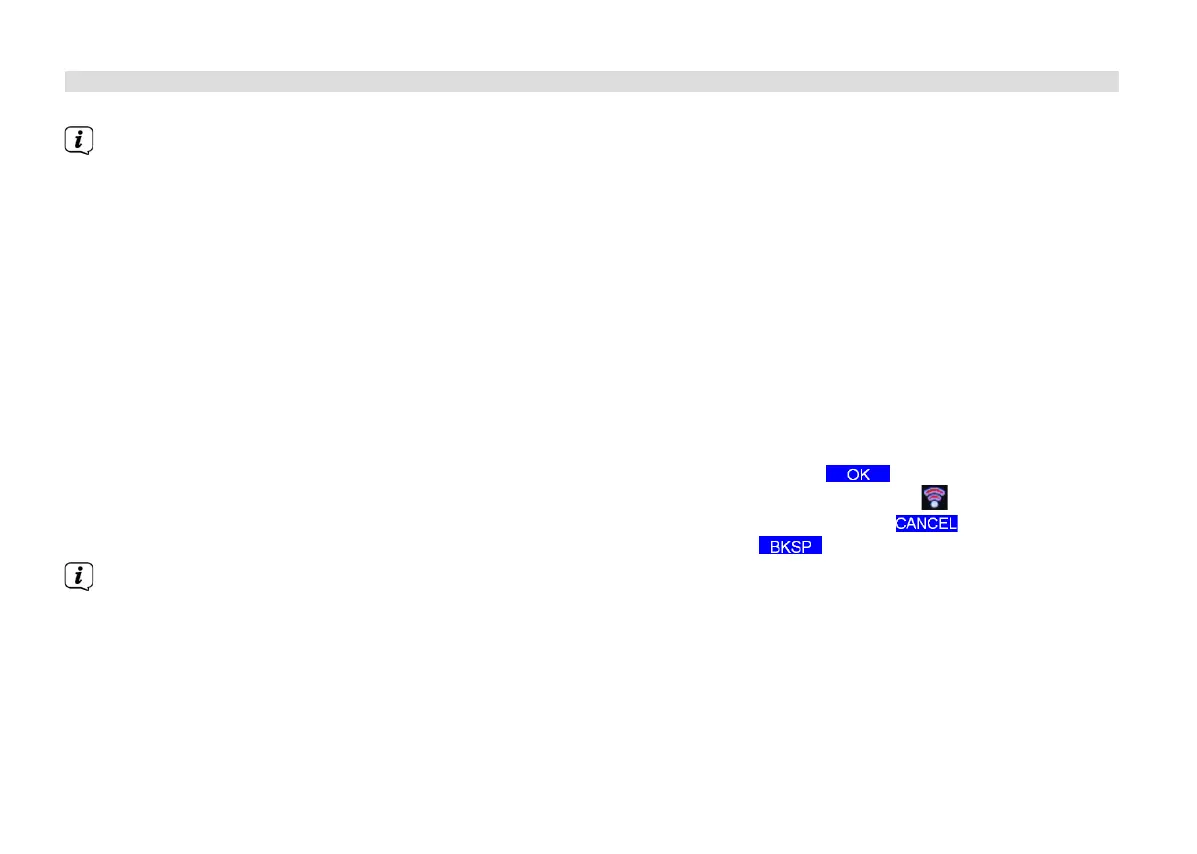
> The network wizard then starts and you can set up an Internet connection. Use the OK buon to select the WLAN
network you know and enter the password using the displayed keyboard. Then select and press the OK buon.
If the password entered is correct a connection to the network is now established. The signal bar in the status bar of
the display indicates whether the connection has been established. To cancel the entry, select and press the OK
buon. If you make a typing error you can delete the last leer entered using .
While the virtual keyboard is shown on the display, you can browse using the arrows buons and the VOL+/- buons on
the remote control. The up/down arrow buons move the highlight upwards and downwards, the VOL+/- buons move
the highlight to the right and le.
> If you have connected the DIGITRADIO to the network using a LAN cable, select the [CABLE] item.
> Aer completing the network set-up, confirm the message that the initial set-up has been completed by pressing the OK
buon.
BDA DigitRadio 140.indd 22 16/04/2018 16:16
 Loading...