AutoZero
The host instrument includes a feature that nulls the DC of
fset at the output of the probe. To initiate the AutoZero routine, do the following:
1. Allow the probe and oscilloscope to warm up for 20 minutes.
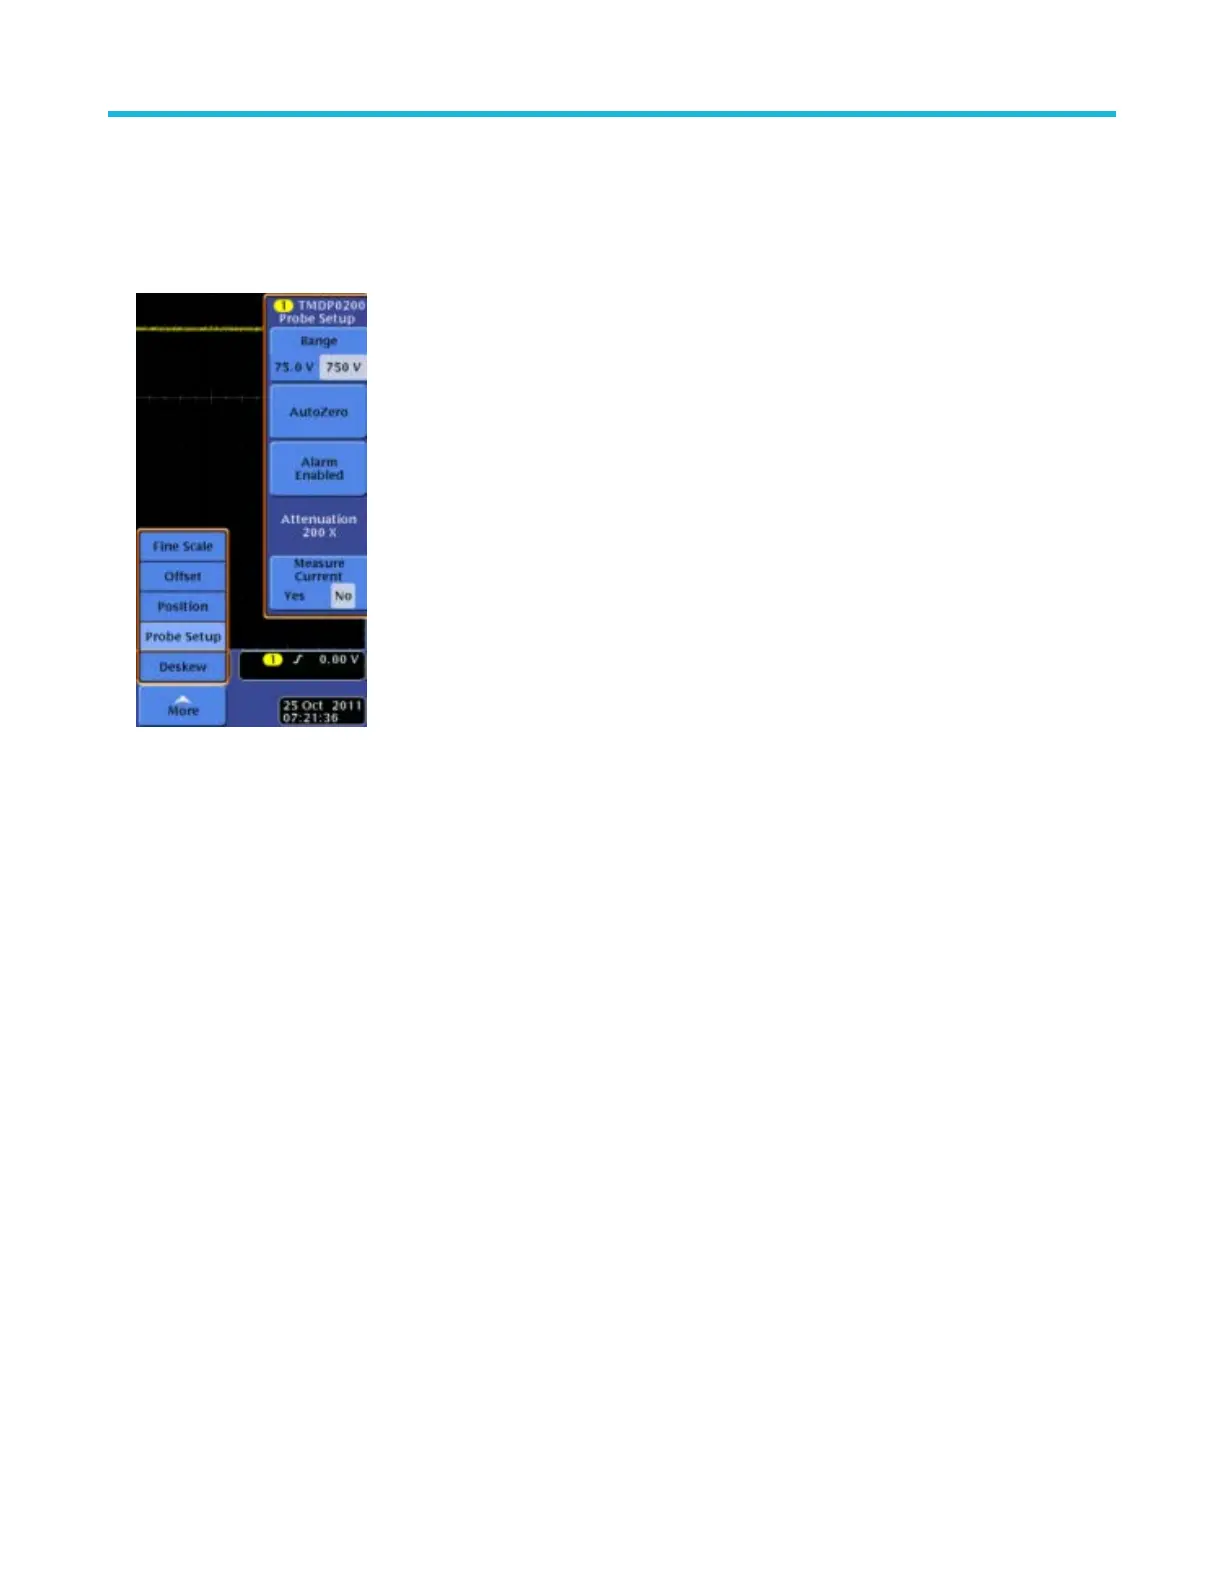
2. Press the MENU button on the probe to display the Probe Setup screen on the oscilloscope.
Figure 5: Probe Setup screen
3. Connect the probe inputs together with the hook tips.
4. Press AutoZero on the Probe Setup screen to initiate the AutoZero routine. If the AutoZero routine does not yield suf
ficient results, use
the DC Offset Zero procedure.
DC offset zero
The offset stored through this feature is retained in the probe between probe power cycles. To set the probe DC offset to 0 V, do the
following:
1. Set the oscilloscope offset for the probe channel to 0 volts.
2. Connect the probe inputs together with the hook tips.
3. Press and hold the probe BANDWIDTH LIMIT and RANGE buttons until the OVERRANGE LED on the probe begins flashing, and then
quickly release the buttons (about 2 seconds).
4. Use the probe BANDWIDTH LIMIT or RANGE buttons to set the probe offset voltage to 0 V, as displayed on the oscilloscope. The
BANDWIDTH LIMIT button decreases the offset voltage and the RANGE button increases it.
5. Press the AUDIBLE OVERRANGE button on the probe to store the value. The OVERRANGE LED on the probe stops flashing to
confirm that the value has been stored.
6. Repeat steps 3 on page 20 through 5 on page 20 for the other range setting on the probe. If you cannot null the offset with these steps,
then use the DC Offset Zero Reset procedure that follows.
Probe operating information
20
 Loading...