Premier 24 Installation Manual Programming the Control Panel
INS248 75
User Options
This menu is only displayed if the Custom User type is
selected (see page 75 for details).
This menu defines which options are available to the user
when their code is entered.
Some of the following options may not always be
selectable or de-selectable.
Press
&
to scroll through the options and press
5
to select them or use keys
#
-
+
(‘Letter’ = option
IS selected, ‘Star’ = option is NOT selected).
The following options are available:
A – Arming
The selected user can be armed.
D – Disarming
The selected user can be disarmed.
O – Omitting
The selected user can omit zones providing that they have
the ‘omit’ attribute assigned to them (see page 36 for
details).
T – Lock TAG = PGM2
The Users TAG is disabled whenever PGM2 is active.
C – Lock Code = PGM3
The Users code is disabled whenever PGM3 is active
(default = during the Full Arm Entry mode).
U – Lock User = PGM4
The Users TAG and Code is disabled whenever PGM4 is
active (default = Control Timer 4).
Y – Auto ‘YES’
After a User code has been entered, pressing the
0
key to confirm the next action is not required.
O – Open/Close
The selected user will report open (disarm) and close
(arm) events to an Alarm Receiving Centre every time they
arm or disarm.
User Name Text
Each user can be assigned up to 8 characters of name
text. This can be beneficial when reading the log, as
identification of people is made easier.
Text is programmed in a similar way to mobile phones.
Select characters by pressing the corresponding key the
appropriate number of times (to select a character on the
same key, press the
&
key to move the cursor along).
Programming Proximity TAGS
To program TAGS proceed as follows:
Ensure that Setup Users is selected, the display should
look like this:
3$:#D!V<$)<!
78:$)!V<$)!UU
Select a user
44
then press
6,
B0!=0#!F(8:!:0
.EE!".Y!:0!V<$)[
Press
0
K)$<$8:!".Y!N@>!h
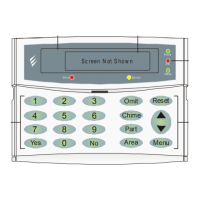
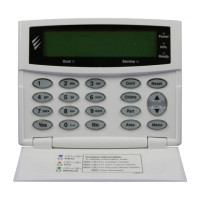
Present the TAG to the ‘Prox’ symbol on the keypad
(A confirmation tone will be heard)
Press
!
when finished
Press
-
to exit the menu
The display will return to normal.
Deleting User Codes
To delete User codes proceed as follows:
Ensure that Setup Users is selected, the display should
look like this:
3$:#D!V<$)<!
78:$)!V<$)!UU
Select a user
44
then press
0,
78:$)!V<$)!,0E$\
!!!!!UUUUUU
Press
-
B0!=0#!F(8:!:0
B7G7"7!V<$)!+_
Press
0
to confirm deletion of the selected User
code
Press
!
when finished
Press
-
to exit the menu
The display will return to normal.
 Loading...
