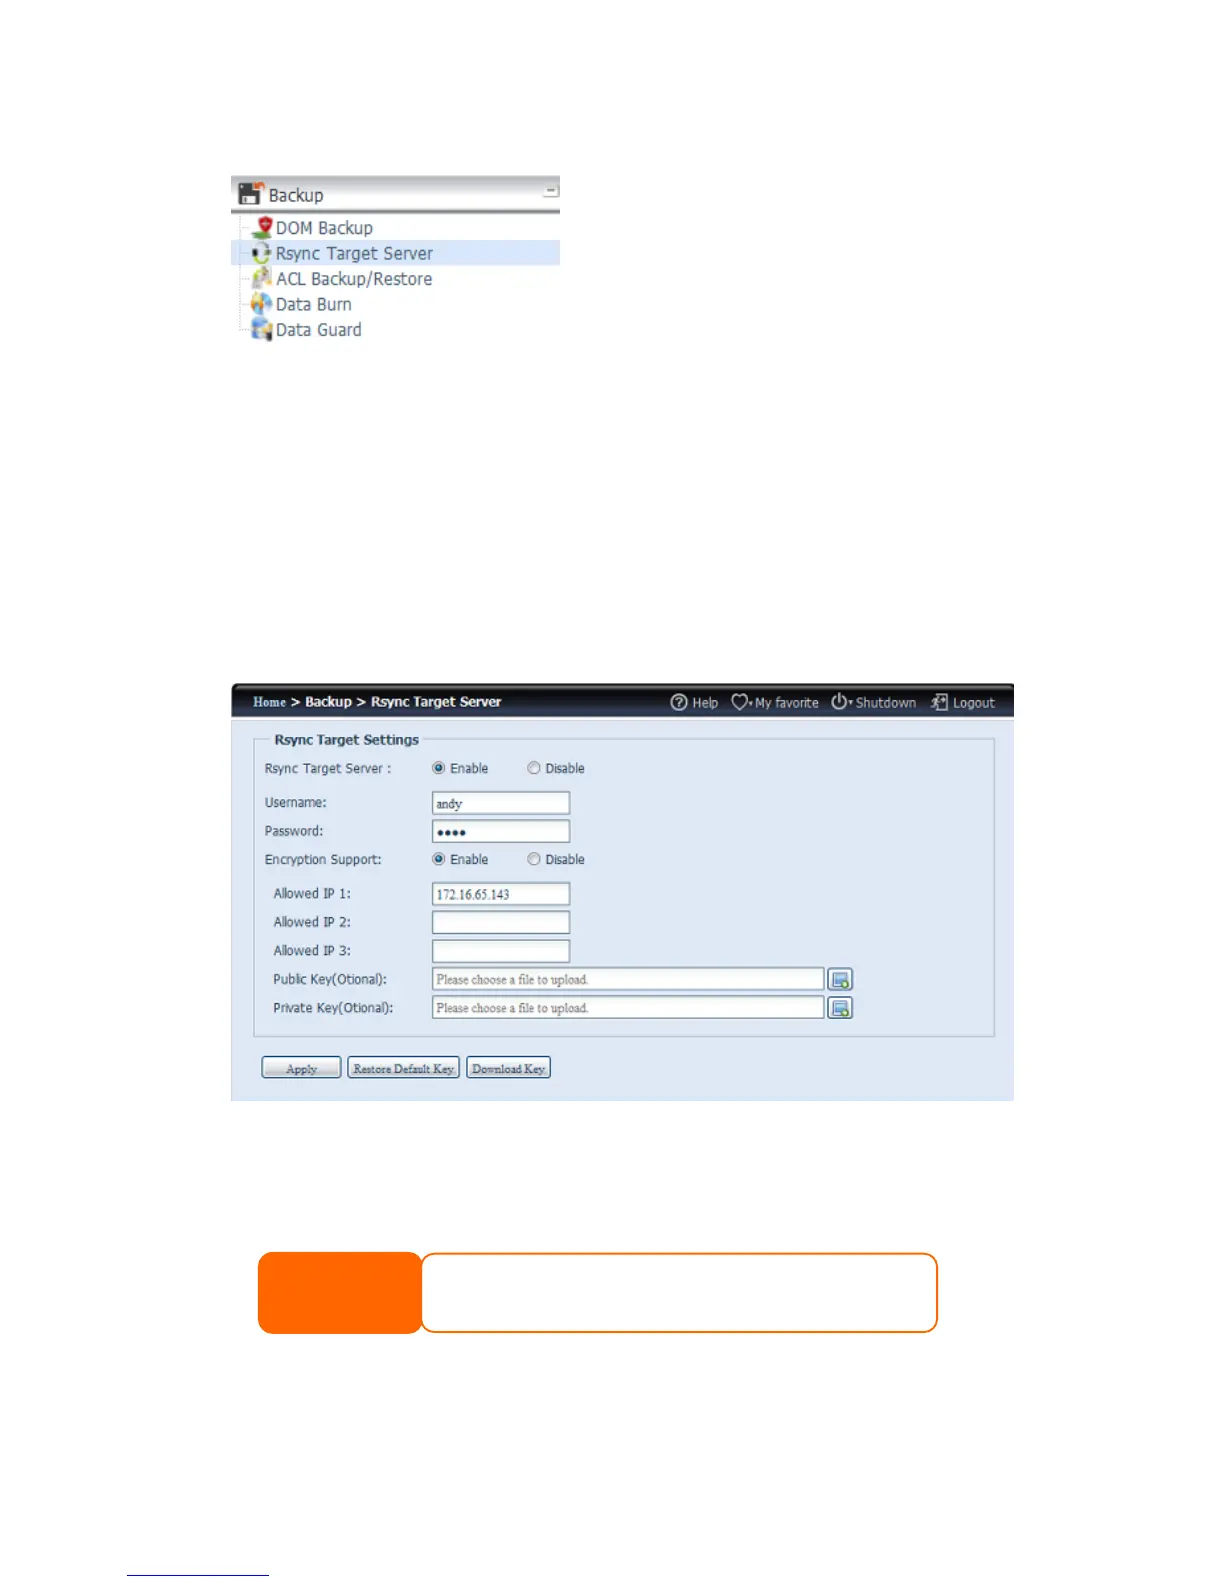
Rsync Target Server
When it comes to backing up your data, it’s very important to have flexibility. Data
guard provides you with many options, including full backup for all shares, custom
backup for selected shares and iSCSI volume backup. Being based on the Linux
operating system, it is also much more stable and experiences much less frequent
data loss during transfer than other remote backup systems.
-For this tutorial you will need to use Rsync Target Server (Step 1) and Data Guard
(Step 2+3) under Backup for this client/server backup feature. It also can be
named for function “Remote Replication”.
Step 1 – Enabling Rsync on your target (backup) NAS
-Log in to your target (backup) NAS through the UI in your web browser
-Go to Rsync Target Server under Backup in the menu of the UI
1. Enable Rsync Target Server
2. Add a username and password (they can be different than your NAS’s
username and password)
3. Select Apply
Now Rsync is turned on your NAS, which means it can be used as a target for Rsync
backup, in other words, only the backup NAS needs to be activated in this way.