REPLACEMENT PROCEDURES 5-2 Manual 0-2725
5.04 Major External Parts
Replacement
Refer to Section 6.03 for parts list and overall drawing.
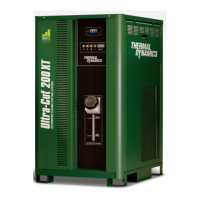
A. Lifting Handle and Leads Wrap
Replacement
1. Remove the mounting screws securing the Handle
and Leads wrap to the top of the Cover.
2. Remove the Lifting Handle and Leads Wrap from
the Cover.
3. Place the replacement Leads Wrap and Lifting
Handle onto the Cover.
4. Secure the Leads wrap and Lifting Handle to the
top of the unit with the mounting screws.
A-02220
Mounting Screws
Handle
Leads Wrap
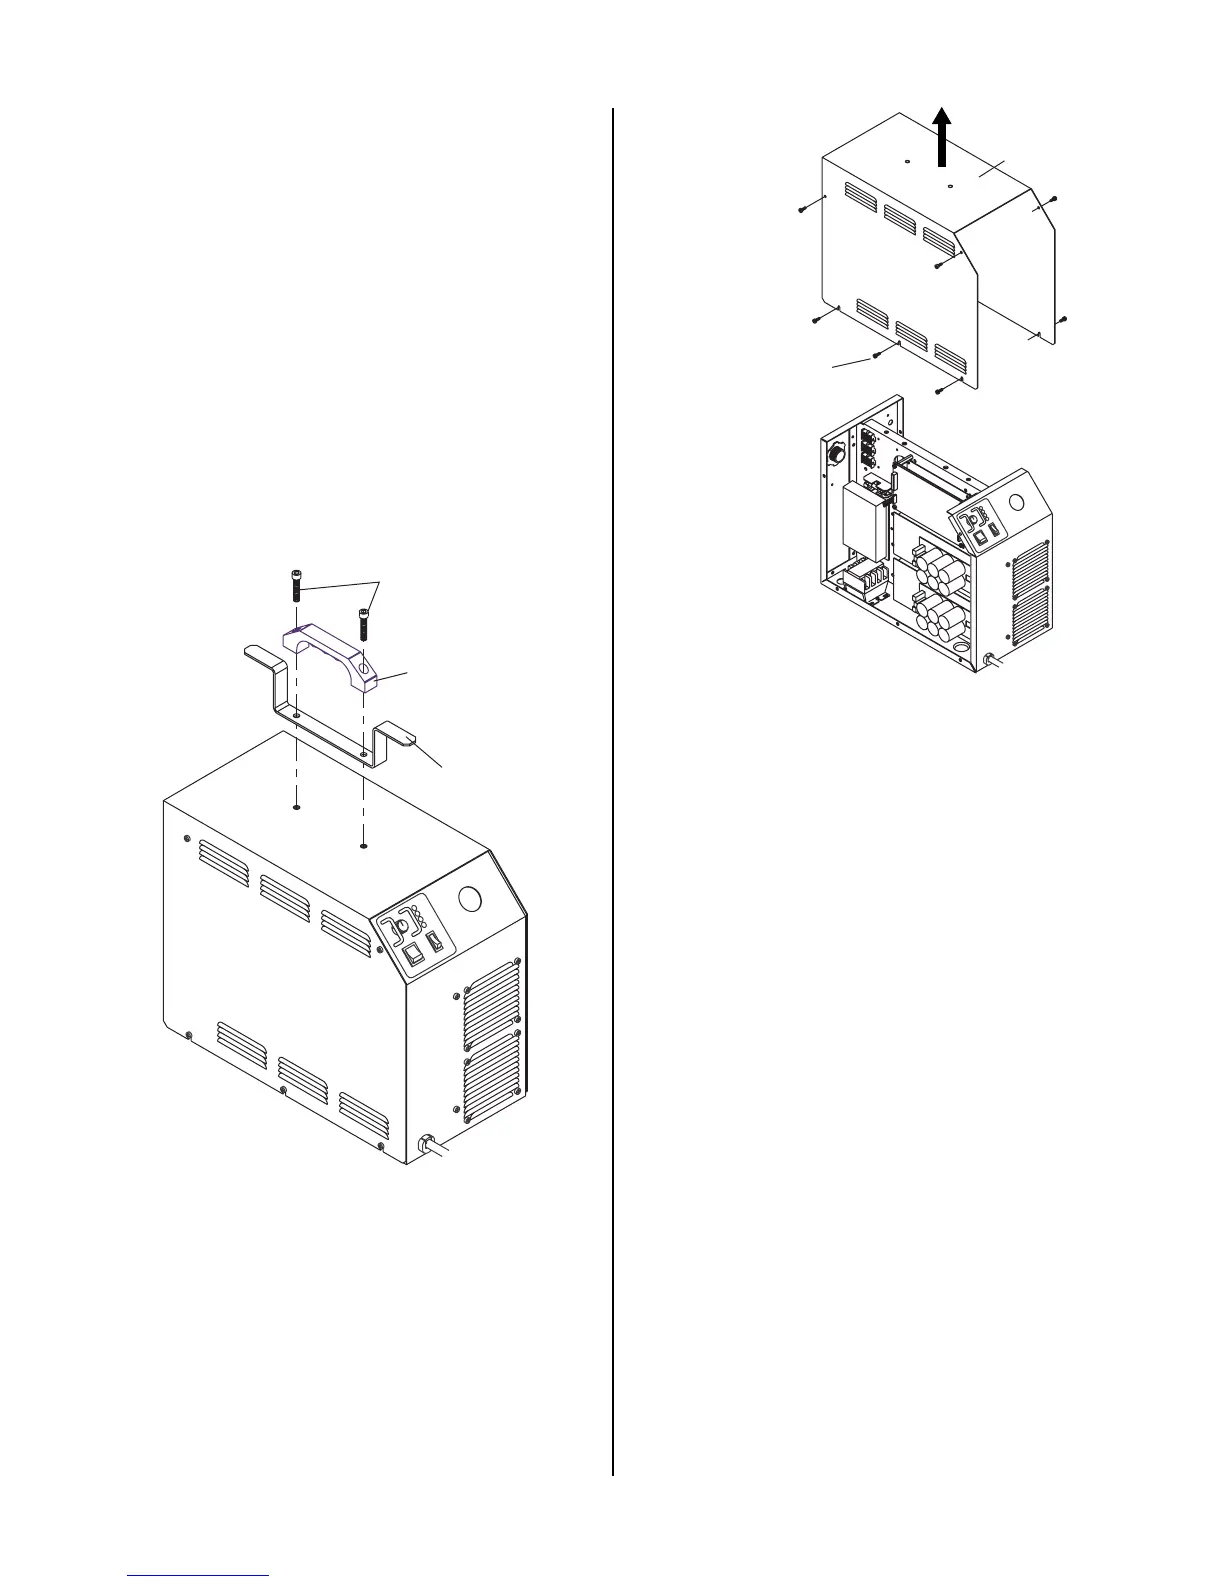
B. Cover Replacement
1. Remove the Lifting Handle and Leads wrap per
paragraph 'A' above.
2. Loosen the six screws which secure the bottom of
the Cover to the frame assembly.
3. Remove the remaining four screws which secure
the Cover to the frame assembly.
4. Carefully pull the Cover up and away from the
unit to gain access to the inside of the unit.
Cover
Cover Screws
(5 Places On Each Side)
A-02260
5. Install the replacement Cover by reversing the
above procedure.
5.05 Front Panel Parts Replacement
Refer to Section 6.04 for parts list and overall drawing.
A. CURRENT Knob Replacement
1. Turn the CURRENT adjustment fully counter
clockwise and note the location of the pointer on
the knob.
2. Loosen the screw securing the Current Knob to
the potentiometer shaft.
3. Remove the old knob.
4. Place the replacement Current Knob on to the po-
tentiometer shaft with the location of the pointer
the same as noted in step 1.
5. Tighten the screw to secure the knob to the po-
tentiometer shaft.
B. ON/OFF Switch Replacement
1. Remove the Cover per Section 5.04-B.
2. Disconnect all the wiring to the ON/OFF Switch.
3. Squeeze the top and bottom of the switch while
pushing it out of the Front Panel.
4. Install the replacement ON/OFF Switch by revers-
ing the above procedure.

 Loading...