䕔
3-12
3.3.3 Capturing endothelium tissue image
ڦ
Stop capturing images immediately if the patient shows any signs of
photosensitive epilepsy.
ڦ
A good image of the endothelium tissues may not be captured, and the
analysis result or corneal thickness value may become unreliable due to
faulty fixing of the sight, eyelid drooping, trichiasis, corneal diseases, etc.
When the captured image is unclear, select or capture another image.
ڦ
This instrument is designed to perform auto shot as the standard setting to
perform highly precise measurement.
ڦ
In rare cases, a good image of the endothelium may not be taken due to
cornea deformation and/or corneal opacity. In this case, perform manual
operation.
a) Auto Shot
1) No operation is required.
- Image is captured automatically when alignment has been completed.
2) The following screen appears when capturing has been completed.
Ɣ In Quick mode
- The capture screen (refer to 2.4.2) appears when an image of one eye
has been captured. Touch the eye selection button again to capture an
image of the other eye.
- The R/L eye analysis screen (refer to 2.4.4) appears when images of
both eyes have been captured.
Ɣ In Basic mode
- The image selection screen (refer to 2.4.3) appears when capturing
has been completed.
b) Manual Shot
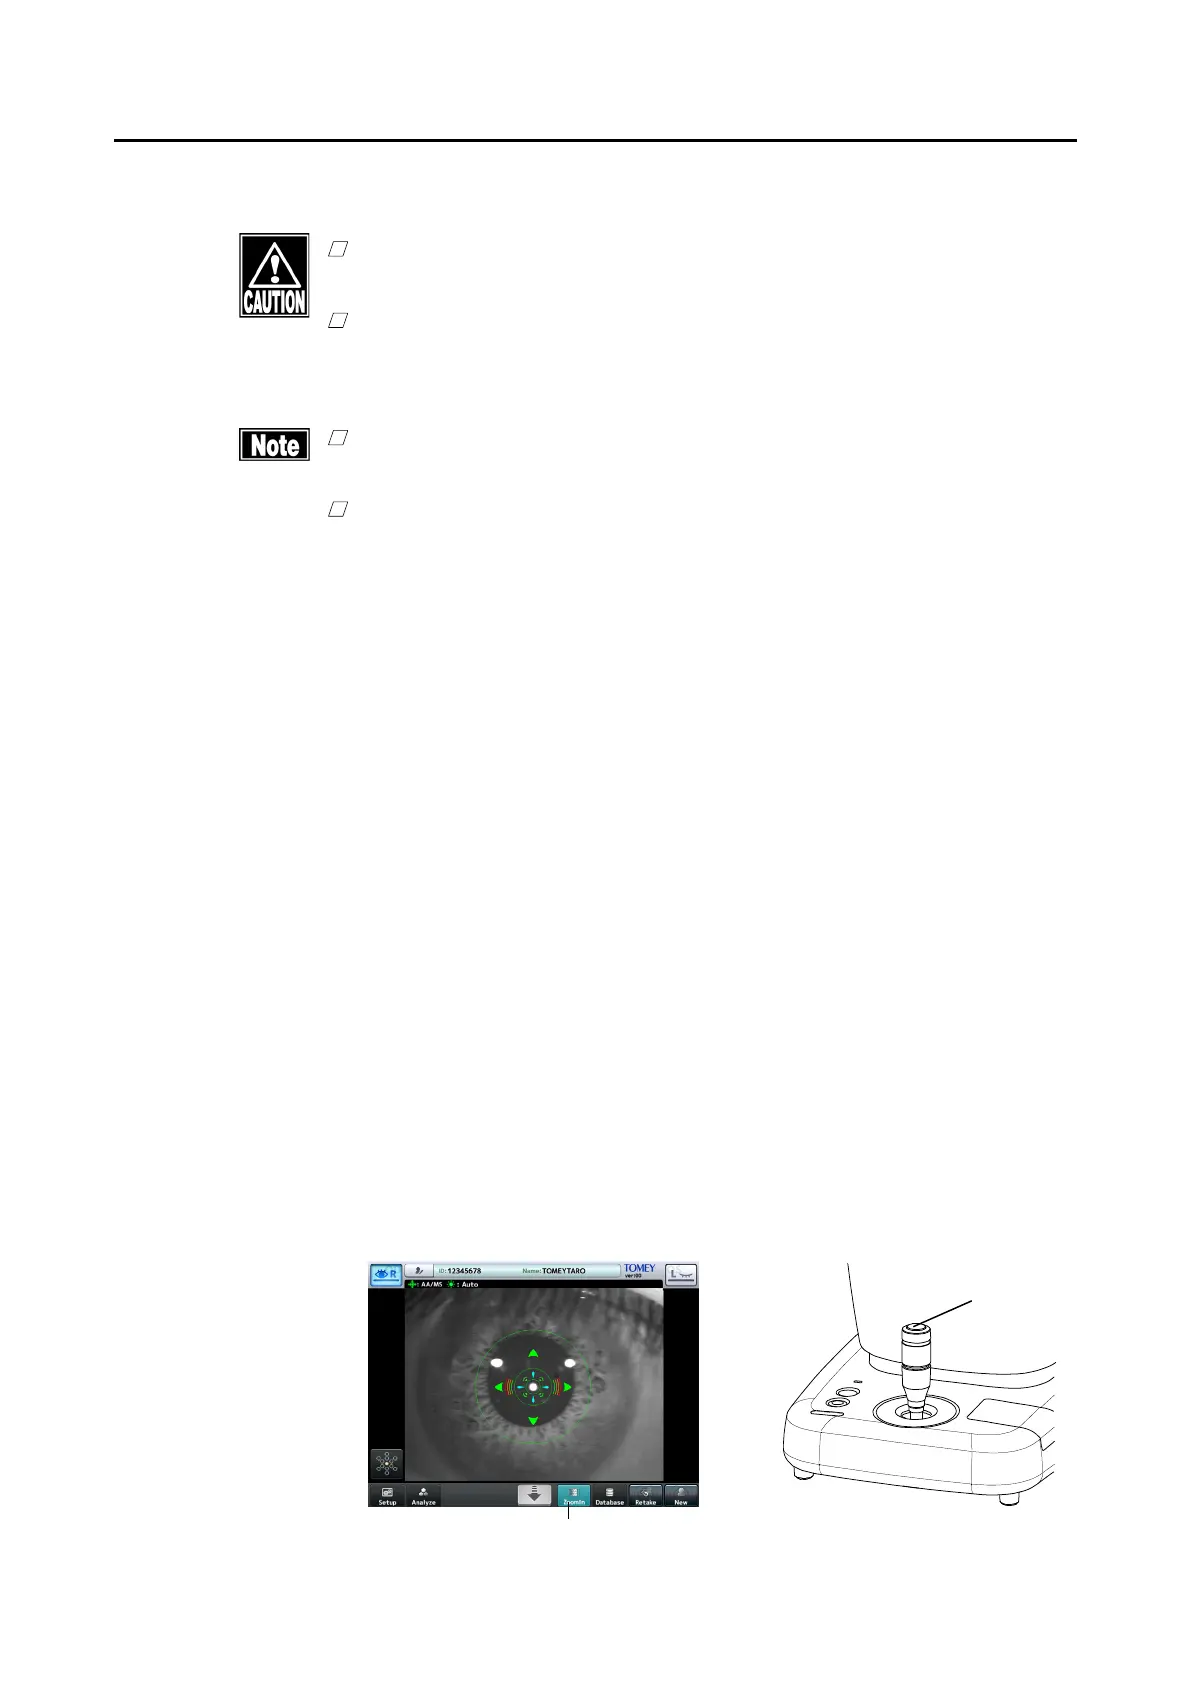
1) After alignment is completed (refer to 3.3.2), touch the “ZoomIn” button
(1) on the capture screen (Fig. 1) or press the button on the joystick (2)
to display the live endothelium image (Fig. 3).
- Touch the “ZoomOut” button (4) on the live endothelium image screen
(Fig. 3) to return to the live anterior chamber image screen (Fig. 1).
(Fig. 1) (Fig.2)
(1)
(2)
 Loading...