䕔
3-36
4) Select the data to be browsed using the “View 1” or “View 2” button.
- The examination data selected by the “View 1” or “View 2” button is
shown on the left or right side of the R/L eye view screen respectively.
- Touch the "Exit" button (9) to return to the Exam List screen.
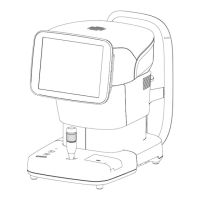
5) Touch the “View” button (8) to display the selected examination data on
the R/L eye view screen.
- Functions of the buttons on the R/L eye view screen are the same as
those on the R/L eye analysis screen. Refer to “2.4.4 Analysis screen”
for operation of the buttons on the R/L eye analysis screen.
- Edit the analysis result and touch the “Save” button (10) to overwrite
the existing examination data with the edited contents.
- Touch the "Exit" button (11) to return to the Exam List screen.
(Fig. 4)
3.6.2 Deleting examination data
ڦ
When the patient information is deleted, all examination data saved with that
patient’s ID will be deleted. Be sure to check the contents saved before
deleting them.
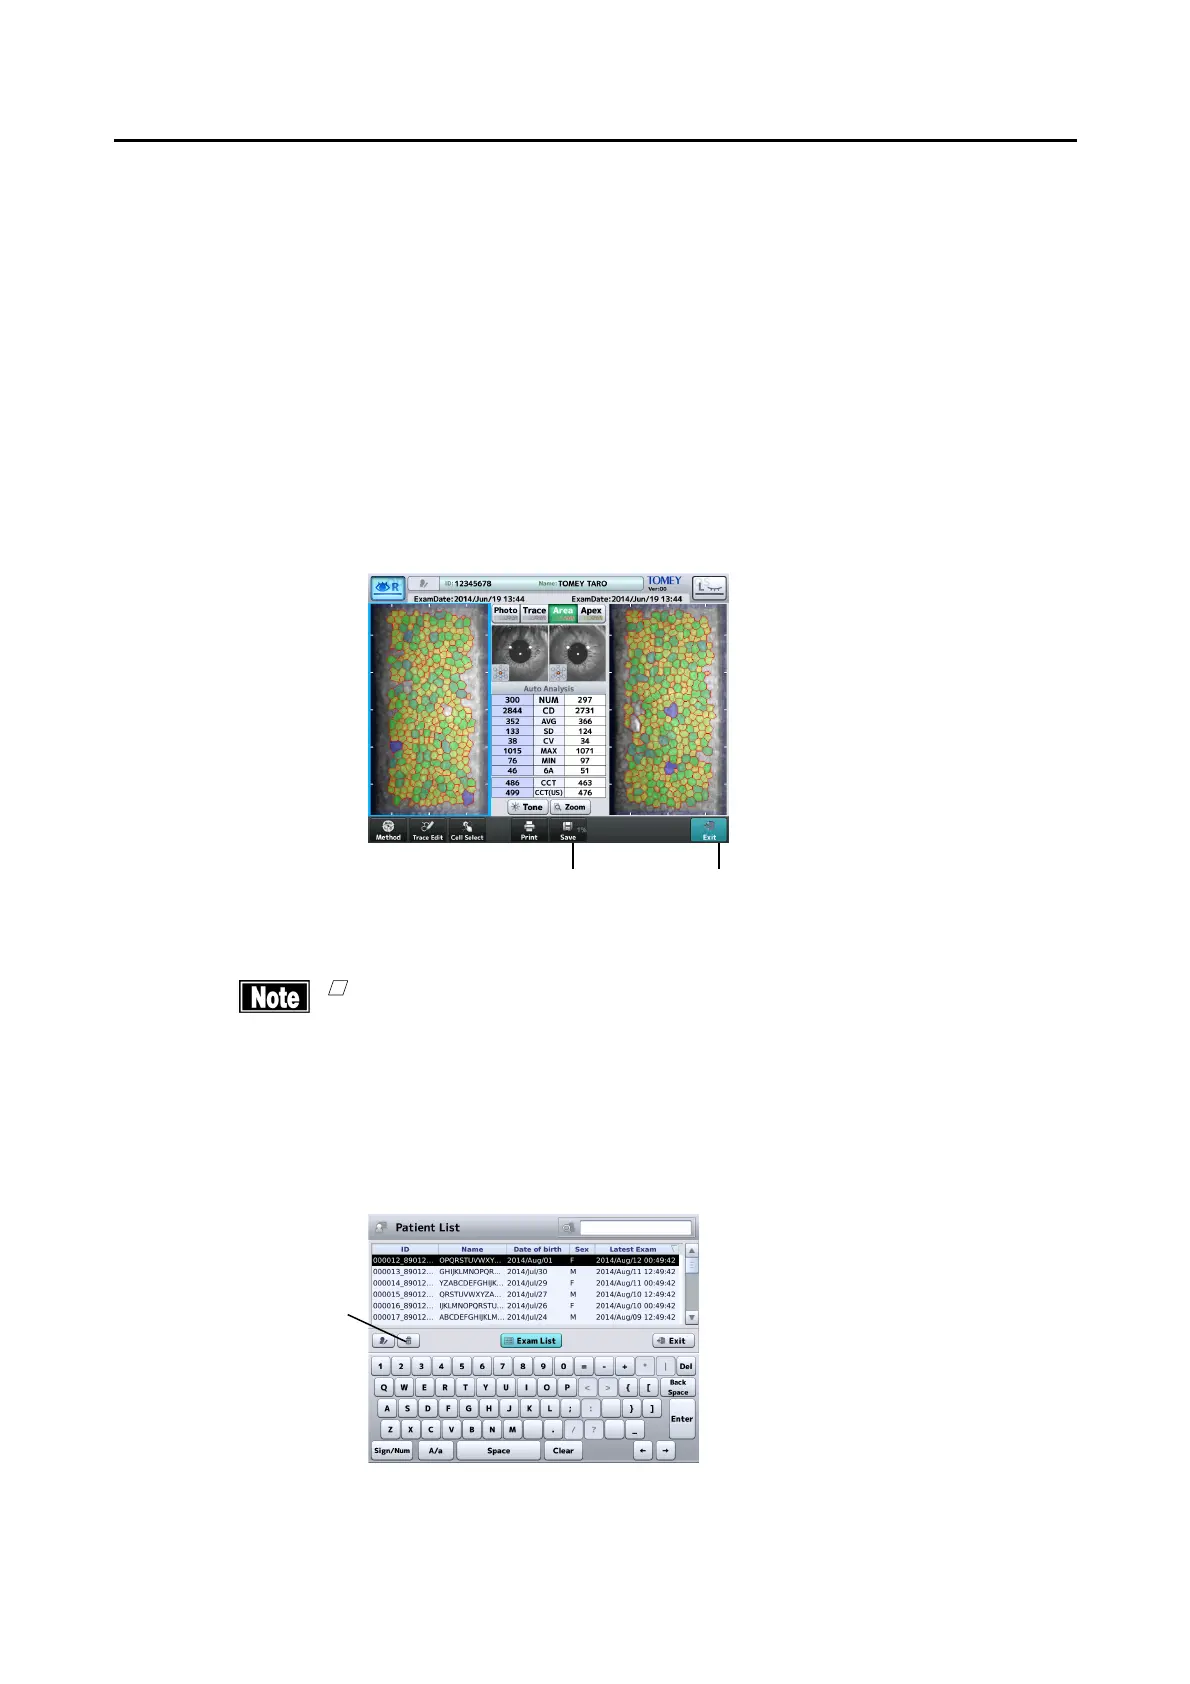
a) Deleting data on Patient List screen
- Touch the delete button (1) to delete the selected patient ID and
captured images.
(Fig. 1)
(10)
(1)
(11)
 Loading...