36
BASIC OPERATION
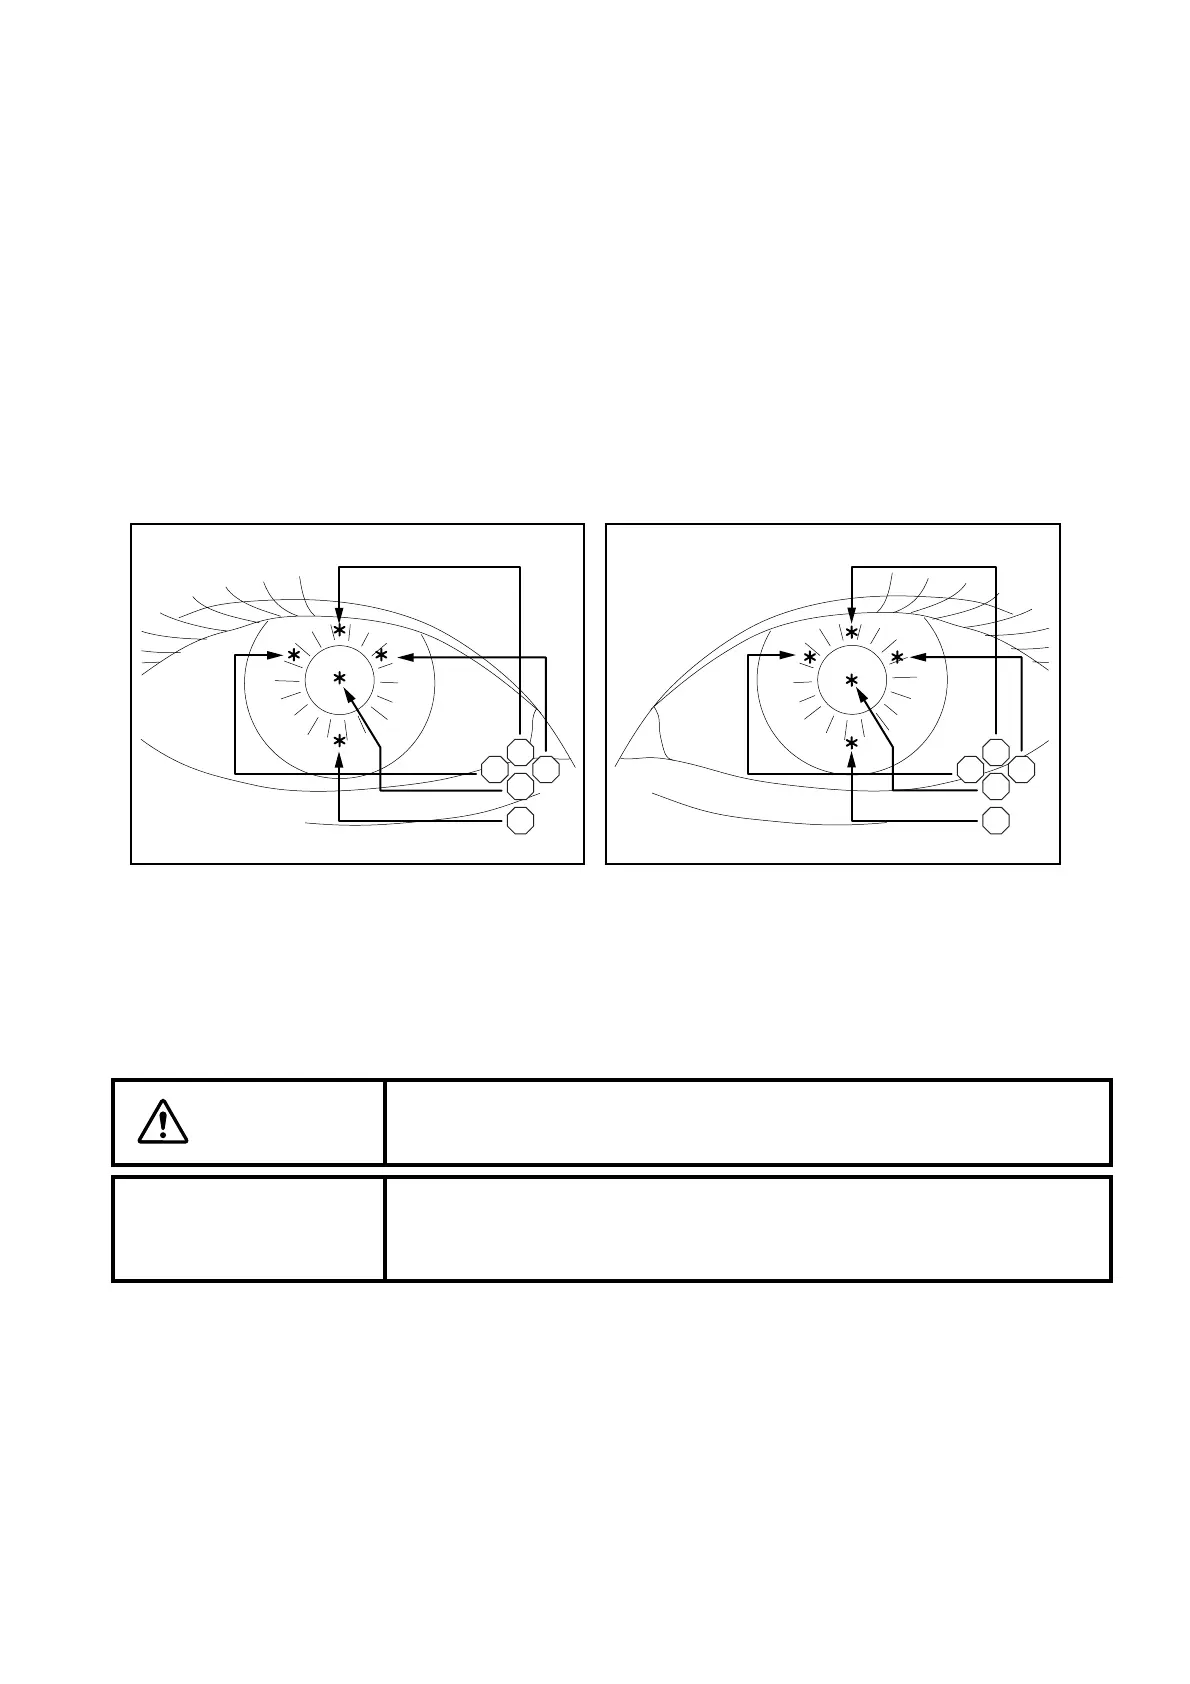
Setting the photography points
You can take a picture not only at the center of cornea but also at 4 places in the peripheral area of the
cornea.
1 Check the eye observation display.
2 Click the photography point changing icon corresponding to the desired photography point.
The fixation target corresponding to the photography point blinks.
C : Center
S : Superior
I : Interior
N: Nasal
T: Temporal
Alignment and photography
CAUTION
To avoid injury during operation, be careful not to hit the patient's eye or
nose with the instrument.
NOTICE
When fixation is made against the peripheral fixation target, instruct the
patient to turn only his/her eye to the target while he/she is facing the
front. If not, the image cannot be obtained in a correct position.
Correspondence between the photography
point (*) and icon (Right eye)
Correspondence between the photography
point (*) and icon (Left eye)
SS
NT TN
CC
II