27
PREPARATONS BEFORE USE
A VARIETY OF SETTINGS
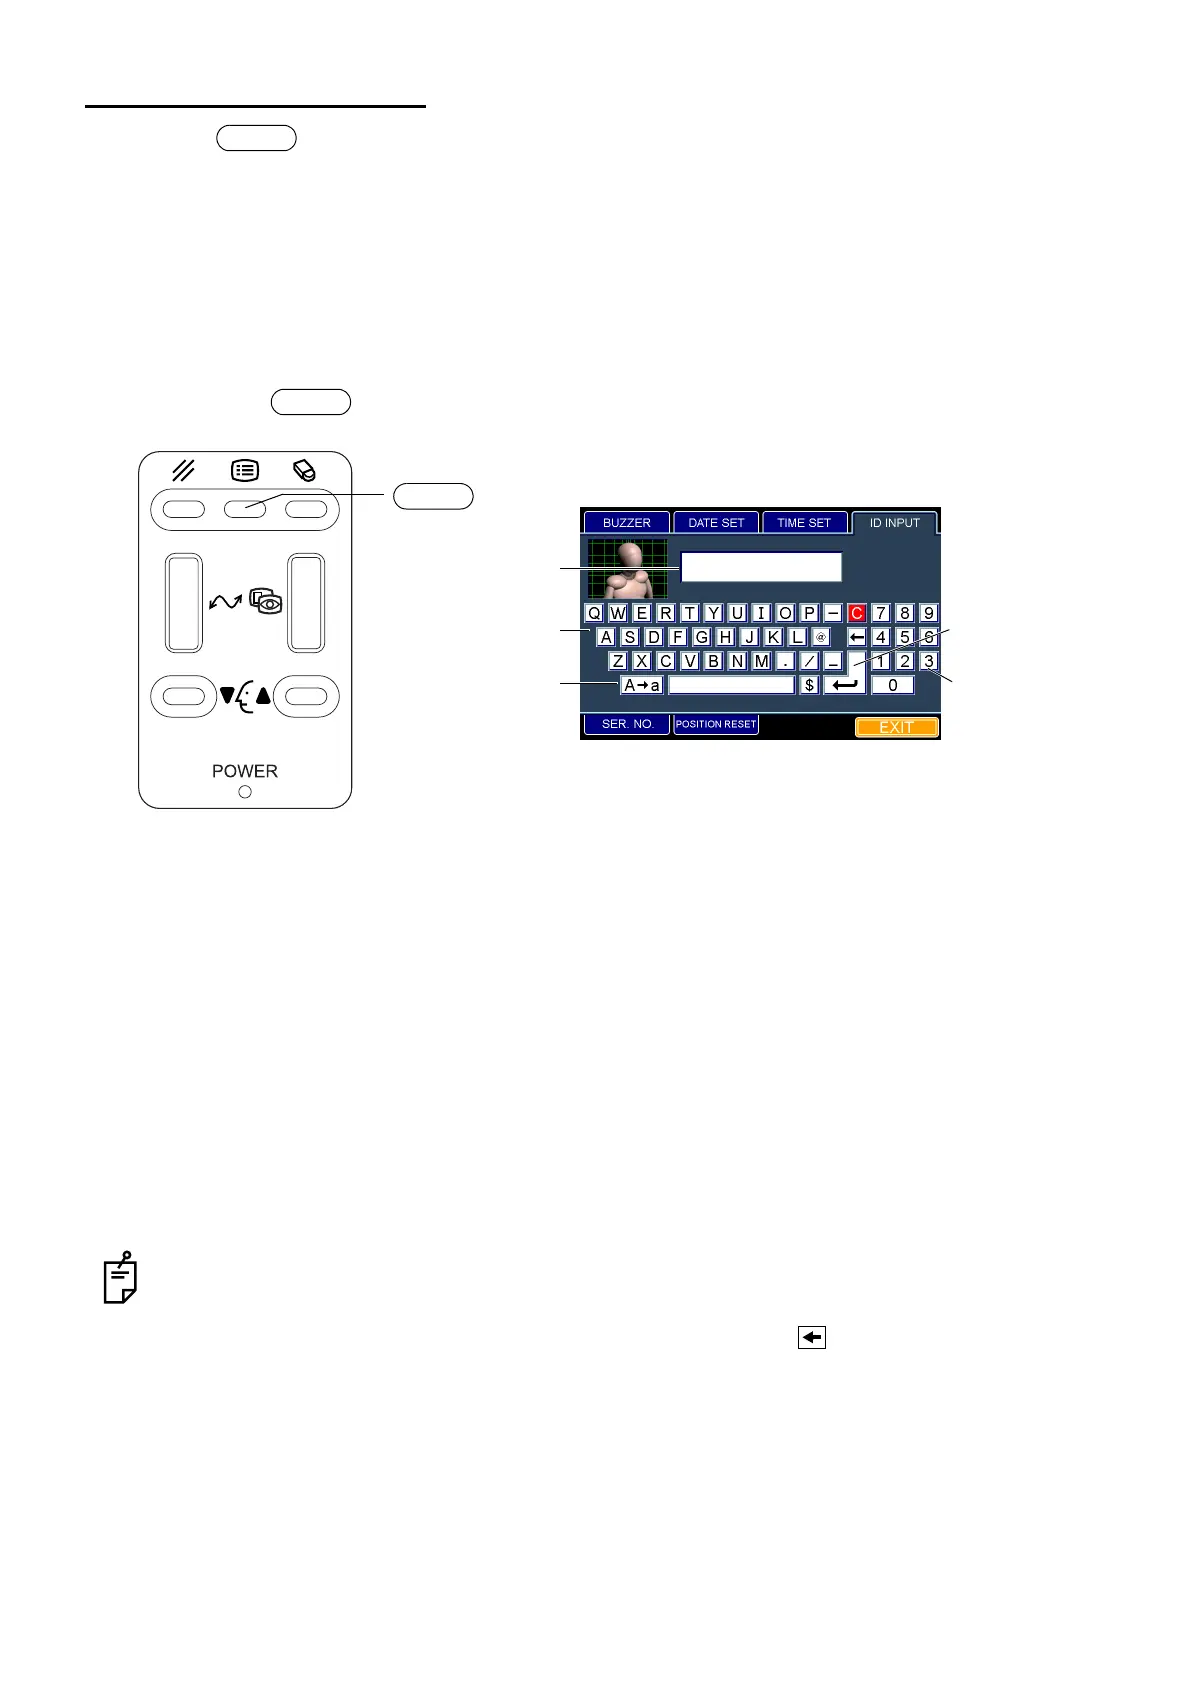
Press the switch on the control panel, and the dialog box will be displayed. It is possible to
set the ID number, the photography serial number, the buzzer sound, the date, the time and the original
point resetting for each shot.
Setting the ID number
You can set the patient ID number that is indicated on the eye observation display and on the image
display.
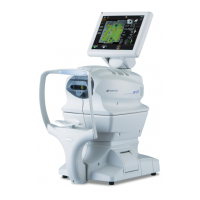
1 Press the switch on the control panel. The "ID INPUT" dialog box appears.
2 Fit the mouse pointer to the desired character among the "Alphabet key" icons or among the "Ten
key" icons and click it.
3 The inputted character is displayed on "ID area".
4 When the desired number is displayed by entering characters continuously, fit the mouse pointer
to the "Enter key" icon and click it. The ID number can be set.
How to finish setting
1 Move the mouse to fit the mouse pointer to the "EXIT" icon and click it.
2 The eye observation display appears.
• The capital letter and small letter can be changed to each other by clicking the "Character
change" icon.
• The character before the cursor can be deleted by clicking the " key" icon.
• All the entered characters can be deleted by clicking "C" among the "Ten key" icons.
• It is possible to enter the characters up to 13 digits in the ID area.
• When you select other tabs without clicking the "Enter key" icon after entering the ID number, the
entered ID number is canceld.
• When you want to set any other item, fit the mouse pointer to the desired tab and click it.
• When you turn off the power of the instrument, the ID number is cleared.
MENU
MENU
MENU switch
ID area
"Alphabet key" icon
"Character change"
icon
"ID INPUT" dialog box
"Enter key" icon
"Ten key" icon