45
BASIC OPERATION
Alignment and photography
The alignment operation should be conducted through the use of the joystick.
For adjusting the instrument finely with the joystick, refer to "Alignment and measurement" on P.37.
Example: Photographing the right segment of the cornea center
1 Hold the joystick and pull the instrument to the inspector side all the way.
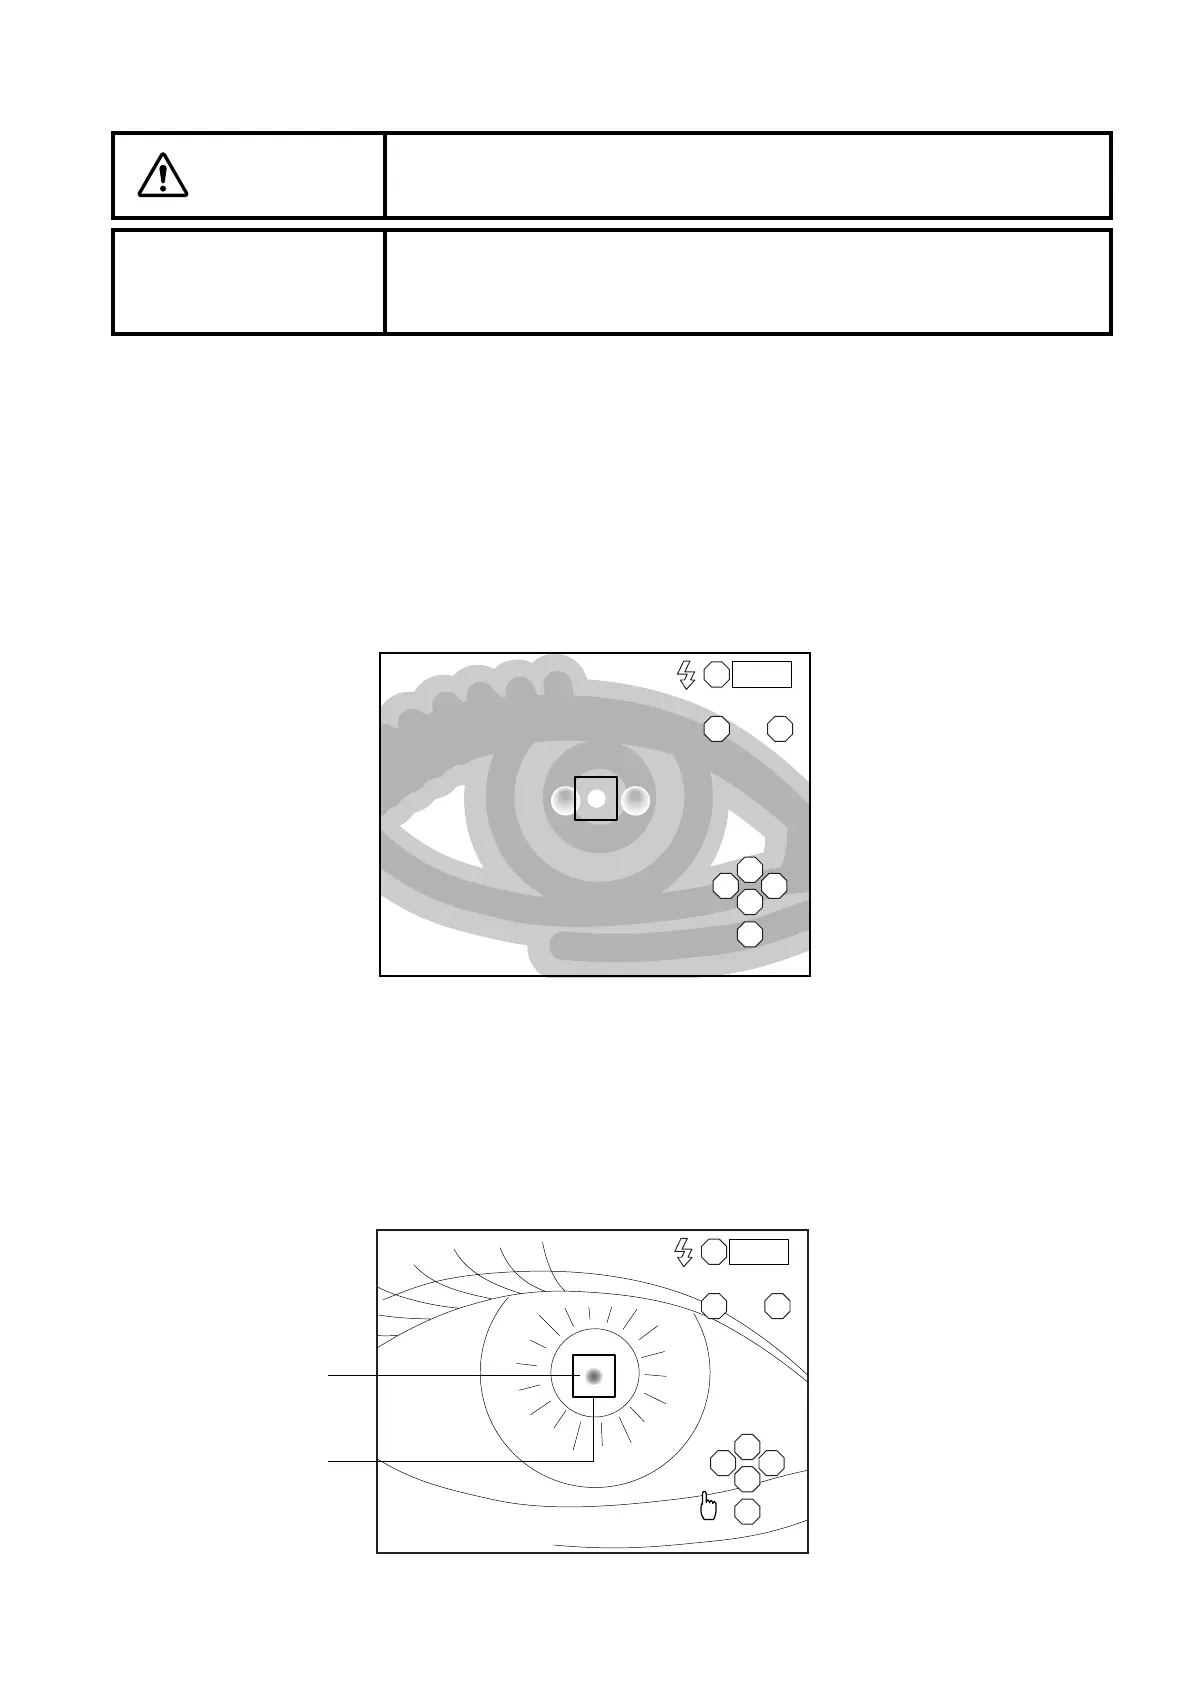
2 Move the instrument laterally or vertically with the joystick to display the right anterior eye seg-
ment on the center of the monitor screen. The anterior eye segment is seen dimly.
3 Instruct the patient to keep looking at the blinking light.
4 Push the instrument toward the patient a little.
A dim alignment dot, which is reflected on the pupil, appears.
5 Move the instrument laterally or vertically so that the alignment dot, which is reflected on the
pupil, is within the alignment frame on the monitor screen.
CAUTION
To avoid injury during operation, be careful not to hit the patient's eye or
nose with the instrument.
NOTICE
When fixation is made against the peripheral fixation target, instruct the
patient to turn only his/her eye to the target while he/she is facing the
front. If not, the image cannot be obtained in a correct position.
R
LM
S
T N
C
I
0001
R 0001
LM
S
T N
C
I
Alignment dot
Alignment frame