Note:Thefollowinginstructionsareadaptedfromthe
SAEJ1494Rev .Dec.2001–BatteryBoosterCables–
SurfaceVehicleRecommendedPractice(SAE–Societyof
AutomotiveEngineers).
1.Checkthebatteryterminalsofthedischargedbattery
andtheboosterbatteryforcorrosion(white,green,
orblue“snow”).
Note:Cleanthecorrosionfromthebatteryterminals
priortojumpstarting.Tightenthebatterycable
connectionsasnecessary.
2.Ensurethattheboosterisa12voltbatterywitha
sufcientampratingthatisingoodconditionandfully
charged.
Note:Ensurethattheventcapsaretightandlevel.
Ifavailable,placeadampclothoveranyventcapson
bothbatteries.
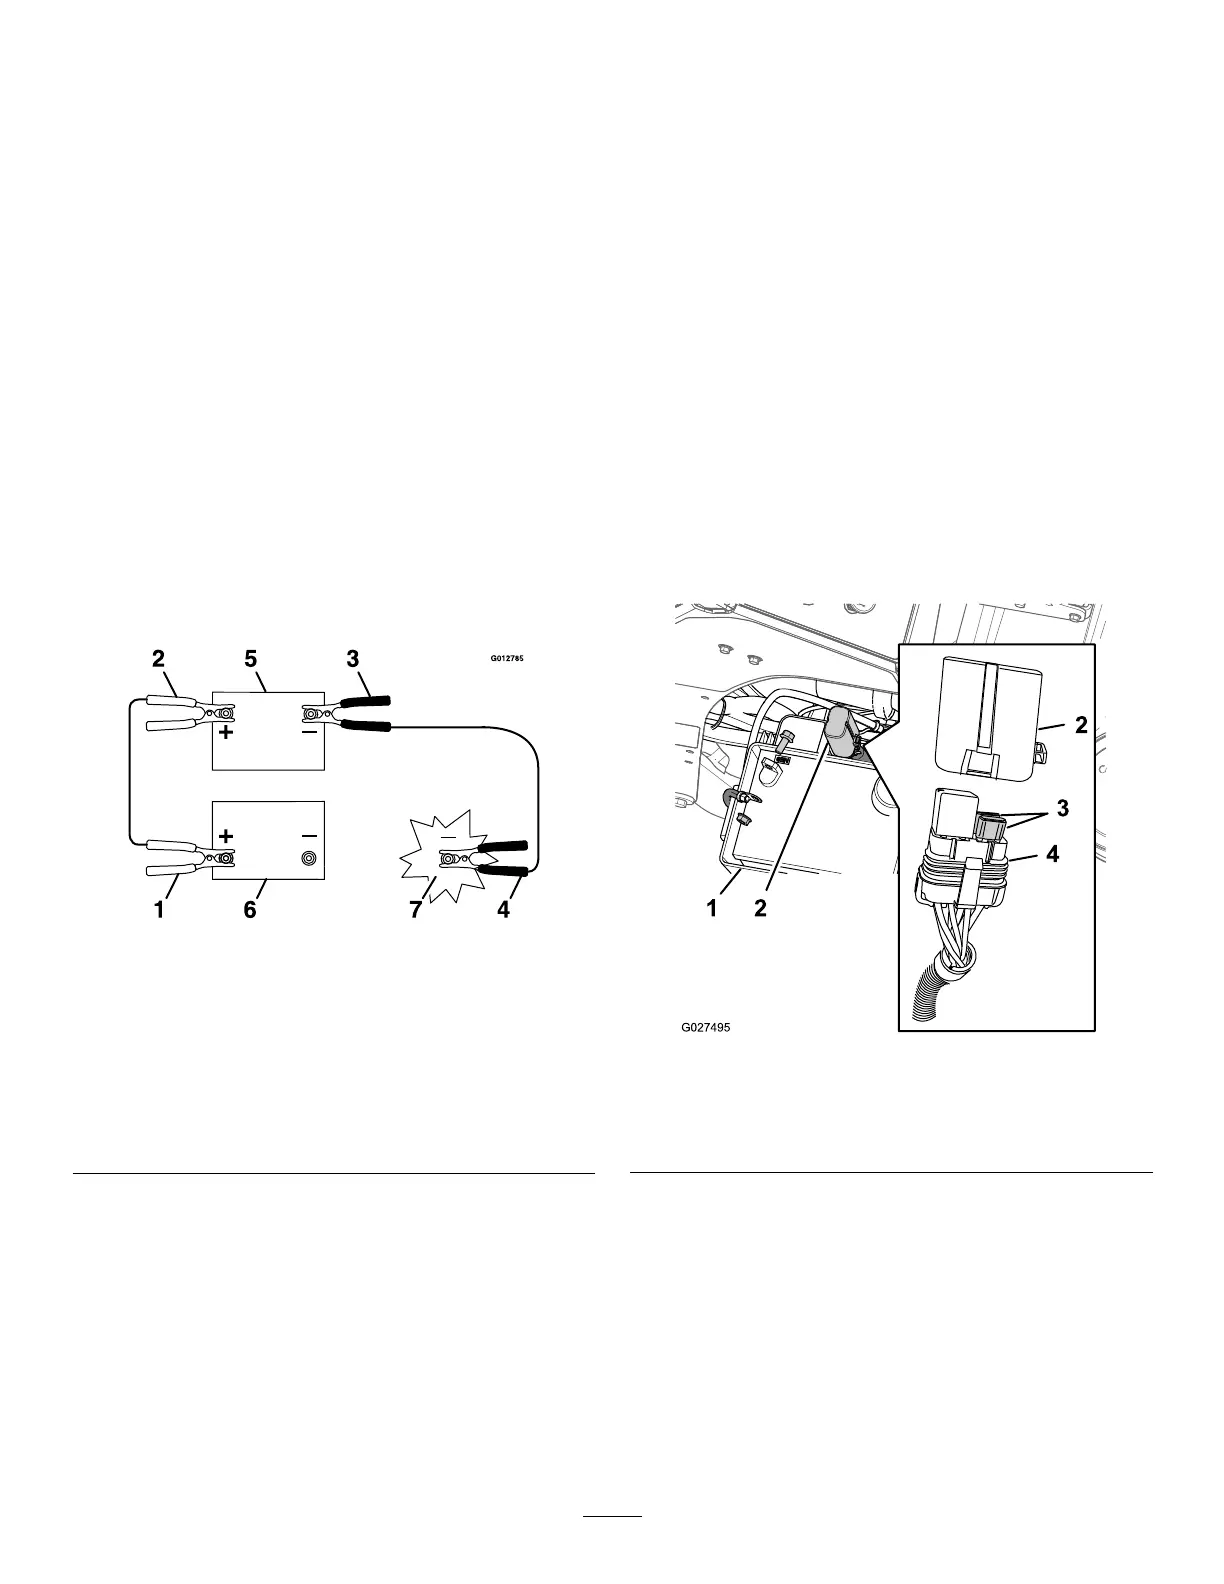
3.Connectthepositive(+)cableclamp(red)tothe
positive(+)terminalofthedischargedbattery(Figure
74).
Note:Thepositive-batterycableiswiredtothestarter
orsolenoid.
Figure74
1.Positive(+)cableonthedischargedbattery
2.Positive(+)cableonboosterbattery
3.Negative(–)cableontheboosterbattery
4.Negative(–)cableontheengineblock
5.Boosterbattery
6.Dischargedbattery
7.Engineblock
4.Connecttheotherpositive(+)cableclamp(red)tothe
positiveterminaloftheboosterbattery.
5.Connectthenegative(–)cableclamp(black)tothe
negativeterminaloftheboosterbattery.
6.Connecttheothernegative(–)cableclamp(black)to
theengineblockofthestalledmachineandawayfrom
thedischargedbattery.
Important:Donotconnectthenegative(–)cable
clamp(black)tothenegativebatterypostofthe
dischargedbattery.
7.Standawayfromthedischargedbatteryofthemachine.
8.Startthemachineandremovethecablesinthereverse
orderofconnection,disconnecttheengineblock
connectionrst.
ServicingtheFuses
Theelectricalsystemisprotectedbyfuses,andrequiresno
maintenance.Ifafuseblows,checkthecomponentorcircuit
foramalfunctionorshort.
1.Removethenegative-batterycablefromthebattery
terminal;refertosteps2and3ofRemovingthe
Battery(page57).
Note:Ensurethatthenegativebatterycabledoesnot
touchthebatteryterminal.
2.Pushingthetabonthefuse/relayholderandseparating
thecoverfromtheholder(Figure75).
3.Pullthefusefromthesocketofthefuse/relayholder
(Figure75).
Figure75
1.Batterybox4.Fuses
2.Fuseholder
5.Fuse/relayholder
3.Cover
4.Installafuseofthesametypeandamperesintothe
socketofthefuse/relayholder(Figure75).
5.Installthecoverontothefuse/relayholderuntilit
locksintoplace(Figure75).
6.Installthenegative-batterycablefromthebattery
terminal;refertosteps5and6ofInstallingtheBattery
(page58).
59