WARNING
Theenginemustberunningtoperformthis
adjustment.Contactwithmovingpartsorhot
surfacesmaycausepersonalinjury.
Keephands,feet,face,clothing,andother
bodypartsawayfromrotatingparts,mufer,
andotherhotsurfaces.
1.Raisetheframeontostablejackstandssothat
thedrivewheelscanrotatefreely.
2.Slidetheseatforward,unlatchit,andswingitup
andforward.
3.Disconnecttheelectricalconnectorfromthe
seatsafetyswitch.
4.Temporarilyinstallajumperwireacrossthe
terminalsinthewiringharnessconnector.
5.Starttheengine,ensurethatthethrottleleveris
midwaybetweentheFASTandSLOWpositions,
andreleasetheparkingbrake.
Note:Themotion-controlleversmustbein
theNEUTRAL-LOCKEDpositionwhilemakingany
adjustments.
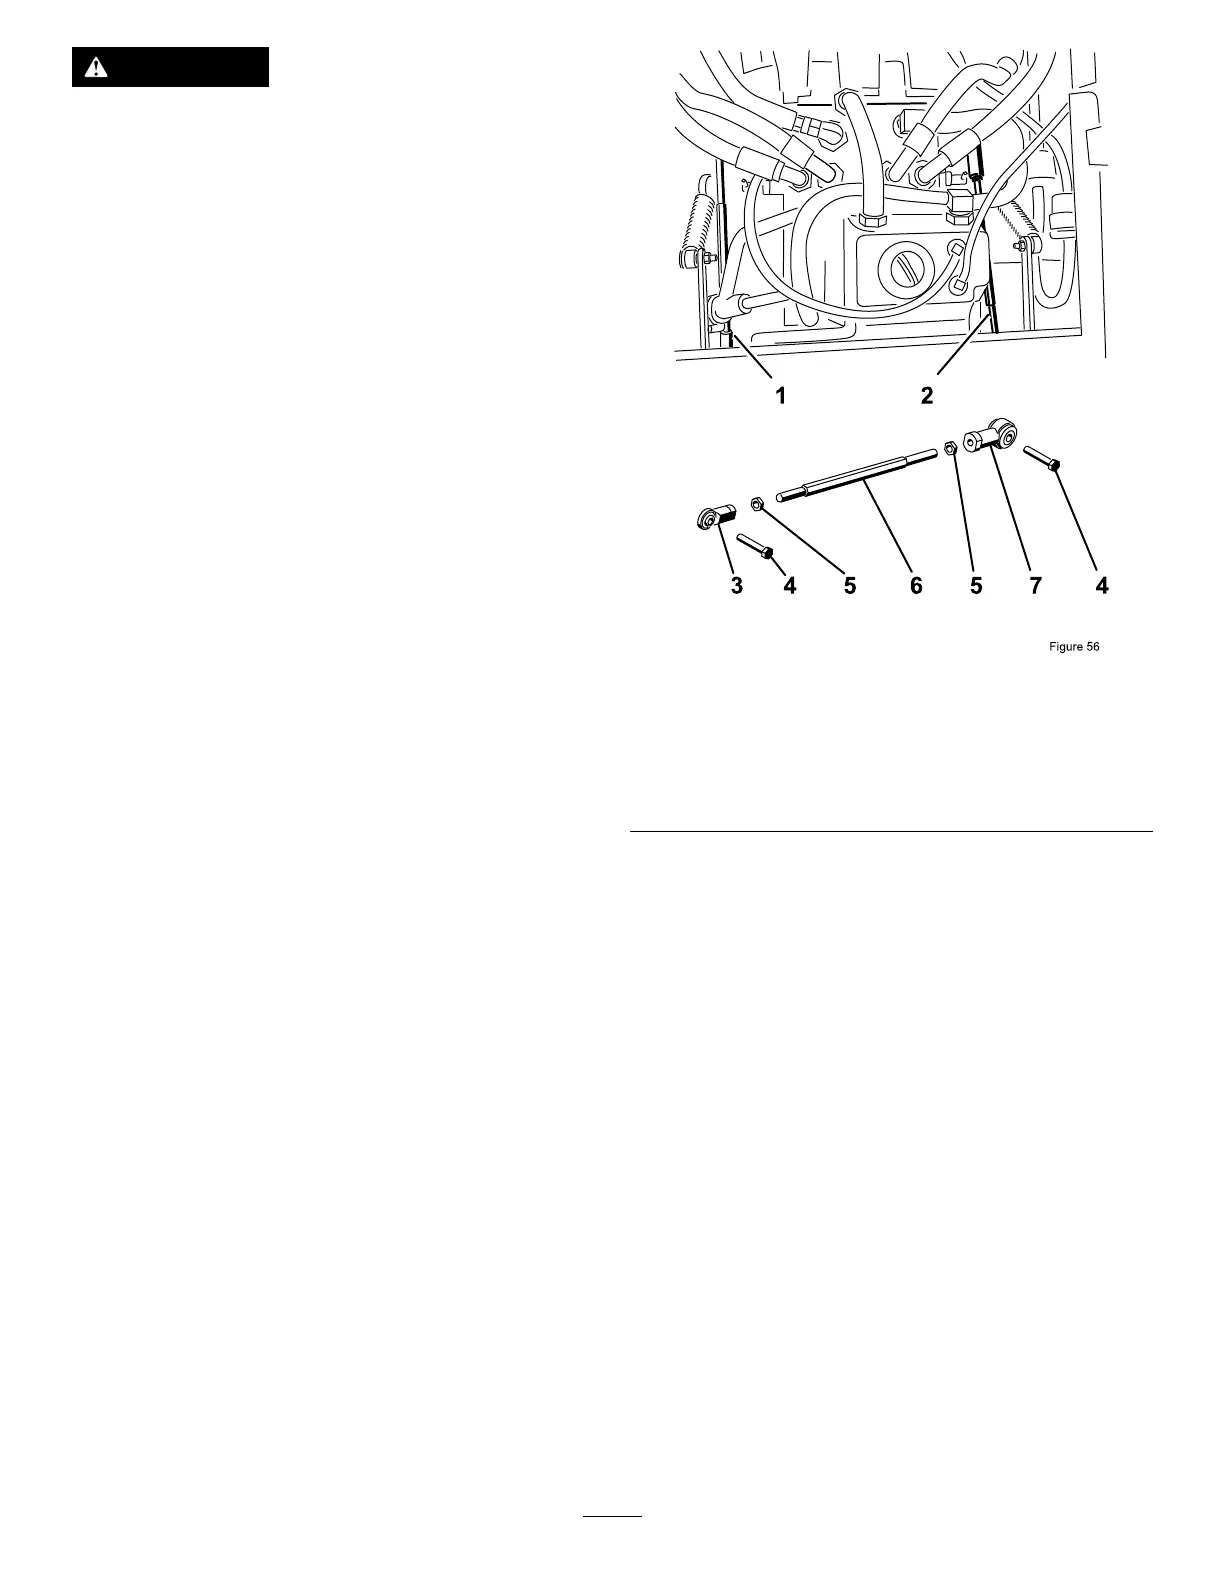
6.Adjustthepump-rodlengthon1sidebyrotating
thehexshaft,intheappropriatedirection,until
thecorrespondingwheelisstillorisslightly
creepinginreverse(Figure85).
g004488
Figure85
1.Rightpumprod5.JamNut
2.Leftpumprod6.Hexshaft
3.Balljoint7.Balljoint
4.Bolt
7.Movethemotion-controlleverforwardand
reverse,thenbacktoneutral.
Note:Thewheelmuststopturningorslightly
creepinreverse.
8.MovethethrottlelevertotheFASTposition.
Note:Makesurethatthewheelremains
stoppedorslightlycreepsinreverse;adjustit
ifnecessary.
9.Repeatsteps6through8fortheothersideof
themachine.
10.Tightenthejamnutsattheballjoints(Figure83).
11.MovethethrottlelevertotheSLOWpositionand
stoptheengine.
12.Removethejumperwirefromthewire-harness
connectorandplugtheconnectorintotheseat
switch.
64