December 2005 © TOSHIBA TEC e-STUDIO163/203 ERROR CODE AND SELF-DIAGNOSTIC MODE
2 - 5
2
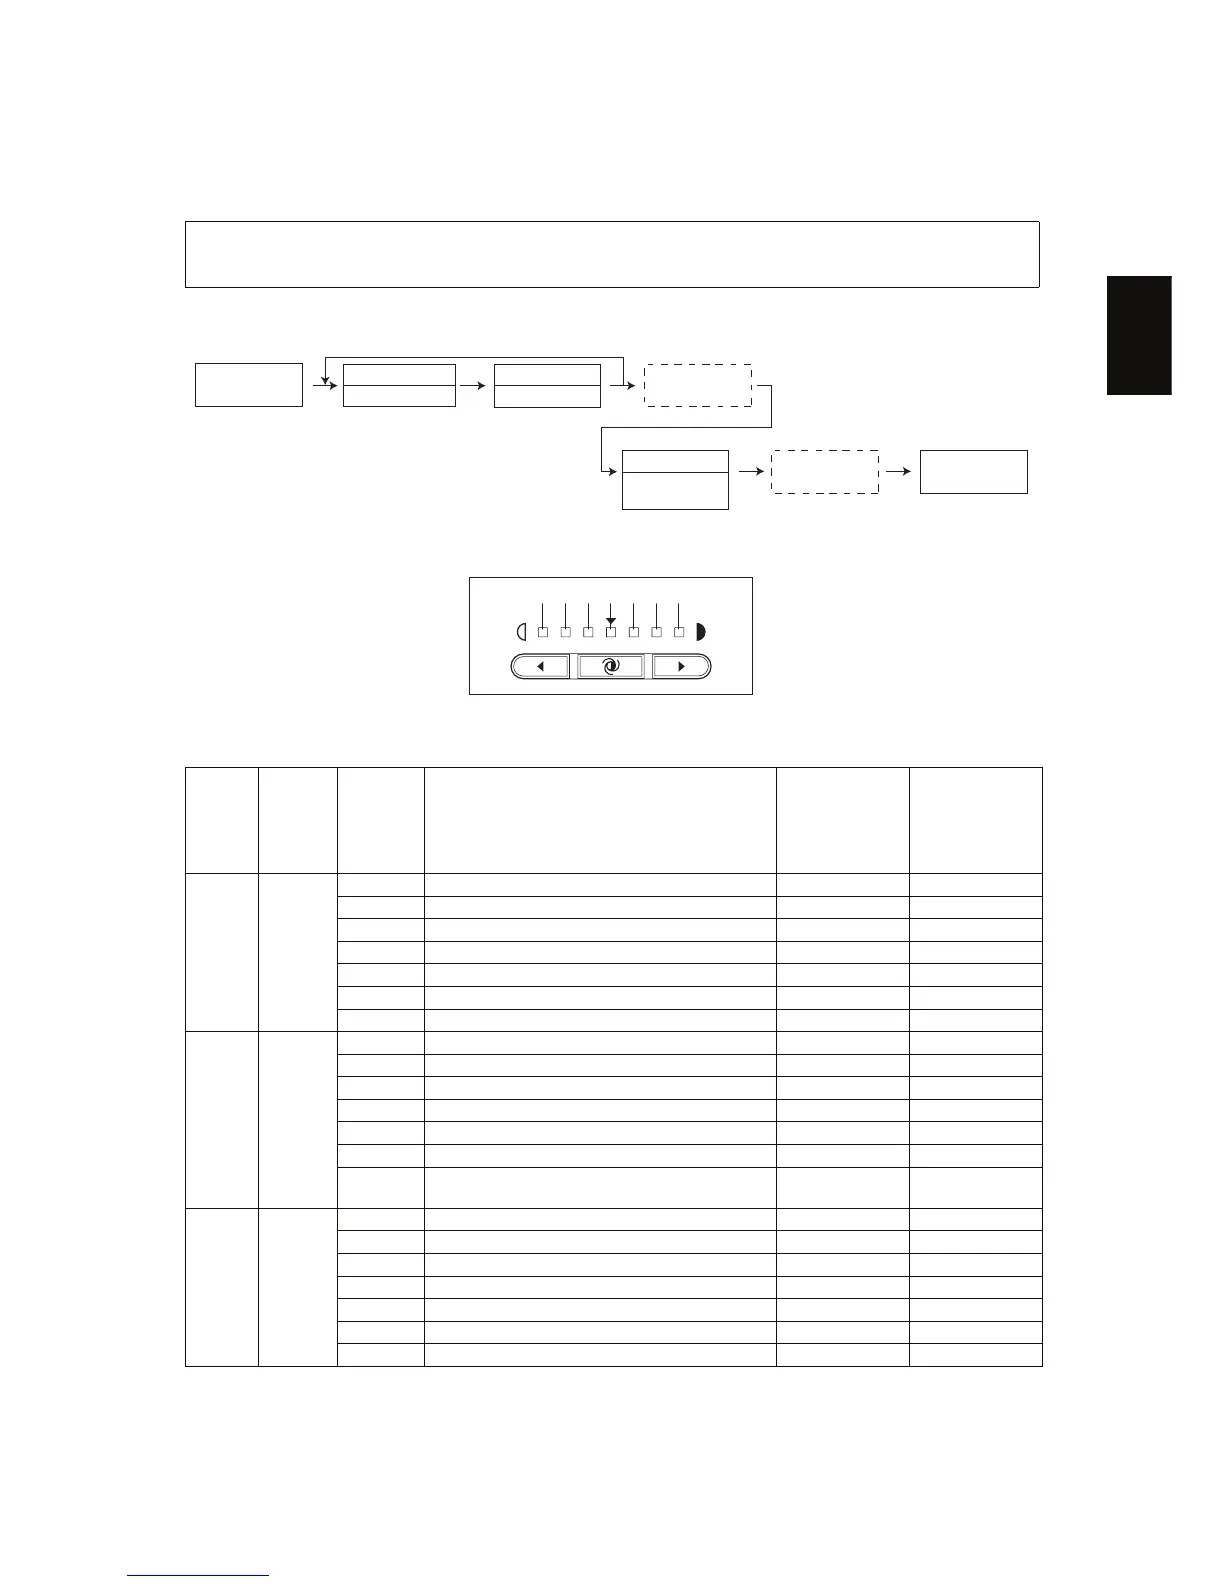
2.2.1 Input check (Test mode 03)
<Operation procedure>
Group is displayed by ON/OFF of the [INTERRUPT] LED, and the number keyed in is displayed with
the 7-segment LED. Each status is indicated by ON/OFF of the 7 [DENSITY LED] s.
Fig. 2-4 Display position of the density LED
The status of each input signal can be checked by pressing the [INTERRUPT] button, and the digi-
tal keys in the test mode (03).
[INTER
RUPT]
LED
Number
[Digital
keys]
Display
position
of the
density
LED
Items to check ON OFF
OFF [1]
0 - - -
1 - - -
2 - - -
3 - - -
4 Bypass paper sensor No paper Paper present
5 Bypass unit connection Not connected Connected
6 - - -
OFF [4]
0 - - -
1 - - -
2 - - -
3 - - -
4 - - -
5 Paper empty sensor No paper Paper present
6 Drawer detection switch Drawer not
installed
Drawer
installed
OFF [6]
0 - - -
1 - - -
2 - - -
3 - - -
4 - - -
5 PFU paper empty sensor No paper Paper present
6 - - -
[0][3]
[POWER]
[INTERRUPT]
Group
[Digital keys]
Number
LED ON
[FUNCTION
CLEAR]
END
[POWER]
OFF/ON
LED OFF
6 5 4 3 2 1 0

 Loading...