1.SETTING ITEMS (USER)
ADDRESS 35
1 SETTING ITEMS (USER)
Adding or removing contacts
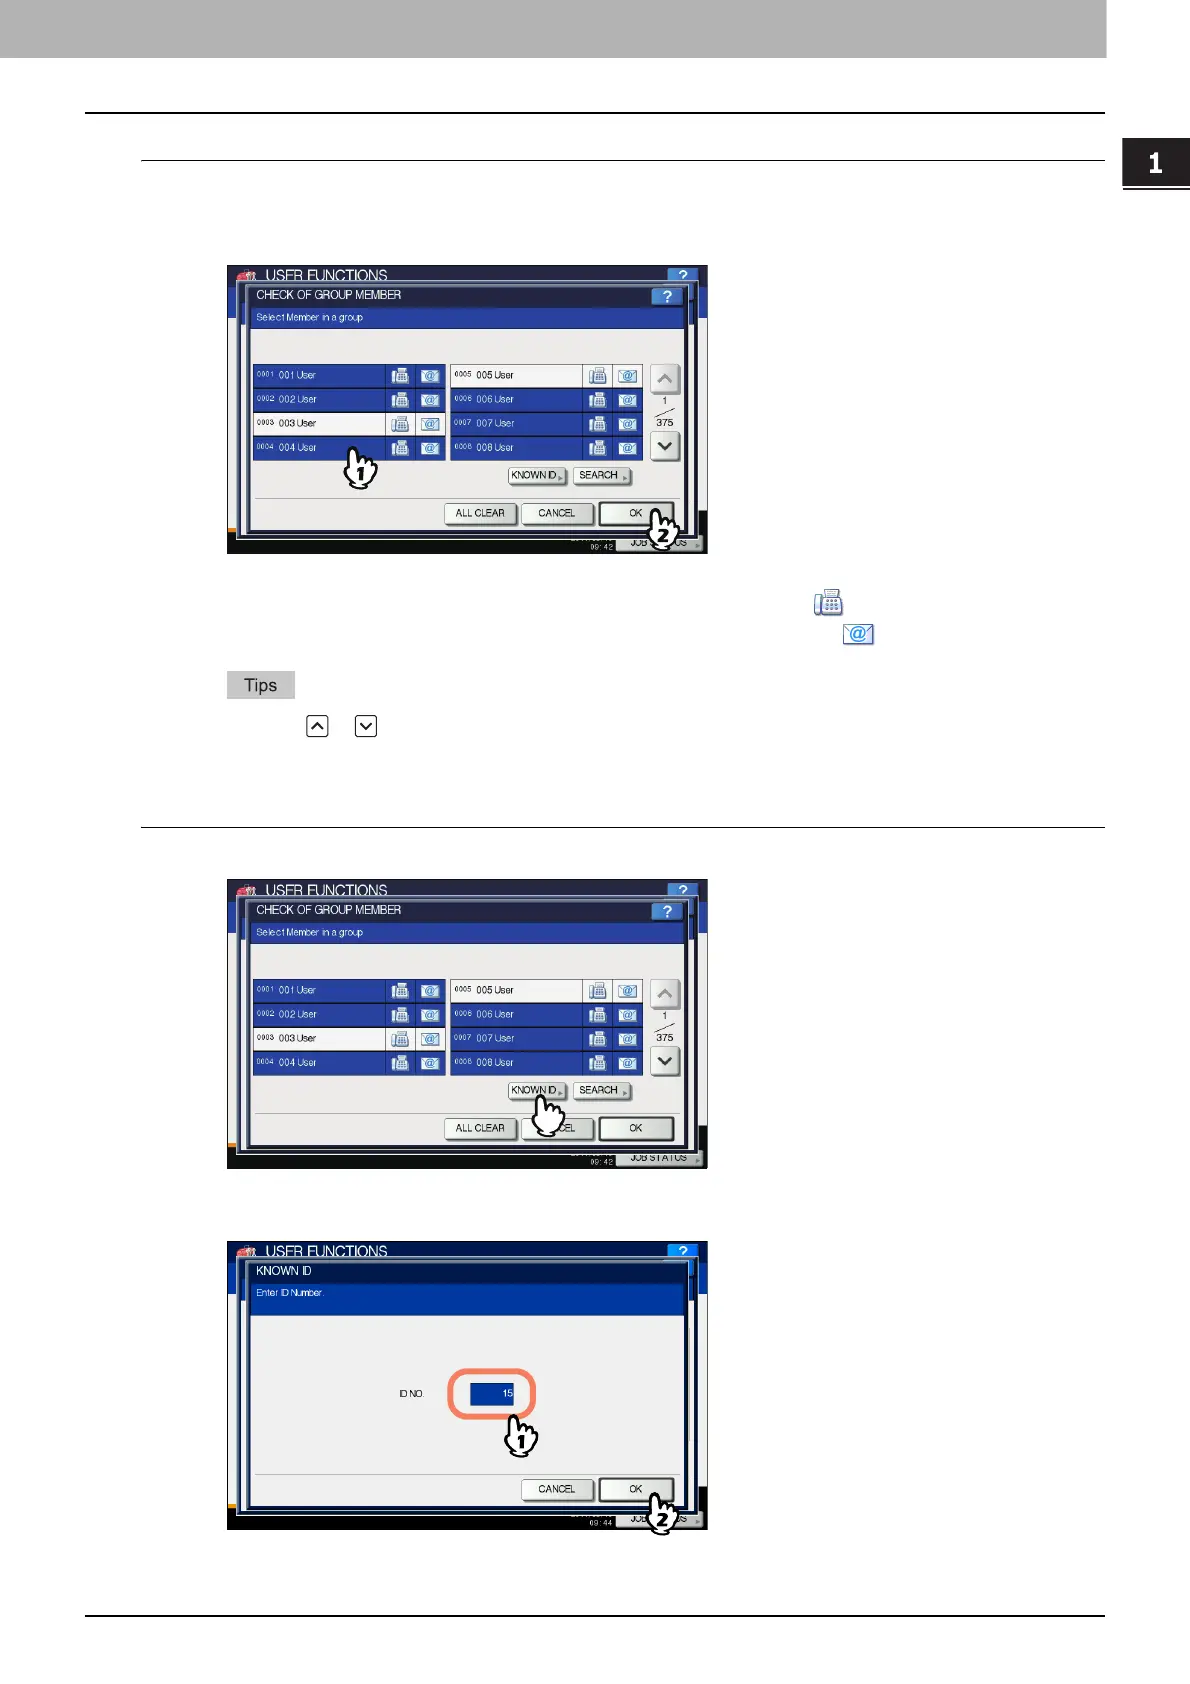
1
To add a contact to the group, press a non-highlighted contact to highlight it. To
remove a contact from the group, remove its highlight. When the addition or removal of
contacts is complete, press [OK].
To add/remove both the fax number and E-mail address of a contact to/from the group, press the contact name.
To add/remove only the fax number of a contact to/from the group, press in the contact information.
To add/remove only the E-mail address of a contact to/from the group, press in the contact information.
Press or to display contacts on different pages.
You can remove all contacts by pressing [ALL CLEAR].
Adding or removing contacts by searching by ID number
1
On the CHECK OF GROUP MEMBER screen, press [KNOWN ID].
The KNOWN ID screen is displayed.
2
Enter the ID Number using the digital keys and press [OK].
The touch panel displays the found contacts.
 Loading...


