2.SETTING ITEMS (ADMIN)
GENERAL 61
2 SETTING ITEMS (ADMIN)
2
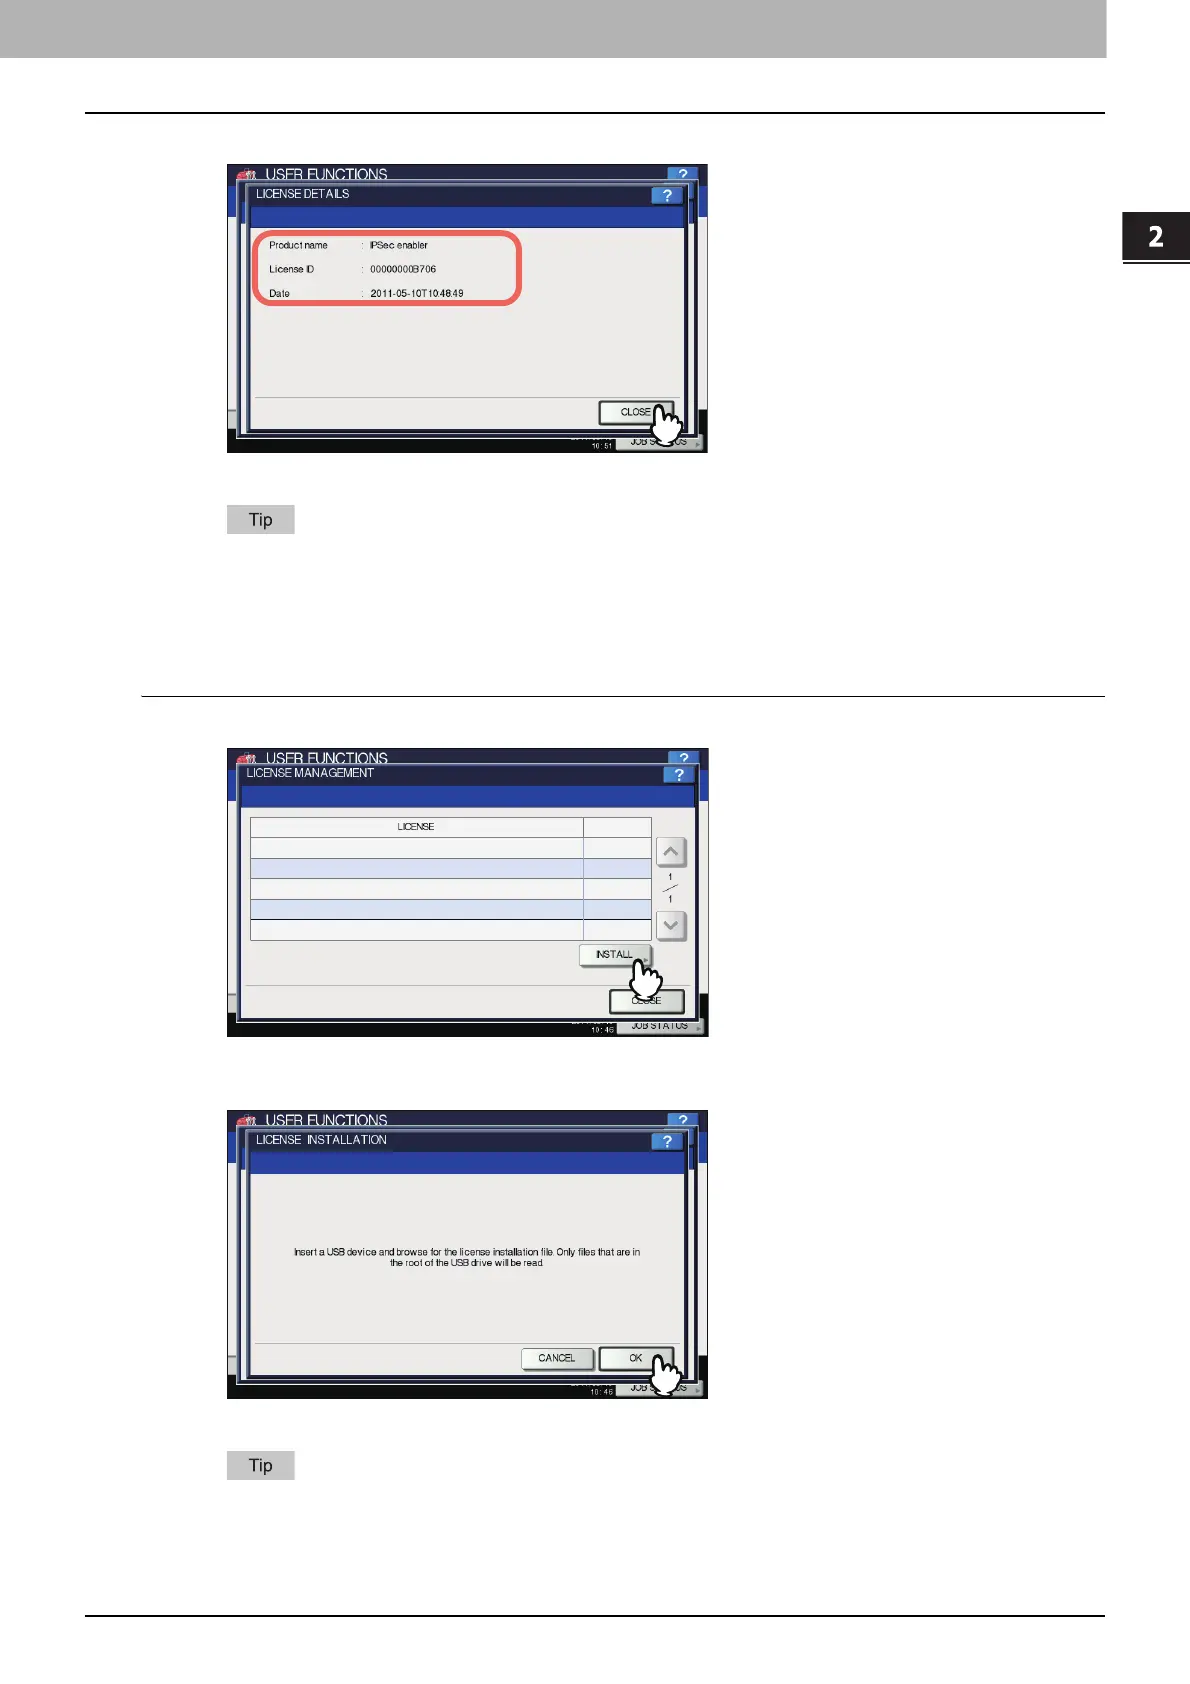
After you confirm product information, press [CLOSE].
You will be returned to the LICENSE MANAGEMENT screen.
The following information is displayed.
Product name: Option name
License ID: License ID
Date: The date and time of when the option has been installed
Installing an option
1
On the LICENSE MANAGEMENT screen, press [INSTALL].
The LICENSE INSTALLATION screen is displayed.
2
Connect your USB storage device to the USB port on the equipment, and press [OK].
The SELECT A FILE screen is displayed.
For the location of the USB port on the equipment, refer to the Quick Start Guide “Chapter 1:
PREPARATIONS”.
 Loading...


