2 SETTING ITEMS (ADMIN)
72 GENERAL
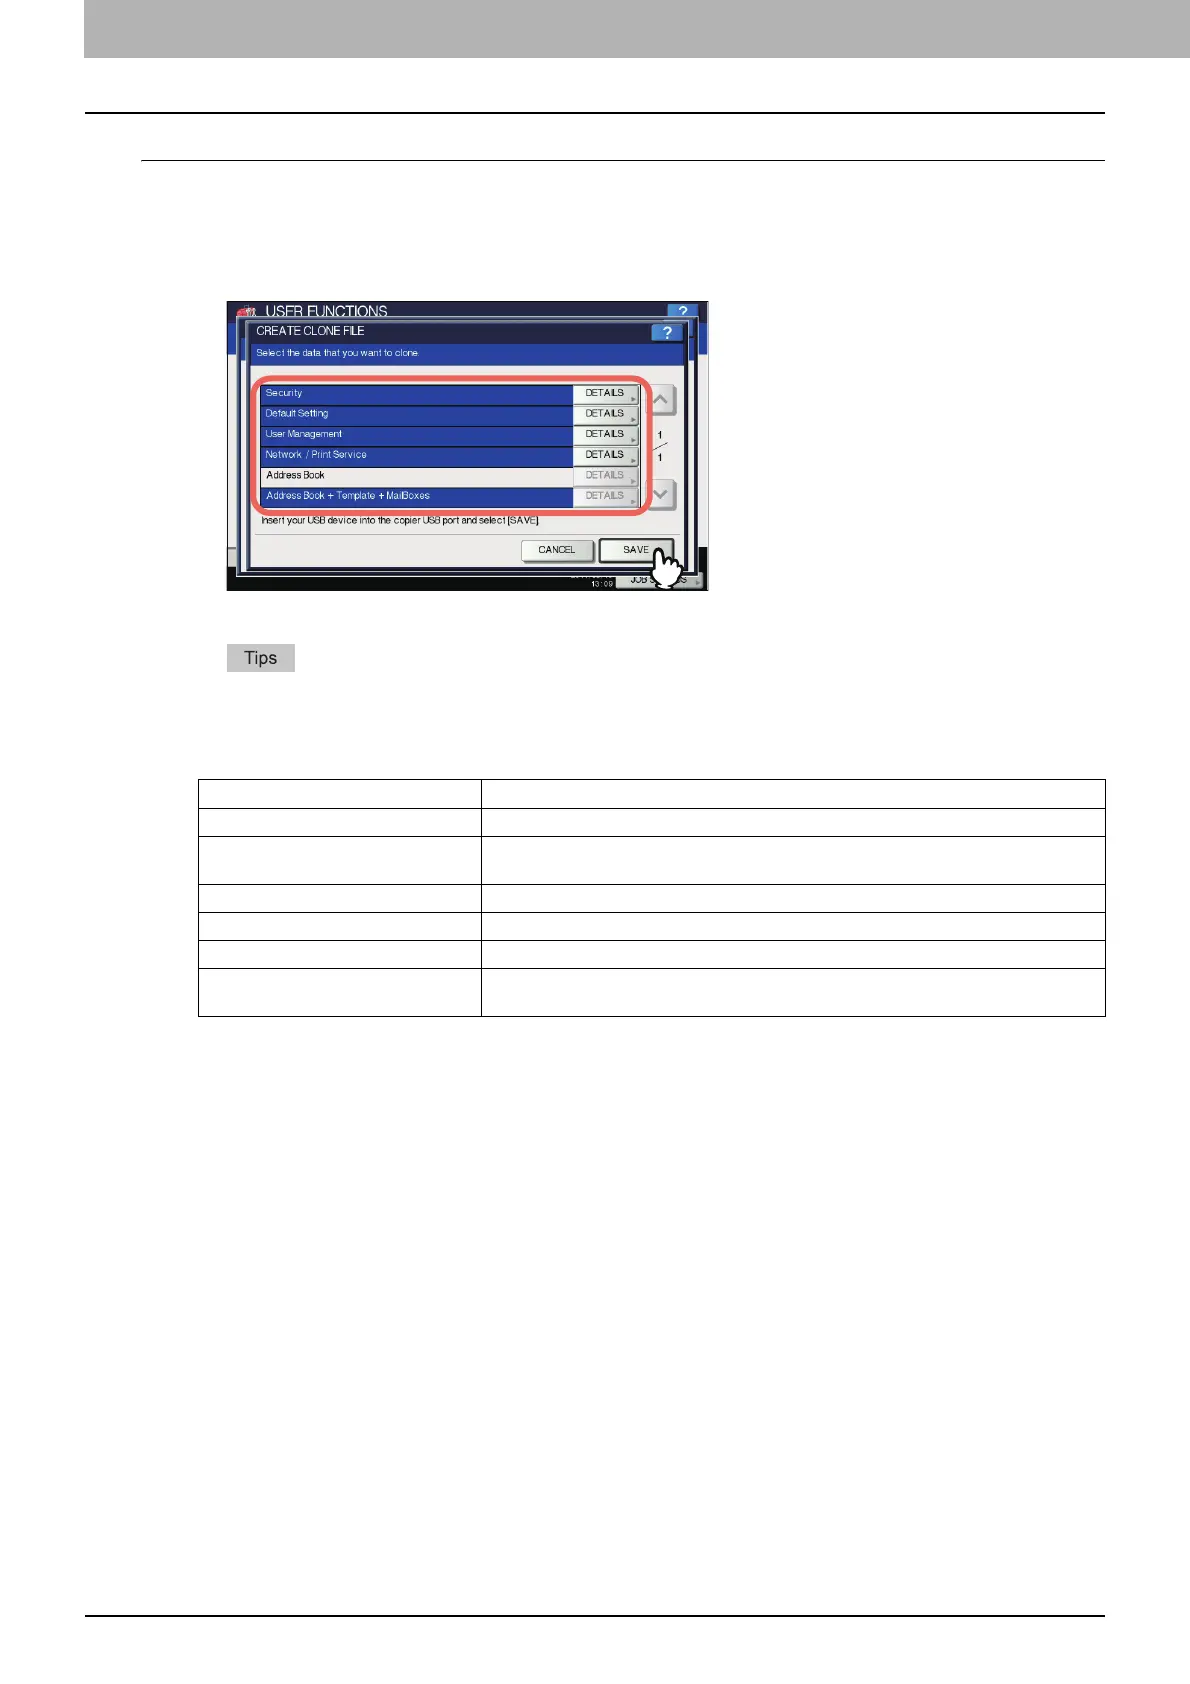
Creating clone files
1
On the CLONING screen, press [CREATE CLONE FILE].
The CREATE CLONE FILE screen is displayed.
2
Connect your USB storage device, select the data that you want to duplicate, and then
press [SAVE].
The SAVE AS screen is displayed.
For the location of the USB port on the equipment, refer to the Quick Start Guide “Chapter 1:
PREPARATIONS”.
For data you do not need to duplicate, press the data category button(s) to clear the highlight.
Press [DETAILS] to confirm which data are duplicated.
3
Enter the file name, set the password, and then save the file.
1) Press [File Name] to enter the file name.
Enter a file name of up to 128 alphanumeric characters.
Data category Data to be duplicated
Security Secure Erase, Authentication
Default Setting General, Copy, Scan, Fax, Internet Fax, Fax/Internet Fax Received Forward, E-mail,
Save as File, Printer, Notification, Log Settings, EWB Settings
User Management User, Group, Role, Quota, Department Code, My Menu with Template/Address Book
Network/Print Service Network settings, Print service, Wireless LAN, Directory Service
Address Book Address Book
Address Book + Template +
MailBoxes
Address Book, Template, Mailboxes
 Loading...


