2 SETTING ITEMS (ADMIN)
122 Setting Network Functions
2
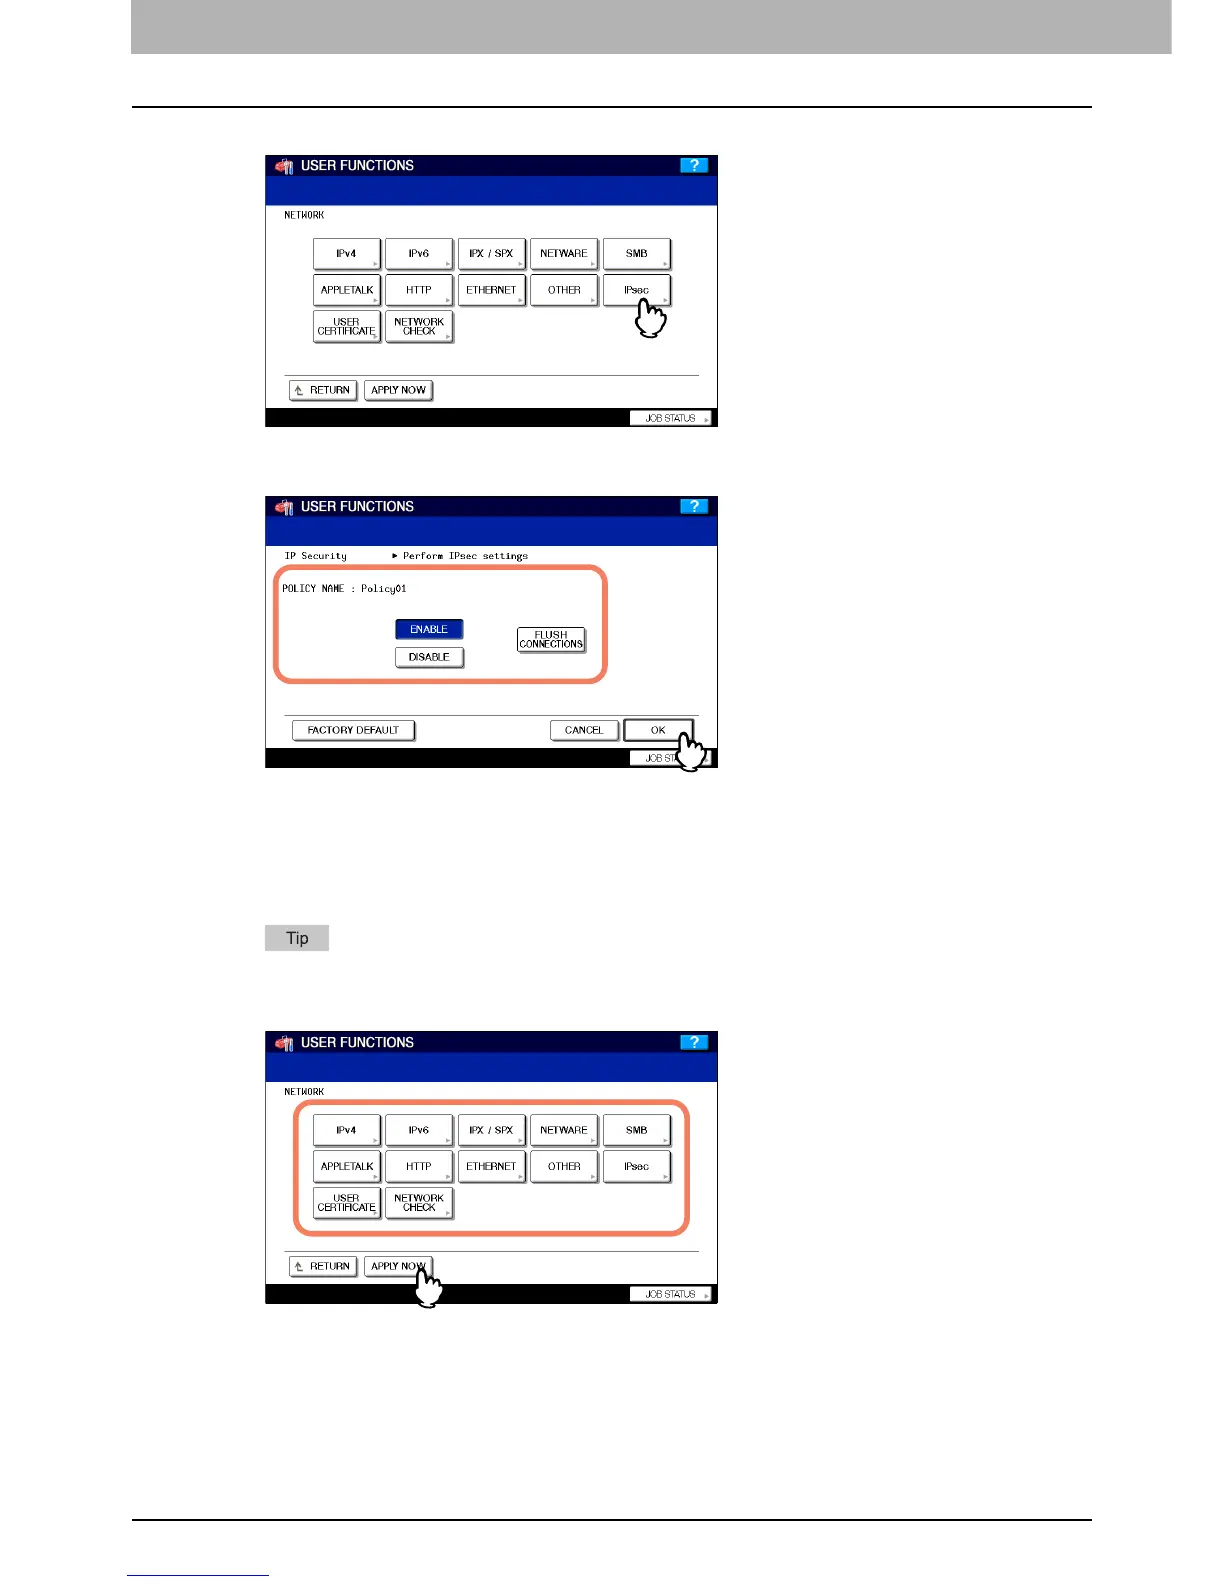
Press [IPsec].
The IP SECURITY screen is displayed.
3
Specify the following items as required and press [OK].
POLICY NAME — IPsec policy name currently applied is displayed.
[ENABLE] — Press this button to enable IPsec communication.
[DISABLE] — Press this button to disable IPsec communication.
[FLUSH CONNECTIONS] — Press this button to manually clear (flush) the current IPsec session, for starting a
new session.
[FACTORY DEFAULT] — Press this button to reset the IPsec settings back to the factory defaults.
When you press [FLUSH CONNECTION], a message asking you to perform the operation is displayed.
4
Continue to another network setting if required, then press [APPLY NOW].
The “NETWORK INITIALIZING” message is displayed and this equipment starts initializing the network interface
card to apply the changes.
 Loading...