GX9 ASD Installation and Operation Manual 35
Using the LCD Screen
The LCD screen is the primary user input/output information center. Parameter settings may be viewed or
changed using the display unit of the EOI. To view or change a parameter setting using the LCD screen,
press the Mode key until the Program menu is displayed. Turn the Rotary Encoder until the desired
Primary Menu item (see pg. 44) is within the cursor block. Press the Rotary Encoder to select the item
from the Primary Menu (repeat for submenu items).
See the section titled Default Setting Changes on pg. 61 for more information on changing parameter
settings.
Upon reaching the desired parameter selection, the current setting may be viewed, or selected and changed
by pressing the Rotary Encoder and the setting will take on the reverse video format (dark background/
light text). Turn the Rotary Encoder to change the parameter setting. Press the ESC key while the new
parameter setting is in the reverse video mode to exit the selection without saving the change or press the
Rotary Encoder while the parameter setting is in the reverse video mode to accept the change.
Repeated ESC key entries at any time takes the menu back one level each time the ESC key is pressed
until the Frequency Command screen is reached. Further ESC entries will toggle the system to and from
the Frequency Command screen and the EOI Command menu.
Note: Changes carried out from the EOI Command screen will be effective for EOI-
controlled ASD operation only. See the section titled EOI Command (RS232/RS485)
Menu on pg. 40 for further information on EOI Command (RS232/RS485) Menu
operations.
Primary Menus of the LCD Screen
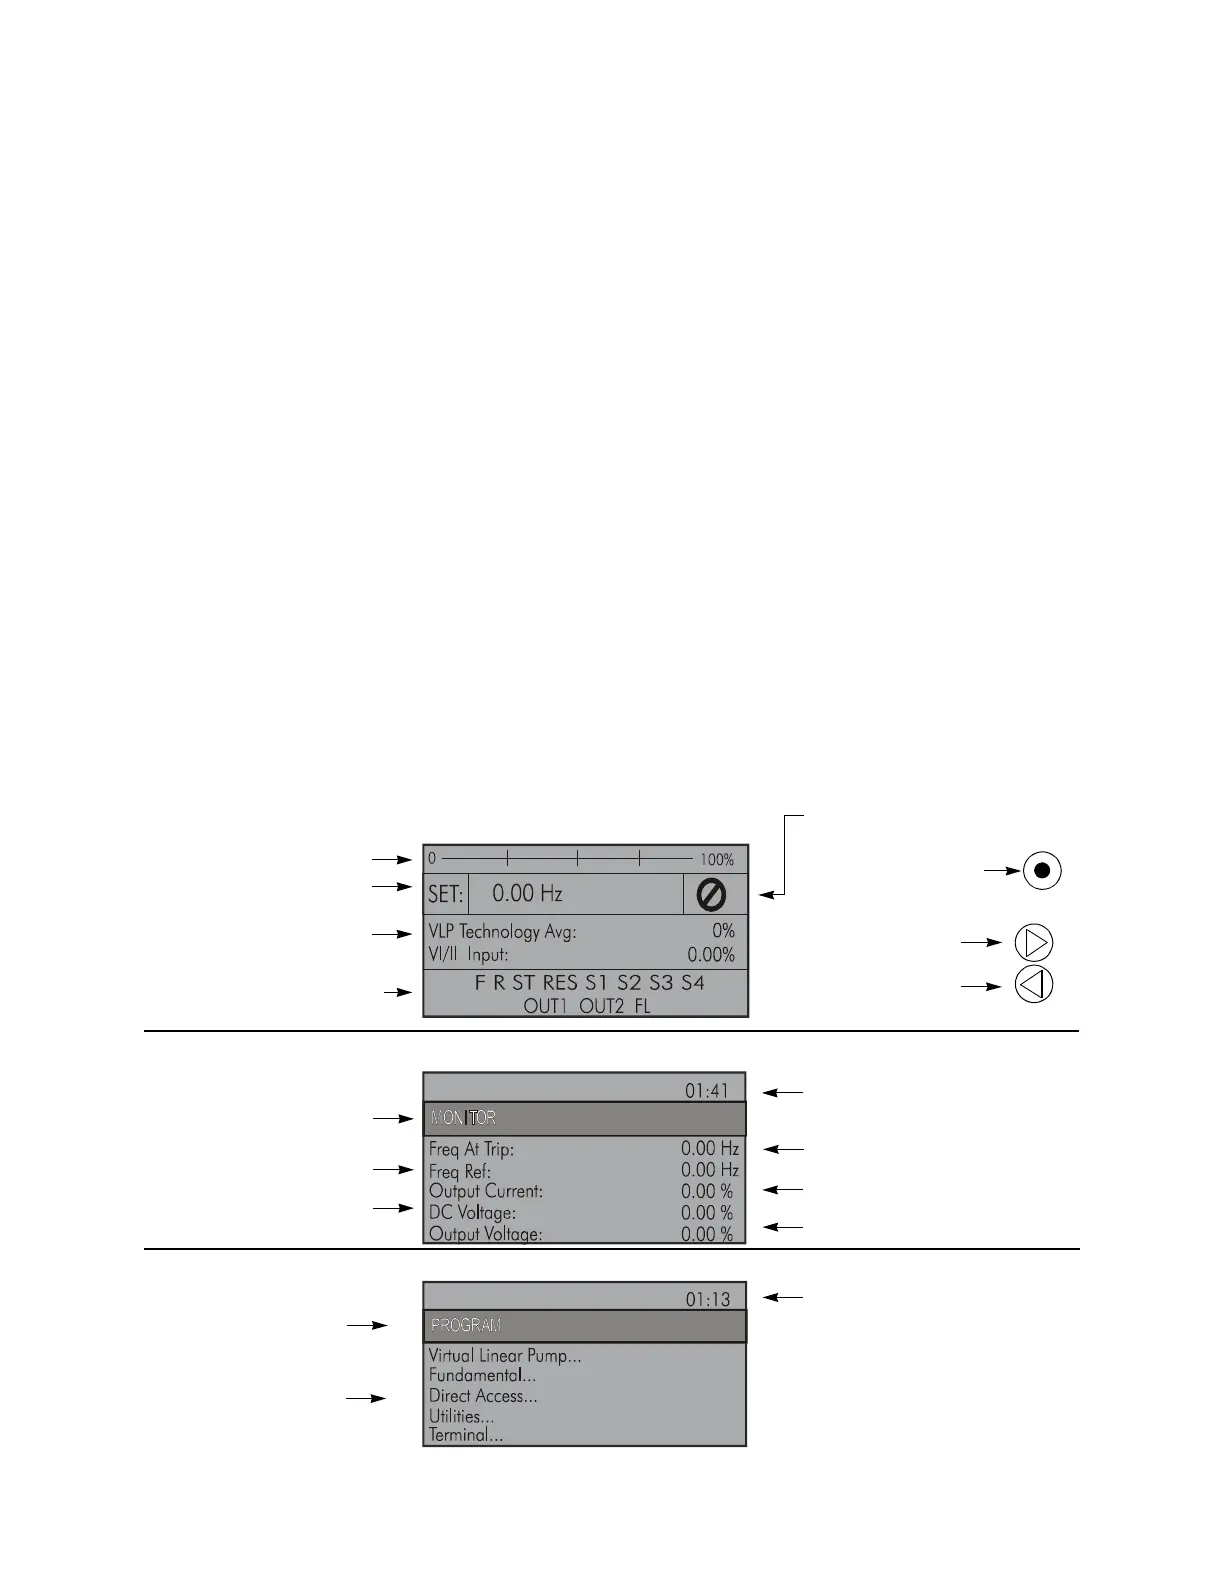
The three primary screens of the LCD screen are displayed while accessing the associated operating
mode: the Frequency Command, Monitor, and the Program Menu screens.
Figure 22. Monitor Screen (see pg. 41 for more on the Monitor screen items).
Figure 23. Program Menu Screen (see pg. 44 for more on the Program Menu Screen).
Speed Reference %
Speed Reference Hz
User-Selected
Monitored Parameters (see
Not-Ready-to-Run
Indicator (ST-to-CC required)
Ready-to-Run Indicator
Appears When ST is Connected
to CC
Main Monitor Selections on pg. 43)
Figure 21. Frequency Command Screen.
Forward Run Active
Reverse Run Active
Discrete I/O Terminal Status Or
Alarm Condition
Item Number 1 of 41
Speed at Trip (If Applicable)
Active DC Bus Voltage
Monitored items
Command
Active Output Current
ASD Output Voltage
Screen Name
(Only 5 Items Listed)
Active Frequency
Primary Menu Items
Screen Name
Item Number 1 of 13
Program Menu items
{
(Only 5 Items Listed)
 Loading...