–7–
Installation Manual
■ How to install on a wall
• Avoid bundling the remote controller wiring with power wires or putting the wiring in the same metal conduits, which can
cause malfunctions.
• Install the remote controller away from sources that generate electronic noise.
1 Insert a flat head screw driver or the like under the 2 hooks on the bottom of the bottom case (rear
case) of the remote controller to remove the bottom case.
2 Use the supplied wood screws (2 pcs.) to secure the bottom case of the remote controller.
Do not use an electric screwdriver.
Be careful to not over-tighten the screws. (Torque up to 1.5 ft·lbs) The bottom case could break.
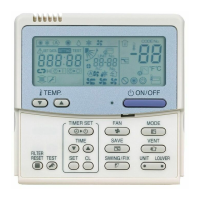
3 Connect the wires from the indoor unit to the terminal block of the remote controller.
For connection, refer to <Connection diagram>. (Page 8)
Wire the remote controller after checking the connector numbers of the indoor unit to prevent miswiring. (Applying
AC208 - 240 V causes damage.)
Bottom case (rear case)
Remote
controller
Wood screw (2 pcs.)
Remote controller (rear surface)
Wall
 Loading...