28
LCD Gauge
REMOVING/INSTALLING
To remove the gauge, pull out on one side of it; then dis-
connect the multi-pin connector and remove the gauge.
PK135
To install the gauge, connect the multi-pin connector and
press the gauge into the dash.
NOTE: Ensure the rubber mounting ring is ori-
ented correctly on the tab and seats fully through the
dash.
WT601A
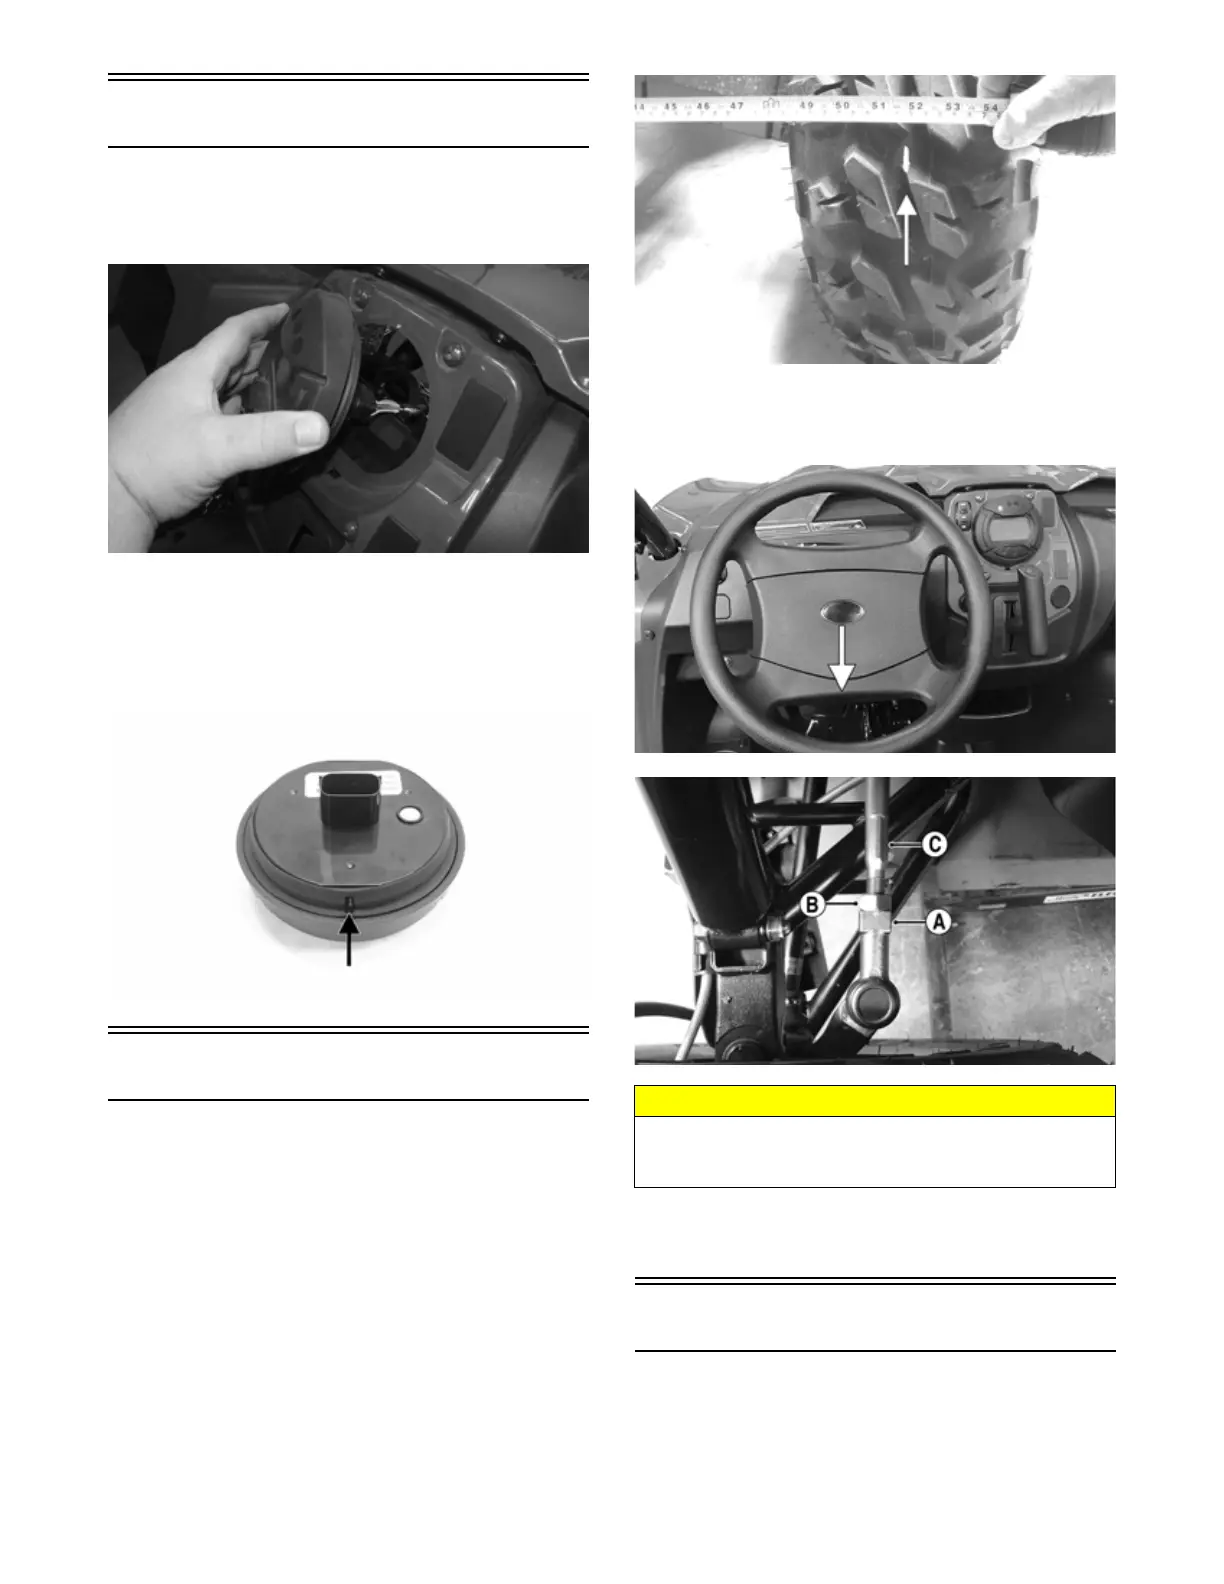
Front Wheel Alignment
NOTE: All measurements and adjustments must be
made with the vehicle unloaded.
Mark the centerline of the front tires at the front and rear
of the tire; then using a tape measure, measure and record
the distance between the marks at the front and rear. The
front measurement should be 0-6 mm (0-1/4 in.) greater
than the rear measurement (toe-out).
PR087A
1. Center the steering wheel; then using an open-end
wrench to hold the tie rod ends (A), loosen the right-
side and left-side jam nuts (B).
TXR002B
PK079A
2. Turn the left-side and right-side tie rods (C) in equal
increments to achieve the proper toe-out; then
tighten the jam nuts to 28 ft-lb (38.1 N-m).
Front Fascia/Front Bumper
REMOVING
1. Remove the eight cap screws securing the lower
front fascia to the frame from both sides of the vehi-
cle; then remove the lower fascia.
CAUTION
Always use a wrench to hold the tie rod ends when
loosening or tightening the jam nuts or damage to the
boots could occur.