31
PK069
PK089
3. Remove the eight plastic rivets securing the top of
the dashboard to the front body panel; then separate
the panel from the dash.
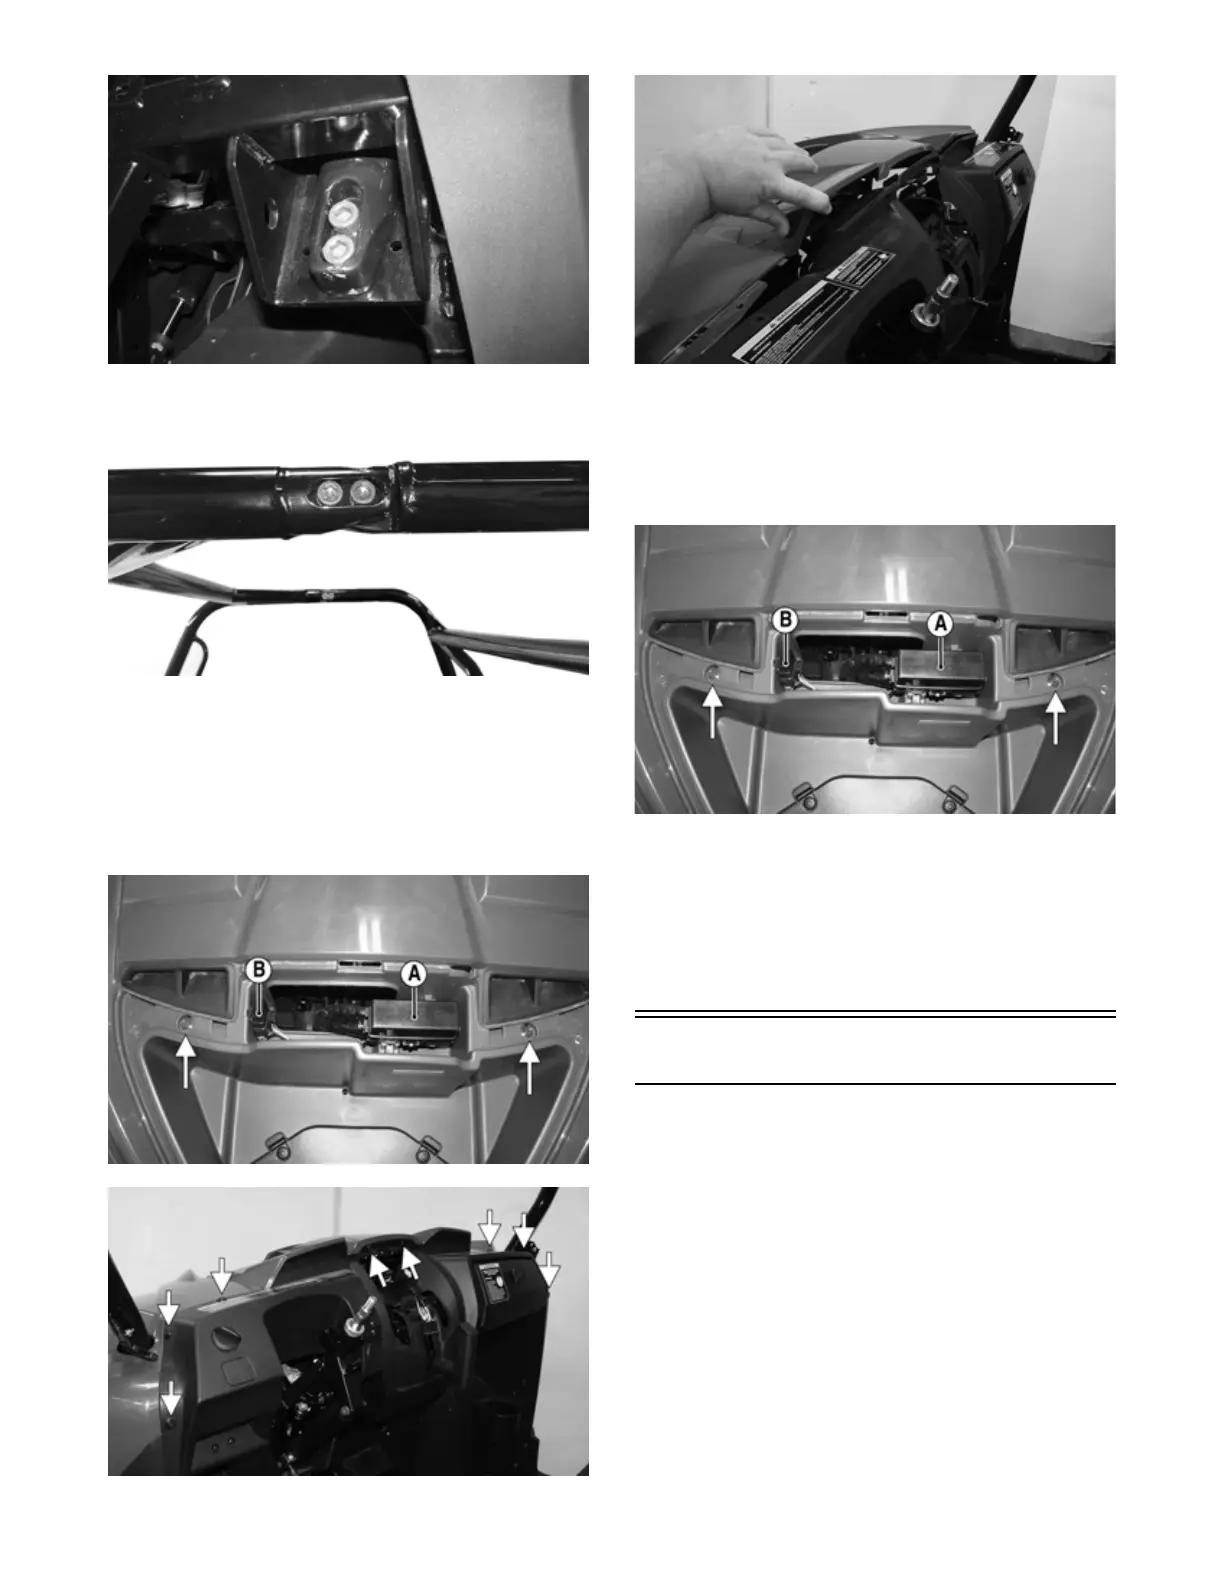
4. Remove the front access panel; then remove the
PDM (A) and diagnostic plug (B) from the body
panel. Remove the two remaining cap screws secur-
ing the body panel to the frame.
PK144A
PK142A
PK143
INSTALLING
1. Install the front body panel; then secure it to the top
of the dashboard using the plastic rivets. Place the
PDM and diagnostic plug into position; then using
the two cap screws, secure the panel to the frame.
PK144A
2. Install the front fascia (see Front Fascia/Front Bumper)
and both side panel assemblies (see Dashboard — step
5).
3. Using new cap screws and nuts and with assistance,
install the front half of the ROPS assembly. Finger
tighten all fasteners first; then tighten to 47 ft-lb
(63.9 N-m).
Floor
REMOVING
1. Remove the dashboard (see Dashboard).
2. Remove the cap screws and plastic rivets securing
the center foot guard. Remove the guard.