28
PKG-SVX027D-EN
Installation Summary
The steps below provide a summary of installation steps for
installing the modular self-contained unit. Read all
installation instructions before starting the installation as
the below is not a complete summary of all steps required.
Recommended Tool List
Note: This is a general list only. Other standard tools will be
required.
• 7/8-inch deep socket
• 11/16-inch deep socket
• Adapter for sockets to drill
• Cordless impact drill
• 5/16 Socket Bit - To be used in the impact drill
• 3/8 Socket Bit
• Phillips bit #2 for drill
• Extensions bit holder for drill - long and short
• Right angle driver for drill (Skew Driver)
• 5/32 hex key (TEE handle if possible)
• 5/16 or 8mm hex key (TEE handle if possible)
• 5mm Hex Key (TEE handle if possible)
• 6mm hex key socket (Intelliclamps)
• Minimum of 4 vice clamps (cassette joining)
• Rubber mallet
• Tube cutter for 1 3/8 copper pipe.
• Furniture Dollies: 6 to 8
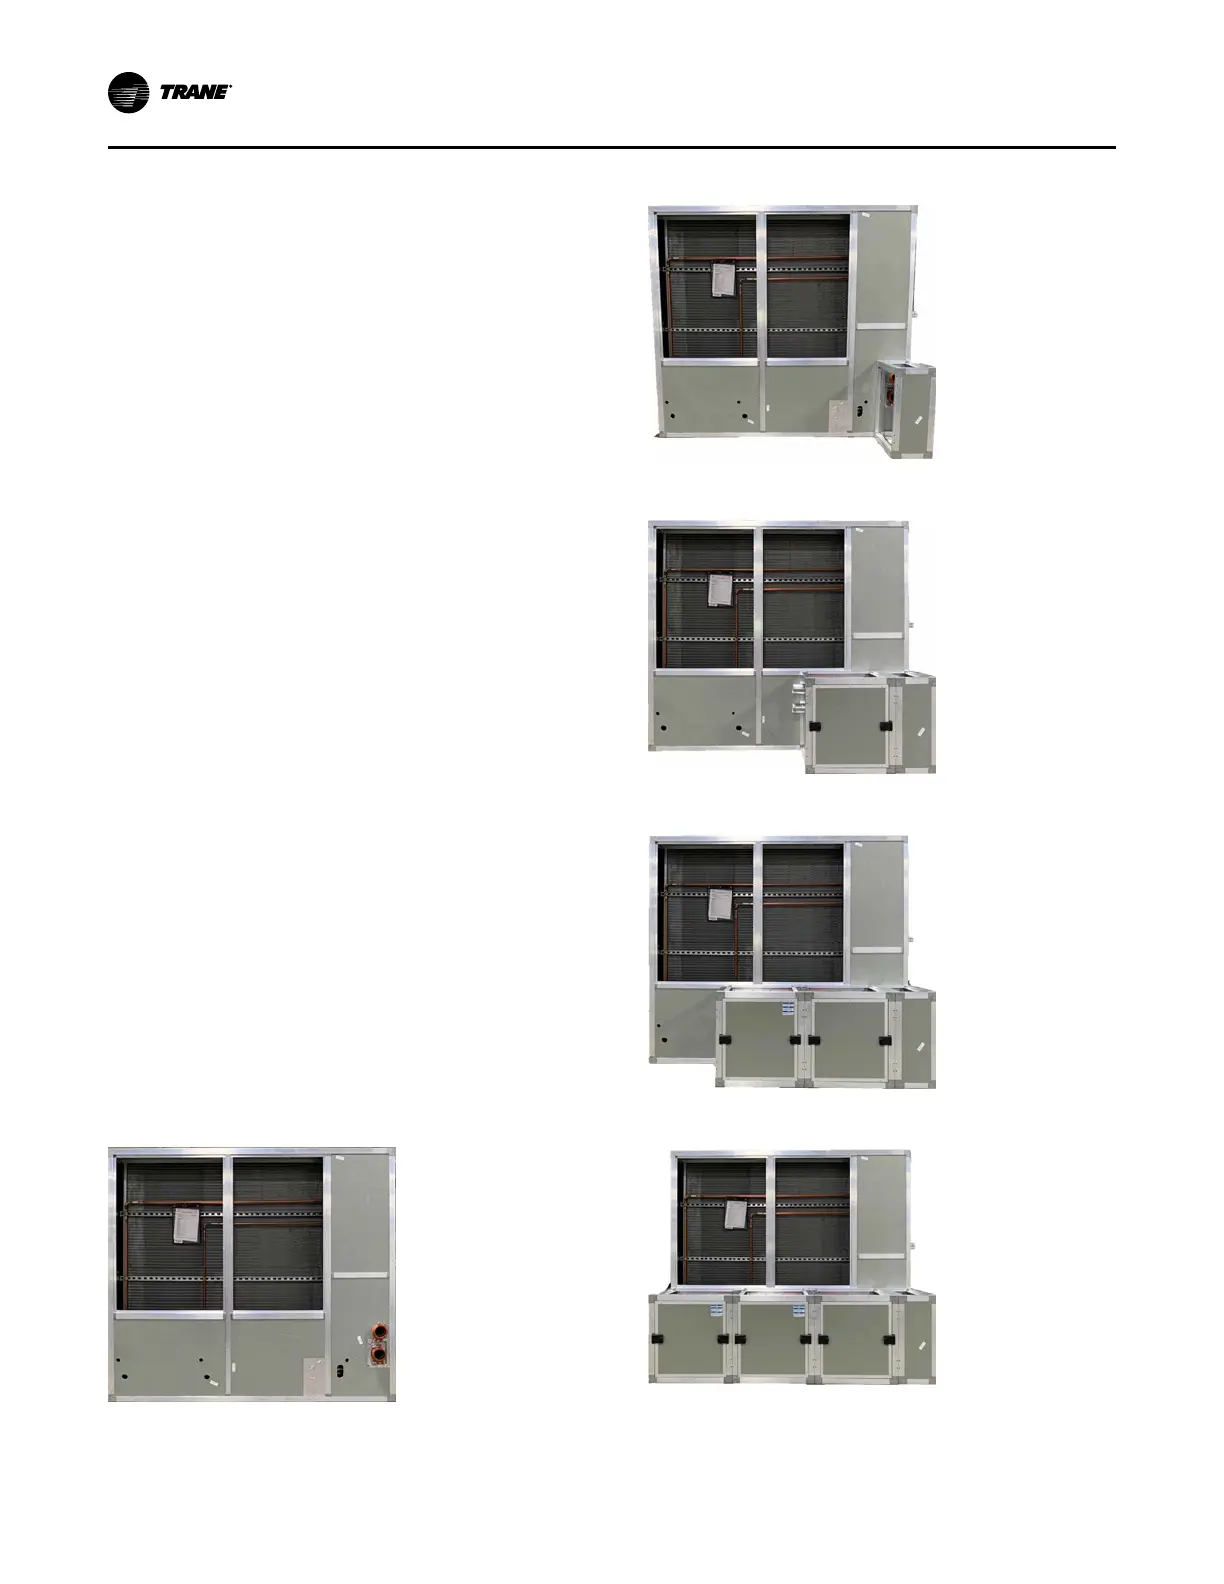
Note: The installation images below depict a 60 ton, right
hand electrical unit, left hand water unit. Water
connections will always be opposite of the electrical
cassette. For a left hand electrical unit, the
installation will be reversed. The second set of
pictures depict the installation for an 80 ton right
hand electrical unit. There is additional detail
provided in these pictures to show the
interconnecting piping and the sealing of the unit.
60 Ton Right Hand Unit
1. Place evaporator into final location.
2. Add spacer cassette.
3. Add variable speed compressor A condensing unit.
4. Add fixed speed compressor B condensing unit.
5. Add fixed speed compressor C condensing unit.
Installation - Mechanical
 Loading...