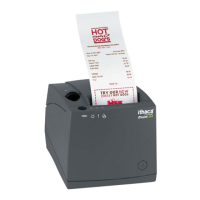
Setup Procedures iTherm
®
280 Programmer’s Guide
Page 36 Rev K
Installing Windows
®
Printer Drivers
Printer Driver Installation for WIN95, 98, Me
1. Insert the ―Windows 95, 98, Me printer driver‖ disk into your diskette drive.
2. Click on ―Start‖ menu -> ―Settings‖ -> ―Printers‖.
3. Double Click on ―Add Printer‖ Icon.
4. Select ―Next‖.
5. Select ―Local printer‖ and ―Next‖.
6. Click on ―Have Disk‖. If your floppy is A: use A:\ and then ―OK‖.
7. Select the printer you have (i.e. Series iTherm
®
280) and then ―Next‖.
8. If you are asked ―Keep existing driver‖ or ―Replace existing driver‖. Choose
―Replace existing driver‖ and then ―Next‖.
9. Select the port the printer is connected to, and then ―Next‖.
10. Select ―Yes‖ or No‖ for default printer, Printer name should not be altered, so
choose ―Next‖.
11. If you wish, you can print a test page. Due to the narrow paper stock that this
printer uses, and the margins Windows chooses, there will not be enough room
to print all the images of the test page. Some of the large text will word-wrap and
be truncated.
12. Select ―Finish‖. The printer driver is now installed.
13. If you selected ―Replace existing driver‖, reboot your machine to ensure all
components are installed.
Printer Driver Installation for NT4.0, 2000
1. Insert the ―Windows NT, 2000 printer driver‖ floppy disk into your diskette drive.
2. Click on ―Start‖ menu -> ―Settings‖ -> ―Printers‖.
3. Double-click on the ―Add Printer‖ Icon.
4. Select ―My Computer‖ and ―Next‖.
5. Select the port the printer will be connected to, and then ―Next‖.
6. Click on ―Have Disk‖. If your floppy is A: use A:\ and then ―OK‖.
7. Select the printer you have (i.e. Series iTherm
®
280) and then ―Next‖.
8. If you are asked ―Keep existing driver‖ or ―Replace existing driver‖. Choose
―Replace existing driver‖ and then ―Next‖.
9. Printer name should not be altered, so choose ―Next‖.
10. Select ―Not Shared‖ ―Next‖.
11. If you wish, you can print a test page. Due to the narrow paper stock that this
printer uses, and the margins Windows chooses, there will not be enough room
to print all the images of the test page. Some of the large text will word wrap and
be truncated.
12. Select ―Finish‖. The printer driver is now installed.
13. If you selected ―Replace existing driver‖, reboot your machine to ensure all
components are installed.