44 Installation (for qualified installers only)
© Travis Industries 3/13/18 - 1474 42 & 54PB GSB2 Aust.
Finalizing the Installation
1. Remove the glass (see page 47).
NOTE: If using propane (LP) convert the appliance prior to installing the media.
2. We recommend you purge the gas line at this time (with the glass removed). This allows gas to be detected
once it enters the firebox, ensuring gas does not build up.
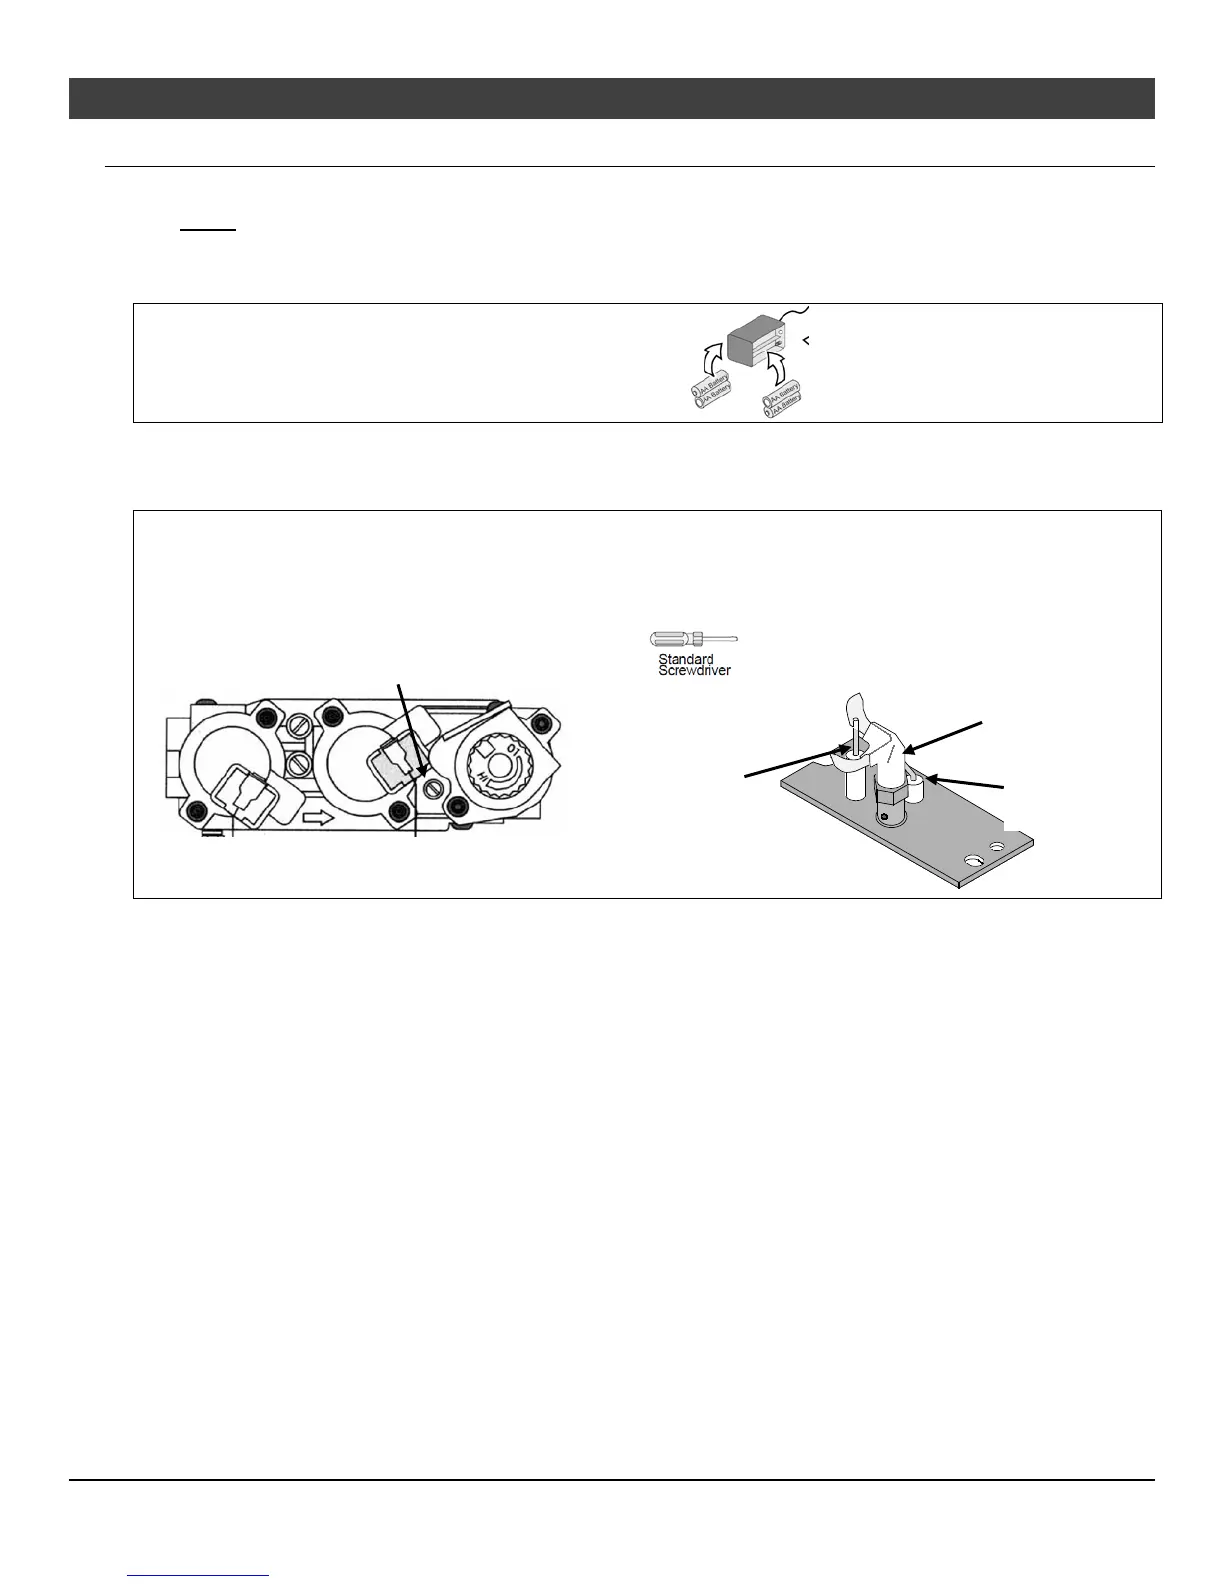
Install the batteries into the battery holder
3. Turn on gas to the heater. Leak test all gas joints prior to starting the appliance. Start the pilot to verify gas
supply (see instructions on page 46). Leak test all the gas joints. Turn the gas control knob to “OFF” to shut
off the appliance.
Pilot Flame Inspection
The pilot flame should look like the illustration below. Adjust the pilot flame if necessary.
The pilot flame should look like the illustration below. Adjust
the pilot flame if necessary.
To adjust the pilot flame, turn this screw. Clockwise lowers
the flame while counter-clockwise raises it.
The pilot flame should touch the top 3/8” of the
sensing electrode and make contact with the pilot
hood. Adjust the pilot up or down as necessary.
4. Replace the glass.
5. Start the main burner and verify the burner ignites correctly.
6. Leak test all gas joints.
Pilot Hood
Spark
Sensing
electrode