Installation (for qualified installers only) 57
© Travis Industries 3/13/18 - 1474 42 & 54PB GSB2 Aust.
Wall Mount Remote Thermostat installation (optional)
Installation
If Using the Optional Blower, Install it First
The optional blower should be installed before installing the remote.
1 Remove the lower front access panel from the fireplace by reaching in behind it and loosening the
two wing nuts and (1) ¼” screw on each side of the panel that hold it in place (see fireplace manual
for details.) Lift up and then out on the panel to remove. Lay the panel face down in front of the
fireplace.
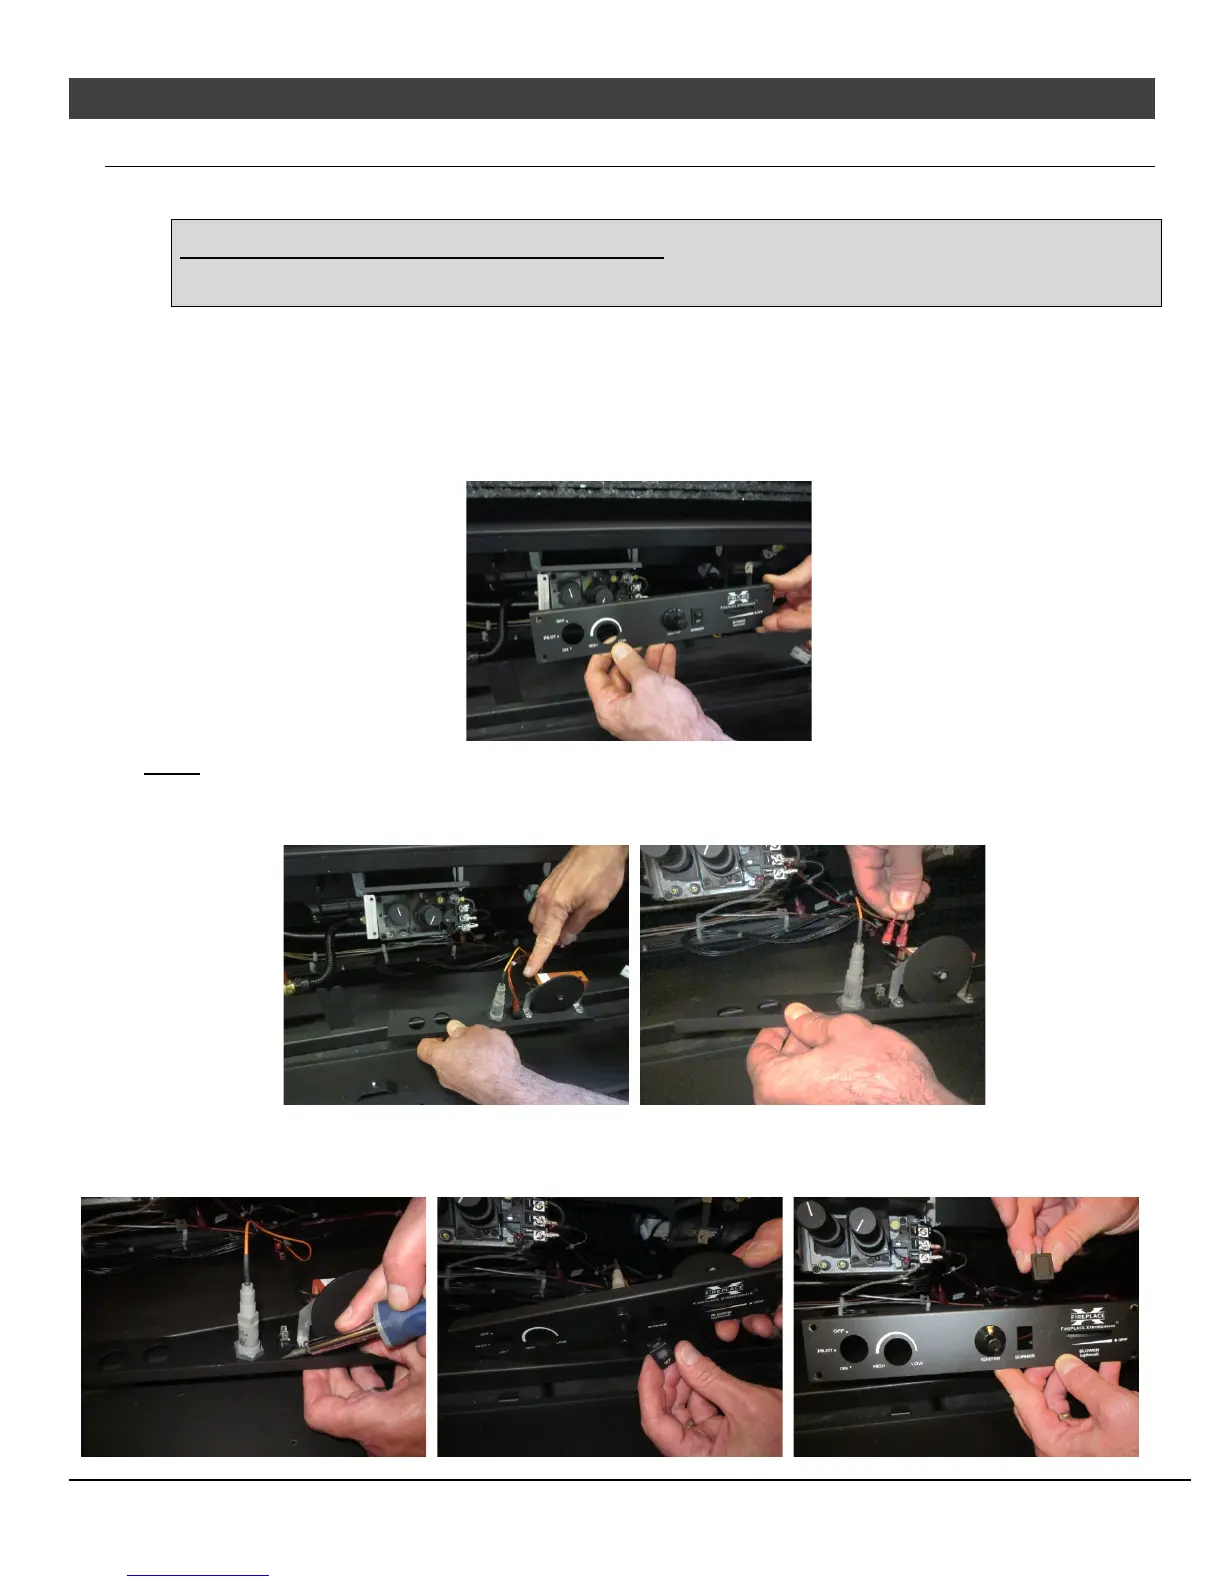
2 Remove the 4 screws that secure the dashboard to the fireplace and gently lower it to gain access to
the back side.
NOTE There should be enough slack in the attached wires to lower the dashboard to the floor. Make sure not
to damage any off the attached wires.
3 Remove the two wires from the back of the on/off switch.
4 Remove the switch from the dashboard by depressing the tabs on the top and the bottom of the
switch housing while pressing the back of the switch forward through the hole in the dashboard.
Replace the switch with the included switch blank (see pictures below).