© Copyright 2013 TRENDnet. All Rights Reserved.
TRENDnet User’s Guide
TEW-718BRM
27
Note: Before configuring WDS, please ensure the following first:
1. Make sure different IP addresses are assigned to each WDS supported wireless device
used for bridging. (ex. 192.168.10.1,192.168.10.2, 192.168.10.3) to avoid IP address
conflict. See page 38
for changing the LAN IP address.
2. If you are using more than one WDS supported router or access point, please make
sure the LAN DHCP server is enabled on only one unit and disabled on all others to avoid
IP address conflict. See page 38
for DHCP server options.
3. Assign a specific wireless channel and use the same channel on all WDS supported
wireless devices. See page 18
for configuring basic wireless settings.
4. Configure the same wireless security and key on all WDS supported devices. See page
14 for configuring wireless security settings.
To configure WDS bridging between TEW-718BRM / TEW-718BRM5 routers:
1. Log into your router management page (see “Access your router management page”
on page 35
).
2. Click on Setup, and click on Wireless Settings.
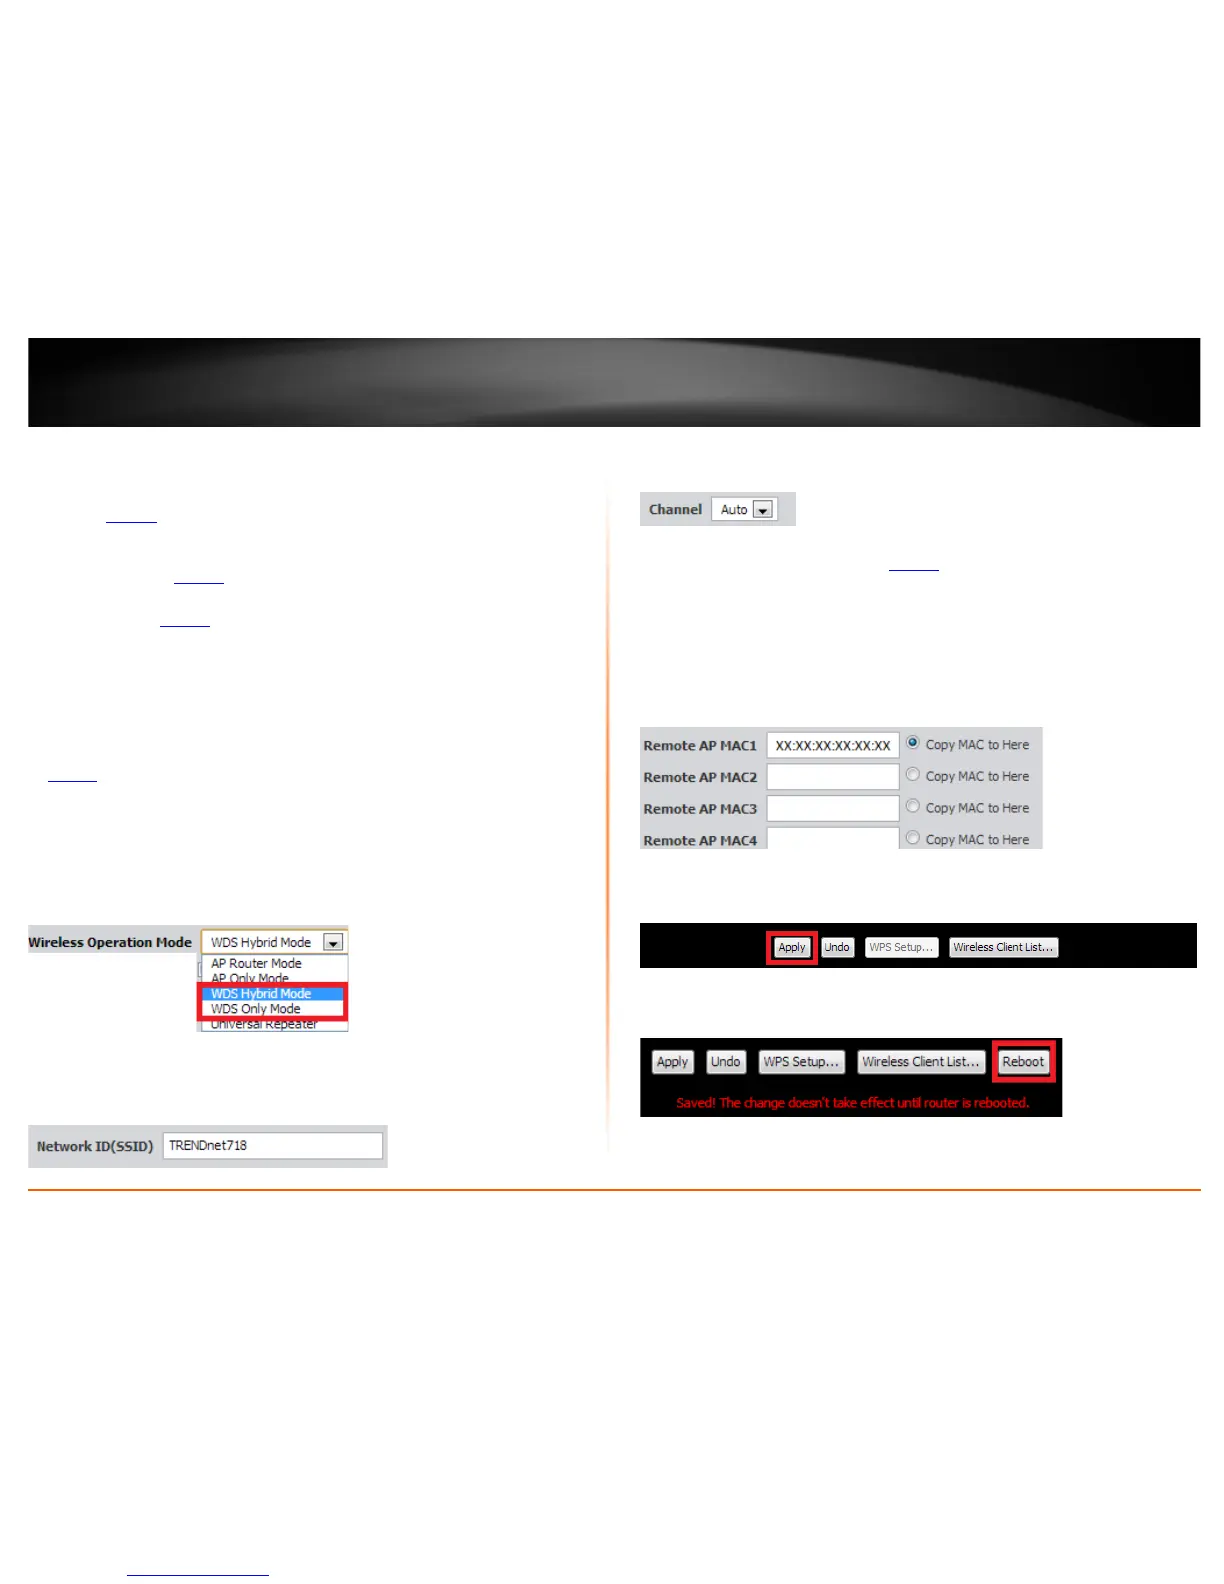
3. Click the Wireless Operation Mode drop-down list and select WDS Hybrid Mode or
WDS Only Mode.
4. Next to Network ID (SSID), enter the SSID (or wireless network name) of the first
router. (e.g. TRENDnet718_1)
Note: SSID setting does not need to be modified if using WDS only mode.
5. Click the Channel drop-down list and select a specific wireless channel.
Note: The wireless channel must be the same on all WDS devices.
6. Configure your wireless security. See page 14
on securing your wireless network.
Note: The wireless security must be the same on all WDS devices.
7. Enter the wireless MAC address of the other WDS supported device.
(e.g. 00:11:22:AA:BB:CC)
Note: If the other WDS supported device is discoverable wirelessly, you can use the Scan
Remote AP’s MAC List to scan for the other WDS and copy the wireless MAC address
from the discover list.
8. To save changes, click Apply.
Note: If you would like to discard the changes, click Undo before you click Apply.
9. If prompted to reboot in order to apply changes, click Reboot at the bottom of the
page and click OK or Continue to reboot the device.