To apply captive portal authentication to a wireless SSID, under 2.4G or 5G, select which
SSIDs captive portal authentication should be applied, then click Save at the bottom of
the page to save the settings.
Note: The SSIDs must be enabled and configured under Wireless > 2.4G or 5G to be
assigned. If using Captive Portal authentication, it is recommended to set the
Authentication method to None in the wireless SSID settings since captive portal
authentication will be used instead. If the Authentication Method is left enabled, the
users will need to authenticate twice, once with the authentication method defined and
also captive portal authentication.
Click on Apply button to apply the settings and then click on the Save button located on
the top right section to save the settings.
Redirect URL
1. Log into your management page (see “Access the management page” on page 13).
2. Click on the System tab and click Captive Portal.
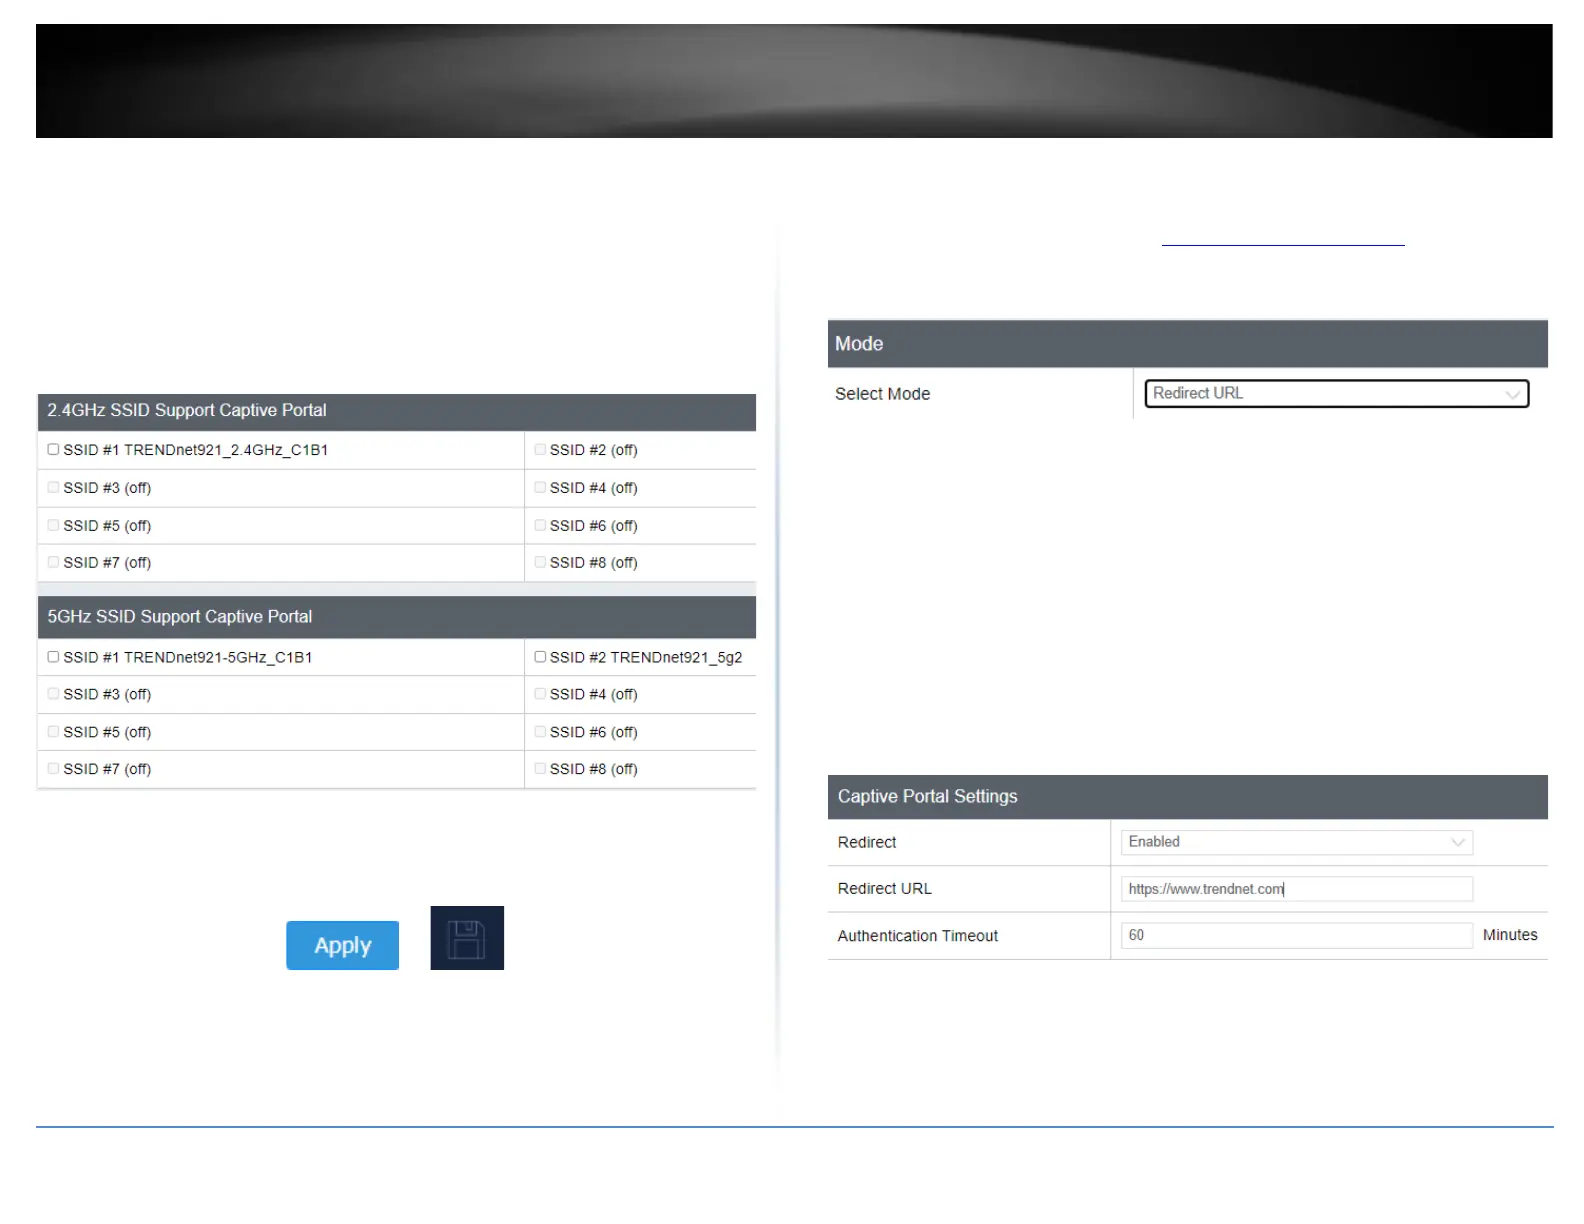
3. Choose the Captive Portal mode Redirect URL.
First, enable Captive Portal, enter the URL/website to redirect users and set an
authentication timeout value. Then click Save at the bottom of the page to save the
settings.
• Redirect – Enables the redirect URL captive portal function.
• Redirect URL – This is the website or URL guest users will be automatically
redirected after connecting to your wireless network through your captive
portal page. (e.g. https://www.trendnet.com)
• Authentication Timeout – This is the session time period (minutes) which users
are allowed to be logged in to your wireless network. Once the time expires,
users will automatically logged and will need to log back in through the captive
portal page again in order to reconnect to your wireless network. It is
recommended to set a value to ensure authentication sessions are closed after
a certain time period.
 Loading...