Adding and Using User Bitmap Charts MicronNav System
0656-SOM-00001-07 93 © Tritech International Ltd.
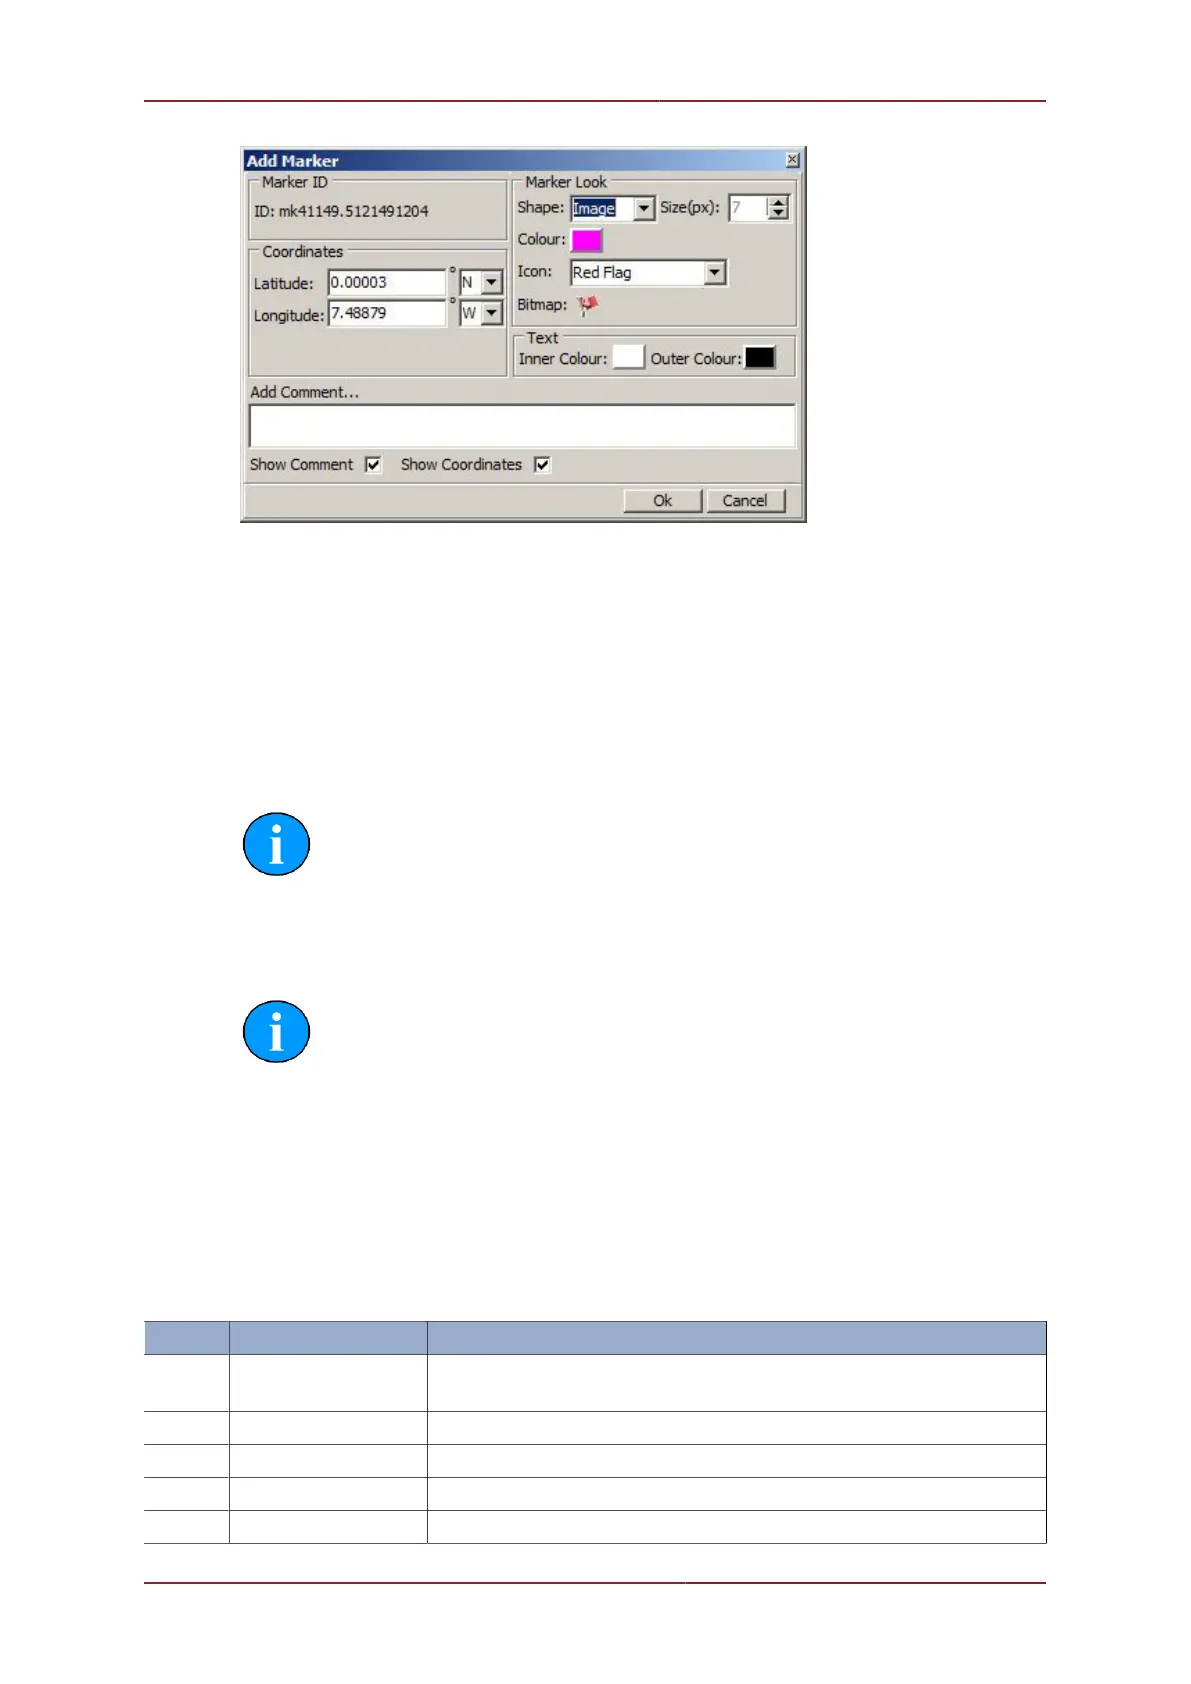
In the Add Marker dialog options for the maker can be configured such as; shape, image
(from a preset or loaded bitmap), size, colour, font colours, comment and coordinates. Once
configured, clicking on Ok will lay the marker on the chart.
Several markers can be created and laid onto the chart. The markers will be stored in the
Seanet Pro configuration and so closing down and re-opening Seanet Pro will result in the
markers being re-loaded as well.
The markers can be edited, cleared, saved or loaded by right-clicking on the chart and
selecting Markers from the pop-up menu.
Note
To edit or delete a marker it is necessary to right-click directly over the marker.
6.5.3. Saving the Markers
Process
Right-click on the chart and select Markers then Save Marker(s).
In the Save as type: drop down list the full (*.mrk) or shortened (*.csv) file formats can
be selected.
Full Marker File Format (.mrk extension)
This is the format that is native to Seanet Pro and includes full details of the marker
configuration. The file is in an ASCII Comma Separated format and contains the following
fields:
Index Value Description
1 ID This is a unique string ID. It comprises a 2 letter header ("mk") followed
by a DateTime code. Any unique string value is acceptable.
2 Group This is unused and should be set to 0.
3 X Coordinate For the .mrk file this will always be output in UTM Easting.
4 Y Coordinate For the .mrk file this will always be output in UTM Northing.
5 Altitude This is UTM Altitude and is currently unused.