Adding and Using User Bitmap Charts MicronNav System
0656-SOM-00001-07 96 © Tritech International Ltd.
6.5.4. Loading the Markers
Process
Right-click on the chart and select Markers then Load Marker(s).
In the drop-down list on the right, select to list *.mrk, *.csv or both file types. Browse to the
marker file to be opened, highlight it and click Open.
If a full format .mrk file is to be opened, it is recommended that this be in the state as saved
from Seanet Pro (i.e. no subsequent modifications have been made to the text file). The .mrk
file format is a native format and any slight modifications or errors to this format will not be
handled.
for loading/importing as a list of targets from another system, it is recommended that the
shortened .csv format be used. There are several variations to this format that can be
handled.
Shortened .csv file variations
Seanet Pro can handle several variations of the shortened .csv file format.
All field data All 7 fields contain data as normally created when Seanet Pro saves
the .csv file.
First 4 fields only There is no entry for Shape, Image Info or Date & Time. Since no
shape data is available all the markers will use a red flag.
First 5 or 6 fields only No Date & Time entry, also, if the Shape Type is 0, 1, 2 or 3 then the
Image Info entry can be omitted (since there will be no need for it).
6.6. Other Chart Functions
These are selected from a popup menu that is opened by clicking on the Tools button (or by
right-clicking on the Chart display).
Note
When the Form is toggled between displaying a Chart or the PPI form (e.g.
‘Display Chart’ check-box toggles this), the Tools button will be populated with
different options in Chart and PPI display modes.
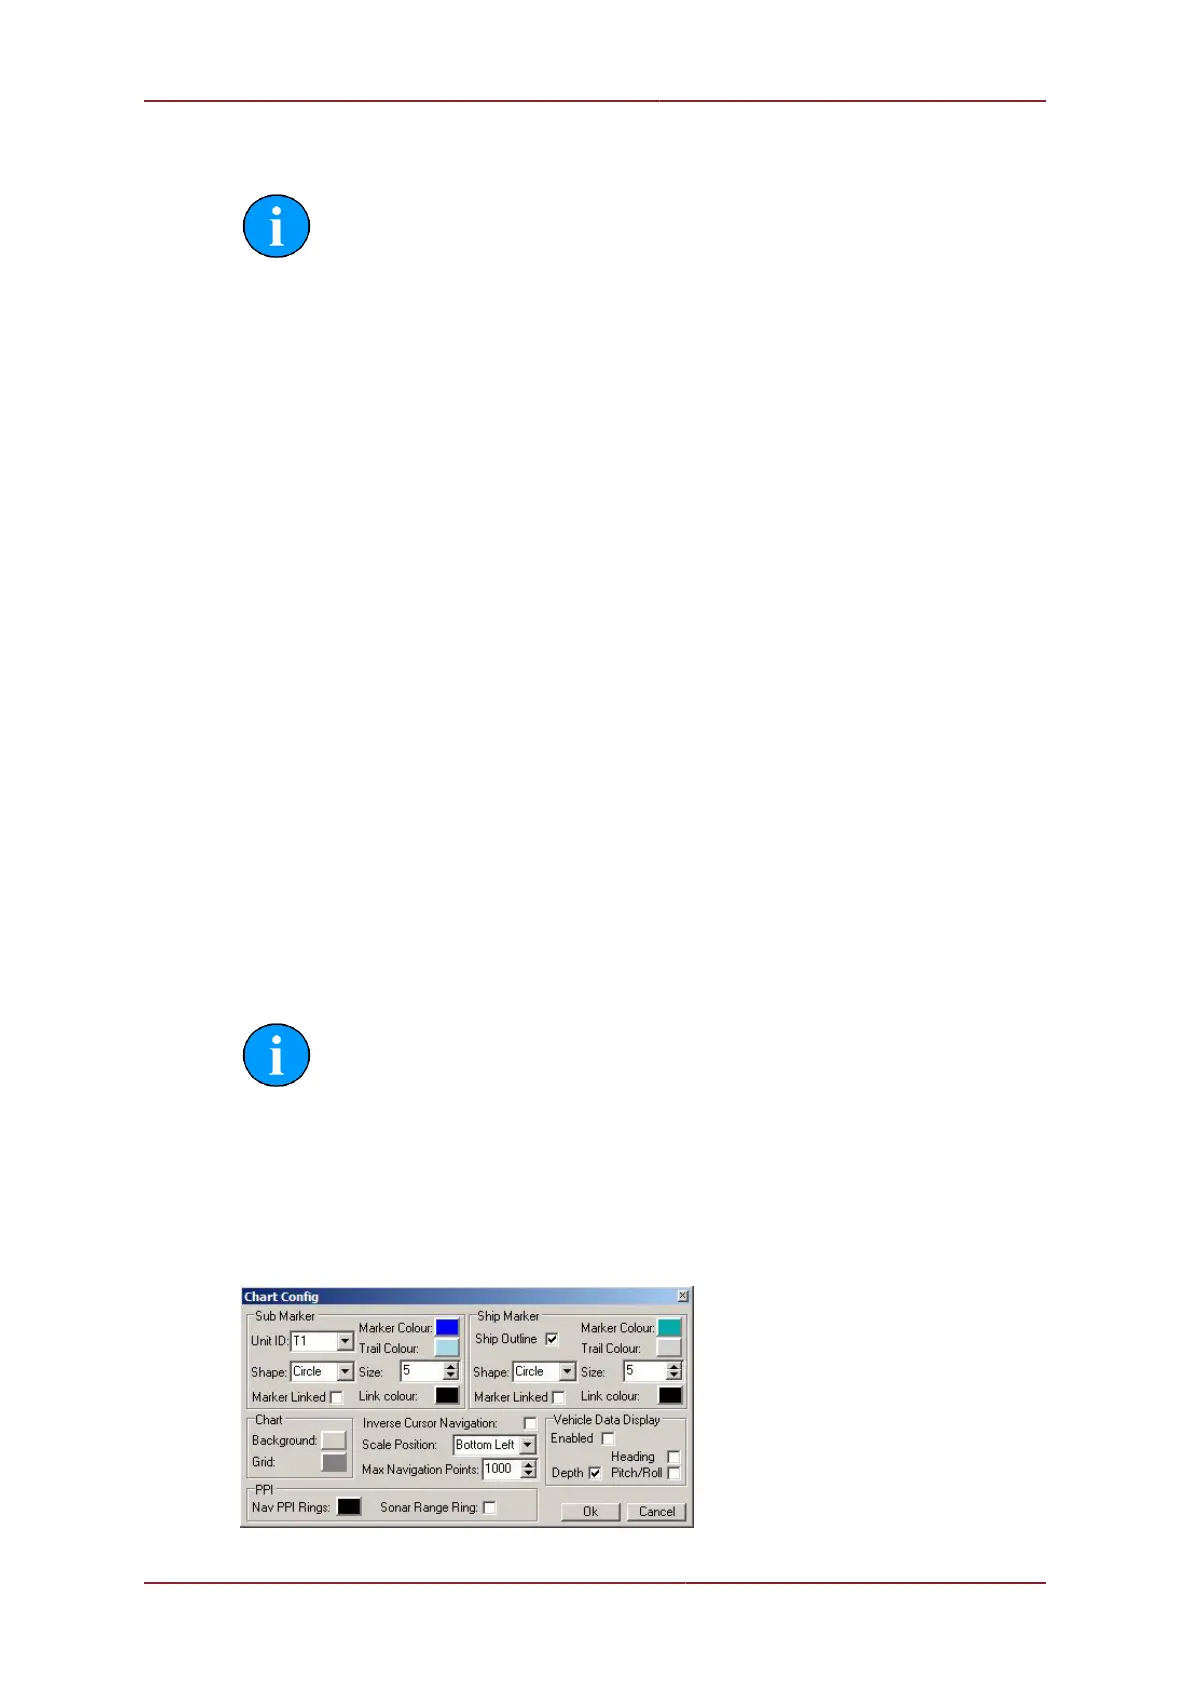
Configuration
Clicking on ‘Configuration’ will open the Chart Config page.