Installing the System MicronNav System
0656-SOM-00001-07 21 © Tritech International Ltd.
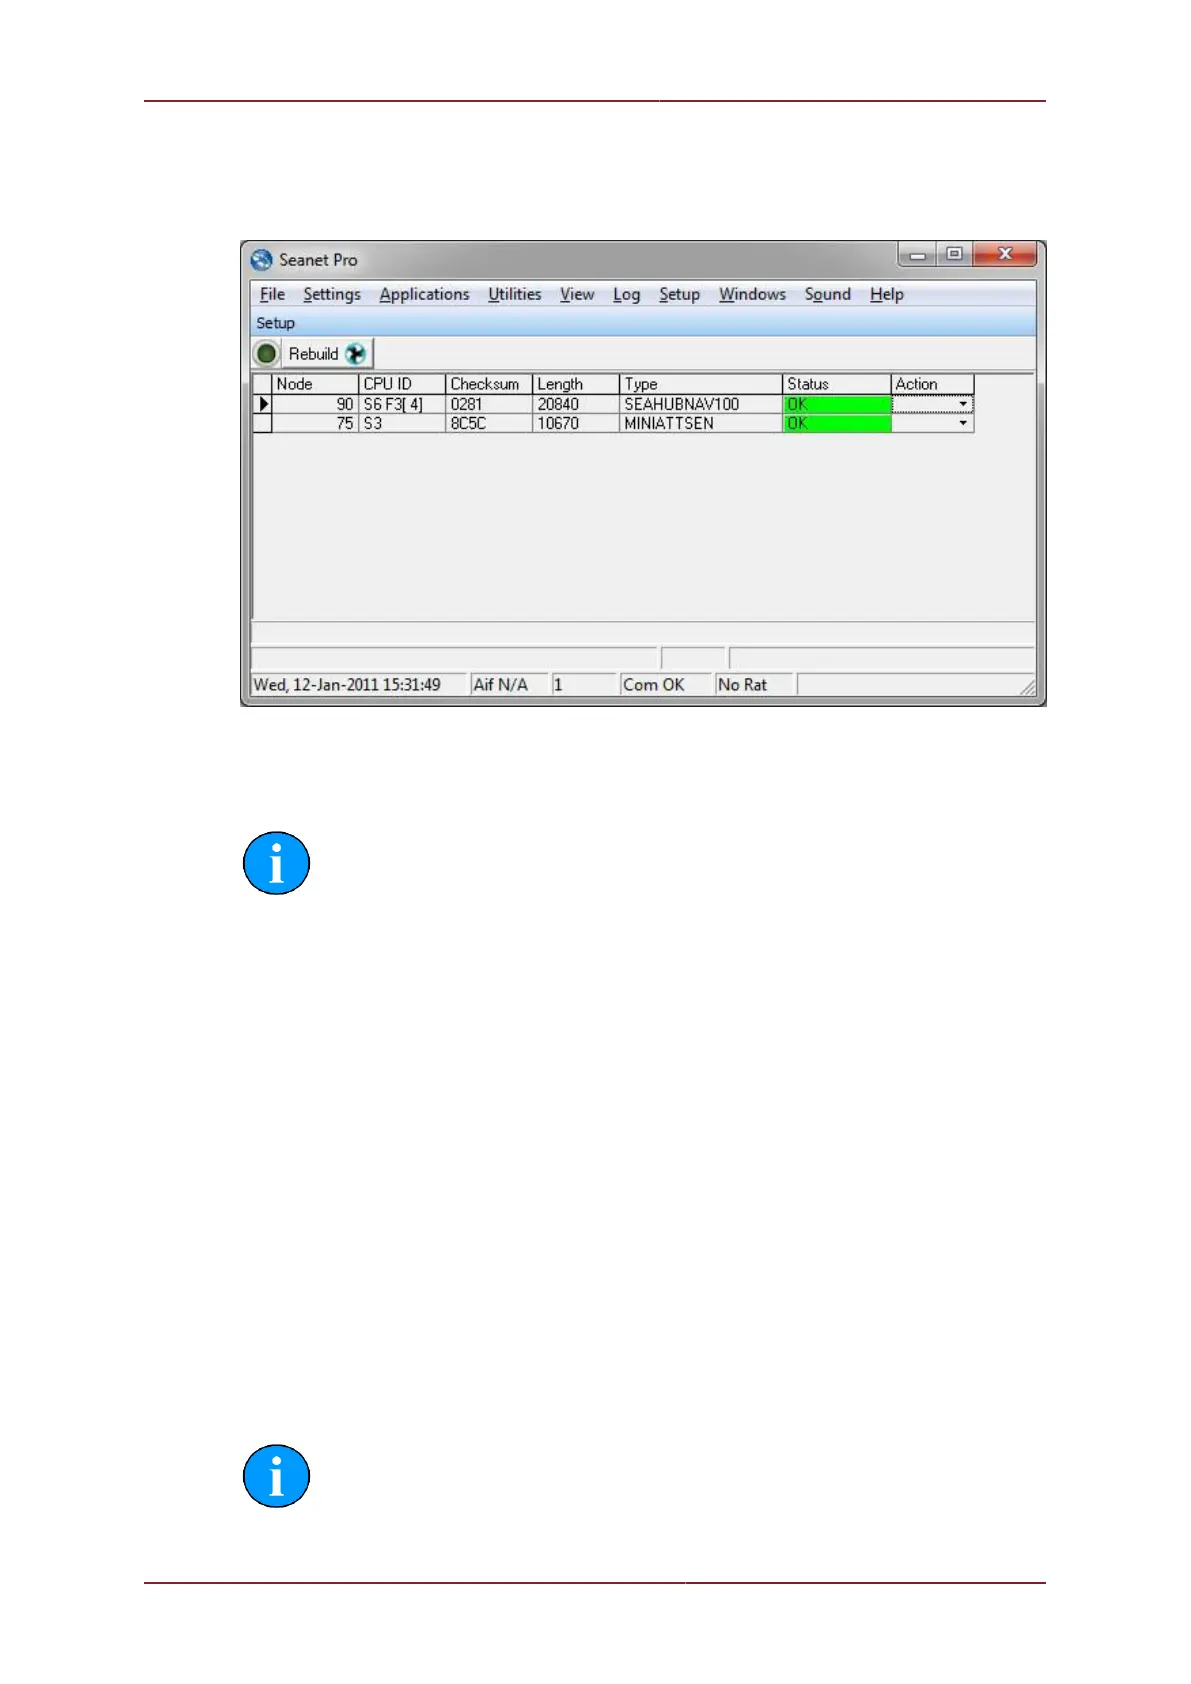
The main setup page should now list two Node numbers in the table; these are the nodes
for the MicronNav100 (SEAHUBNAV100) and the attitude sensor (MINIATTSEN) inside the
USBL Dunking Transducer head.
Node 90 Surface MicronNav100 Interface Hub.
Node 75 Attitude Sensor built into the USBL Dunking Transducer.
Note
The USBL Dunking Transducer itself does not appear as a node number.
Finally switch off the power supply to the MicronNav100 Hub.
3.2.4. Subsea Hardware Responder Configuration
Installation
As of Seanet Pro V2.23 Build 539 the MicronNav Responder unit can be connected in a
variety of different ways:
• Through the AUX Port of a Sonar connected on Port B of the MicronNav Hub - this is
the factory default option
• Through the AUX Port of a Sonar connected on Port D of the MicronNav Hub
• Directly connected to Port B of the MicronNav Hub
• Directly connected to Port D of the MicronNav Hub
• Through the AUX Port of a Gemini Sonar
Note
In all cases, the communications setup for a Micron Responder are: RS232,
9600 Baud, 8 Data bits, 1 Stop Bit, No Parity. It is not advisable to attempt to